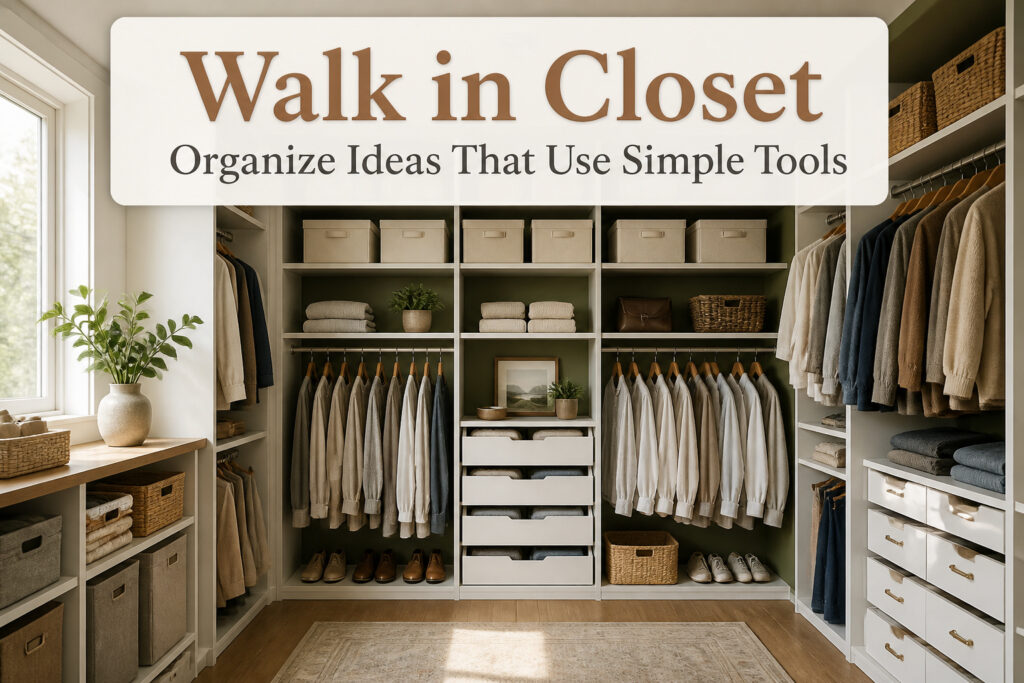
A walk in closet organize project can run under $250 if you build from stock parts and paint the wall behind the shelves a contrasting color so the gaps disappear.
The single rule that decides which tool you need is how often you touch the item: hooks for daily grabs, divided drawers for frequent folding, bins for once-a-month retrieval.
The trip-up is measuring for the life you already live, not the one you imagine. I eyeballed my first shelf height and ended up with storage I never used because the step stool lived in the garage.
[link-whisper-related-posts]1. Slimline Velvet Hangers
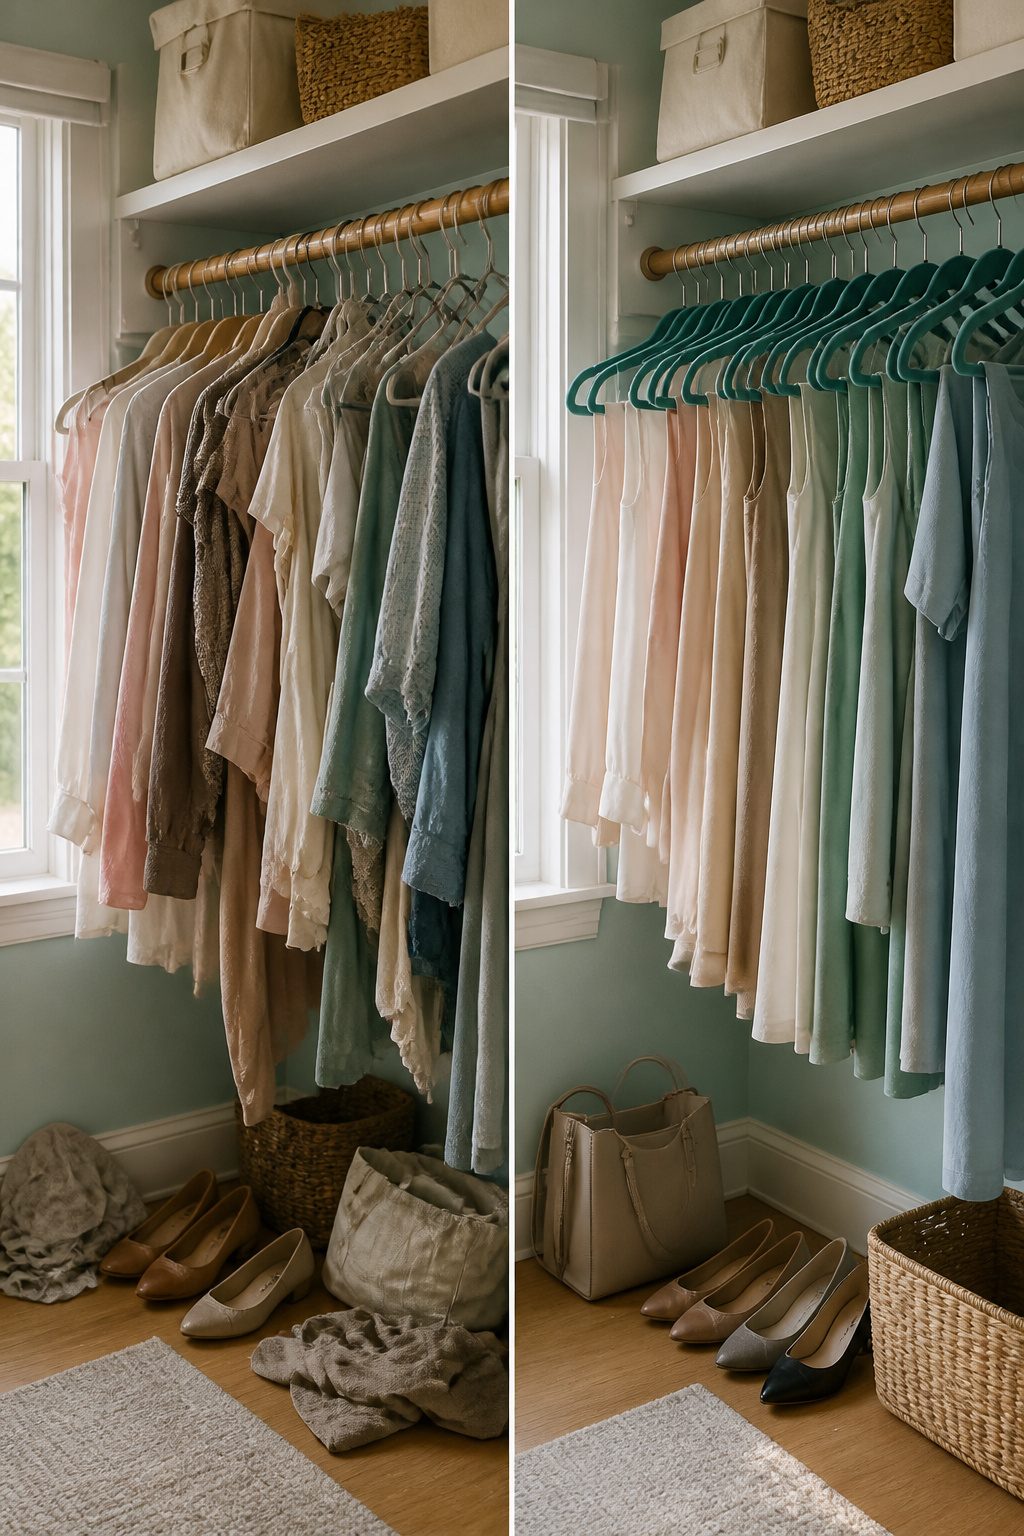
Standard hangers waste about a quarter-inch of rod space each, which adds up fast across a whole closet. Slimline velvet hangers cut that bulk to roughly half, letting you fit more on the same rail without crowding.
The flocked surface grips fabric too.
Silk blouses and wide-neck tops stay put instead of sliding to the floor by Tuesday. I switched mine out two years ago after watching a cotton sweater slip off a wire hanger for the hundredth time.
The velvet ones from Amazon Basics run about $21 for fifty, and they shed less flocking than other brands I tried.
Mawa makes a steel-and-PVC version if you want something sturdier and don’t mind paying more, though for most renters the velvet set gets the job done.
One thing to skip: the clip-on velvet attachments for skirts. The hook mechanism breaks too easily.
If you need hangers for bottoms, get the ones with metal clips built in, or grab The Container Store’s chrome pant hangers. The thinner bar can crease dress pants, but for weekend shorts and jeans they work fine.

INCLUDES: 30 suit clothes hangers in Ivory/Silver for keeping shirts, blazers, slacks, and more neatly hung and organized

INCLUDES: 50 suit clothes hangers in Black/Silver for keeping shirts, blazers, slacks, and more neatly hung and organized

INCLUDES: 50 suit clothes hangers in Gray/Silver for keeping shirts, blazers, slacks, and more neatly hung and organized
2. Open-Ended Pant Hangers
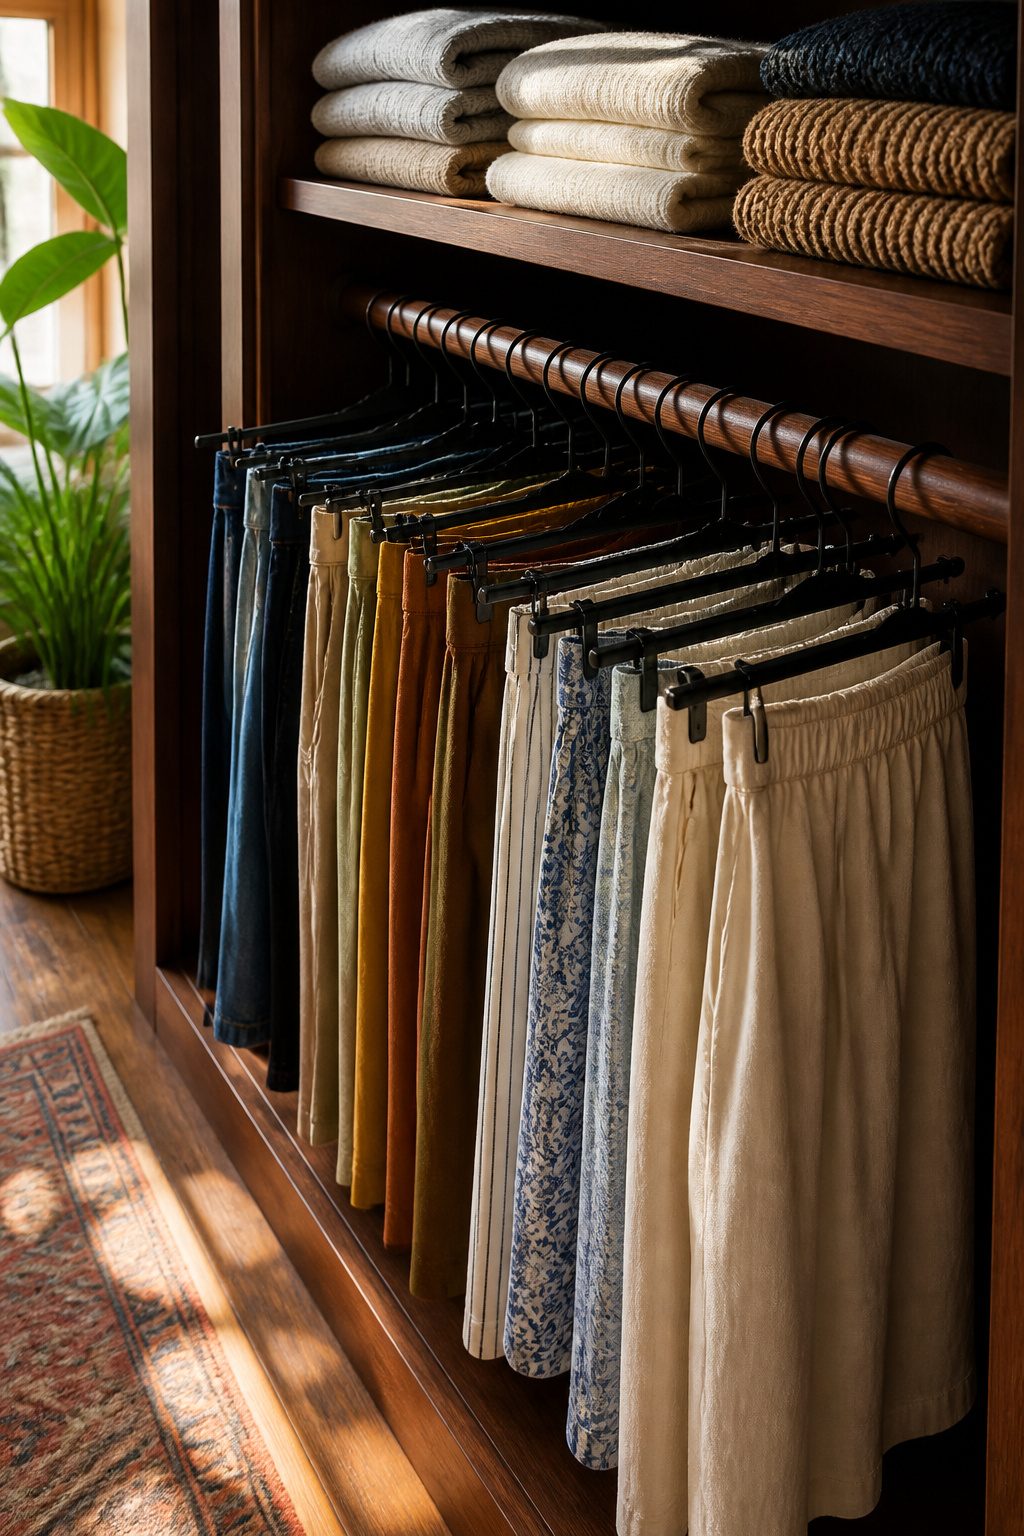
Open-ended pant hangers solve the one problem clamp and folded styles keep creating: you can pull the garment straight off without fighting the hardware. Clamp hangers pinch creases into trouser legs and eventually lose their grip.
Folded bars force you to thread the pants through a narrow slot or drape them over a rod that leaves a ridge across the knee. Both designs turn simple retrieval into a two-hand operation.
The open-ended version works best for pants and skirts you reach for regularly. The bar slips out from the back, so the hanger stays on the rod while the garment comes free.
Most versions open toward the back rather than the front, which means you either turn the hanger around or lift the whole thing off to grab your clothes.
Removing the hanger entirely is the faster habit, and it doubles as a way to keep empty hangers corralled on one end of the rod instead of tangled among your clothes.
Color matching is worth the extra search. Black is the default stock, but white sets blend with standard closet schemes and read as intentional rather than afterthought.

Dimension- 15" Width X 6.5" High X 0.2'' Wire thickness. Our design is wider and thicker than most the same styles with 14" width X 0.15'' wire thickness. Pack of 20pcs.

RUBBER COATING - Say goodbye to wrinkled pants on the floor. These clothes hangers have a non-slip grip to ensure your pants, skirts, scarves, or whatever you're hanging up stays in place

【7 LBS HEAVY DUTY SUPPORT】 Engineered with a high-tensile metal core that supports up to 7 lbs—strong enough for 3 pairs of heavy denim or winter trousers without bending.
3. Bins for Storage
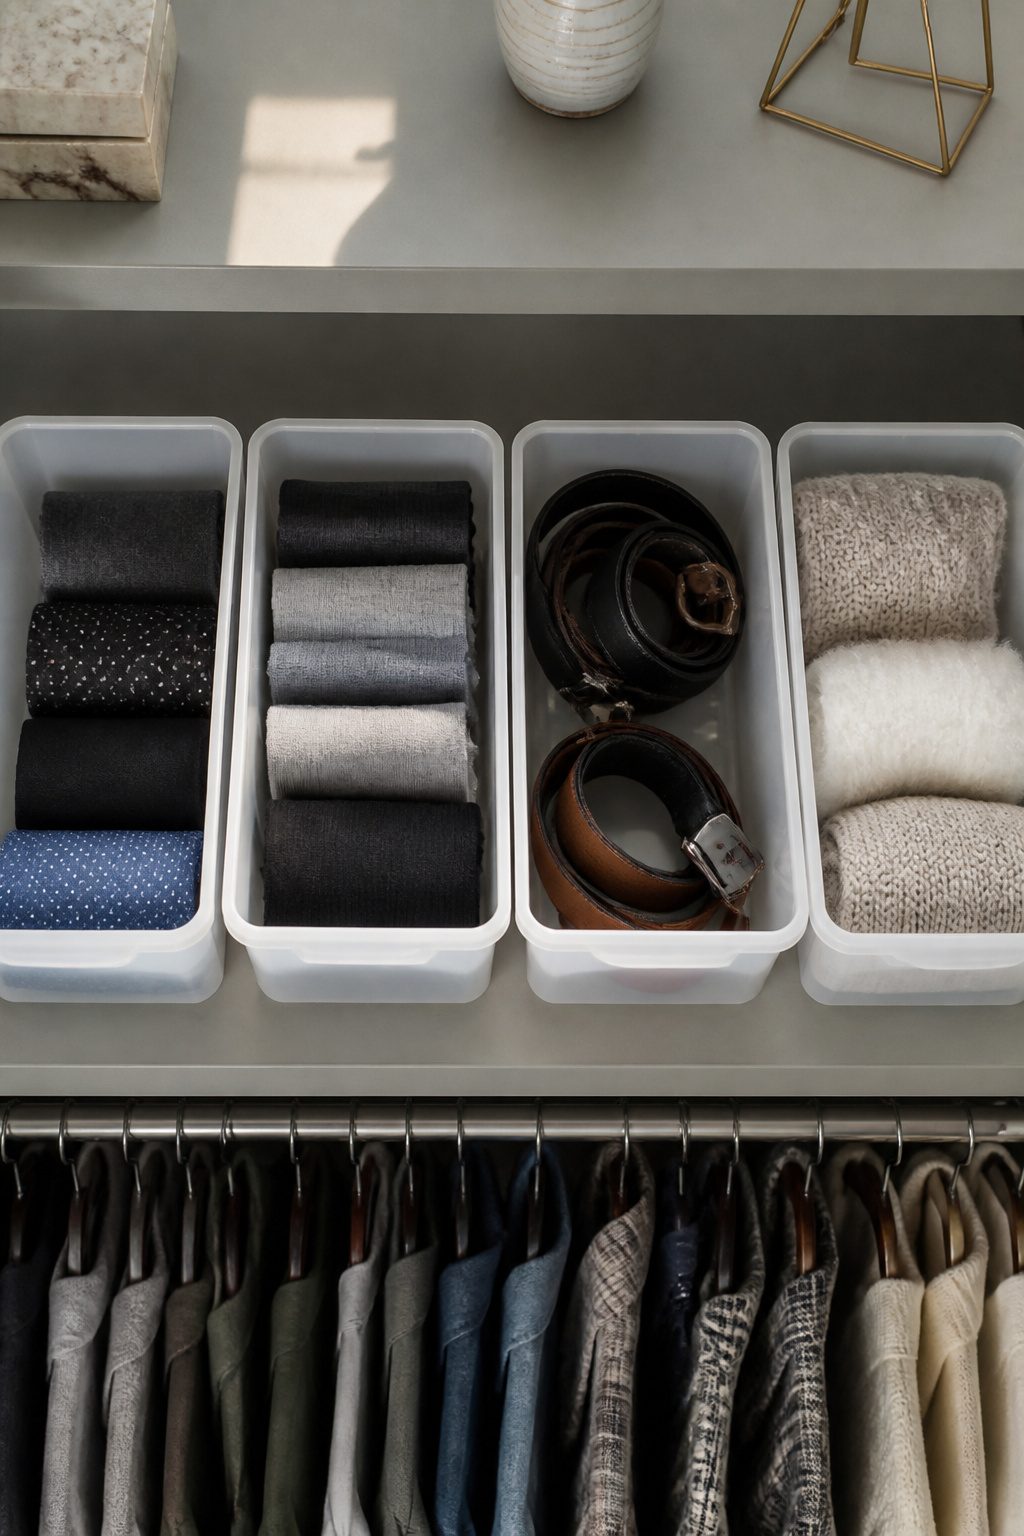
Matching bins matter more than most people expect when they first set out to organize a closet.
A shelf lined with identical containers reads as intentional; a jumble of leftover baskets from three apartments ago reads as temporary, even when everything inside is neatly folded.
Solid sides hide the visual noise of socks and belts, which is why I lean toward opaque over clear for daily-use items.
The 12-inch shelf depth is what actually fits standard storage baskets without wasted space behind them.
Deeper shelves leave a gap between the bin front and the shelf edge, and that gap becomes a graveyard for single earrings and folded receipts.
What goes inside deserves more thought than what shows. Small bins on a shoe rack corral watches, keys, and loose change before they migrate to the floor.
Medium baskets handle dress socks and belts; larger ones on the top shelf swallow out-of-season clothes and spare linens you touch twice a year.
The mistake is sizing for what you wish you owned rather than what you actually rotate through. A bin too big for its contents buries the one thing you needed; too small, and you stop closing it.

INCLUDES: 24 skirt hangers in Black for keeping skirts, slacks, jeans, shirts, jackets, and more neatly hung and organized

Heavy Duty Metal Material - NORTHERN BROTHERS pants hangers with clips is made of excellent metal pants hangers material, which is not easy to bend, the metal is not easy to rust. It is more durable than wooden or plastic pant hangers.

Pant Hangers With Clips: Superior grasping force, Our clips will not let go of your pants, it can catch the thin clothing even silky pants. The rubber coat of the clips is designed to increase the friction and prevent leaving a scar on your clothes
4. Hooks for Accessories
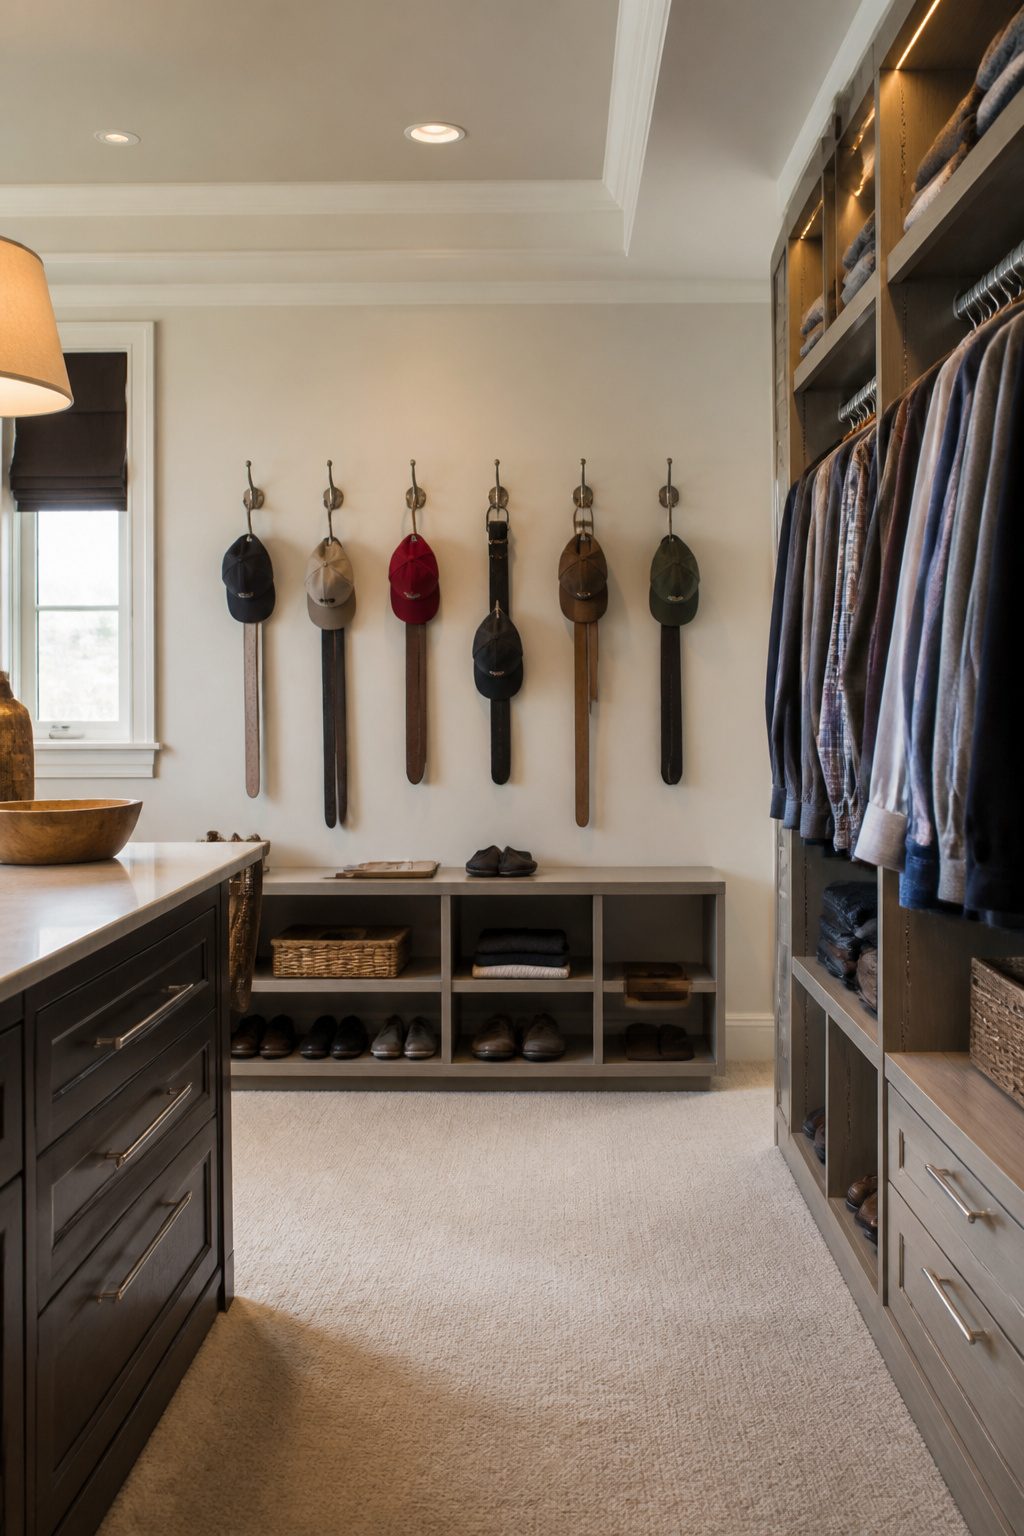
Wall-mounted hooks hold more weight and stay put, but door-mounted ones keep accessories visible at eye level.
The Franklin Brass hooks come in a five-pack for roughly nine to ten dollars, mount on studs or anchors, and carry up to 35 pounds when anchored properly.
Their white finish blends into walls; black, brass, and nickel hide on darker doors.
Not everything stays on a hook.
Belts, baseball caps, and frequently worn vests hang reliably. Necklaces slide and tangle unless the hook has a slight upward curve.
Bags with thin straps crease; wider straps or handles hold their shape. A row of hooks at shoulder height works for grab-and-go items, while higher placement keeps occasional pieces off the floor and out of the way.
It’s important to not squander precious vertical space. Remember to look up and down to find inspiration.
For a narrow walkway under three feet, side walls become your main real estate. Mount a 1-by-4 board with hooks at varying heights: lower for belts, mid-wall for bags, high for out-of-season hats.
Hooks beat hangers for anything you remove daily; the two-second difference between hooking and unhooking determines whether the item returns to its place or lands on a chair.

【Reinforced Storage That Builds Up, Not Out】Create more room without taking over your floor space. These closet organizers and storage baskets stack vertically to turn unused shelf height into practical closet storage. The reinforced structure helps each closet organizer stay neatly in shape while organizing shirts, pants, towels, accessories and lightweight daily essentials.

These Fabric Storage Bins are crafted with high-quality cationic fabric materials, ensuring durability and longevity. Made from premium fabric, these bins are designed to withstand regular use and provide reliable storage for your belongings. The fabric is chosen for its strength and resistance to wear and tear, ensuring that the storage bins maintain their shape and integrity over time. With their sturdy construction, these storage bins are a dependable choice for organizing your home.

【Multi-Functional】The closet drawer are convenient to store your lightweight items such as shoes, clothes, toys, snacks, books, file etc. Suitable for bedroom, bathroom, kitchen, living room, office or study areas. Stylish neutral style, suitable for any place
5. Drawer Dividers
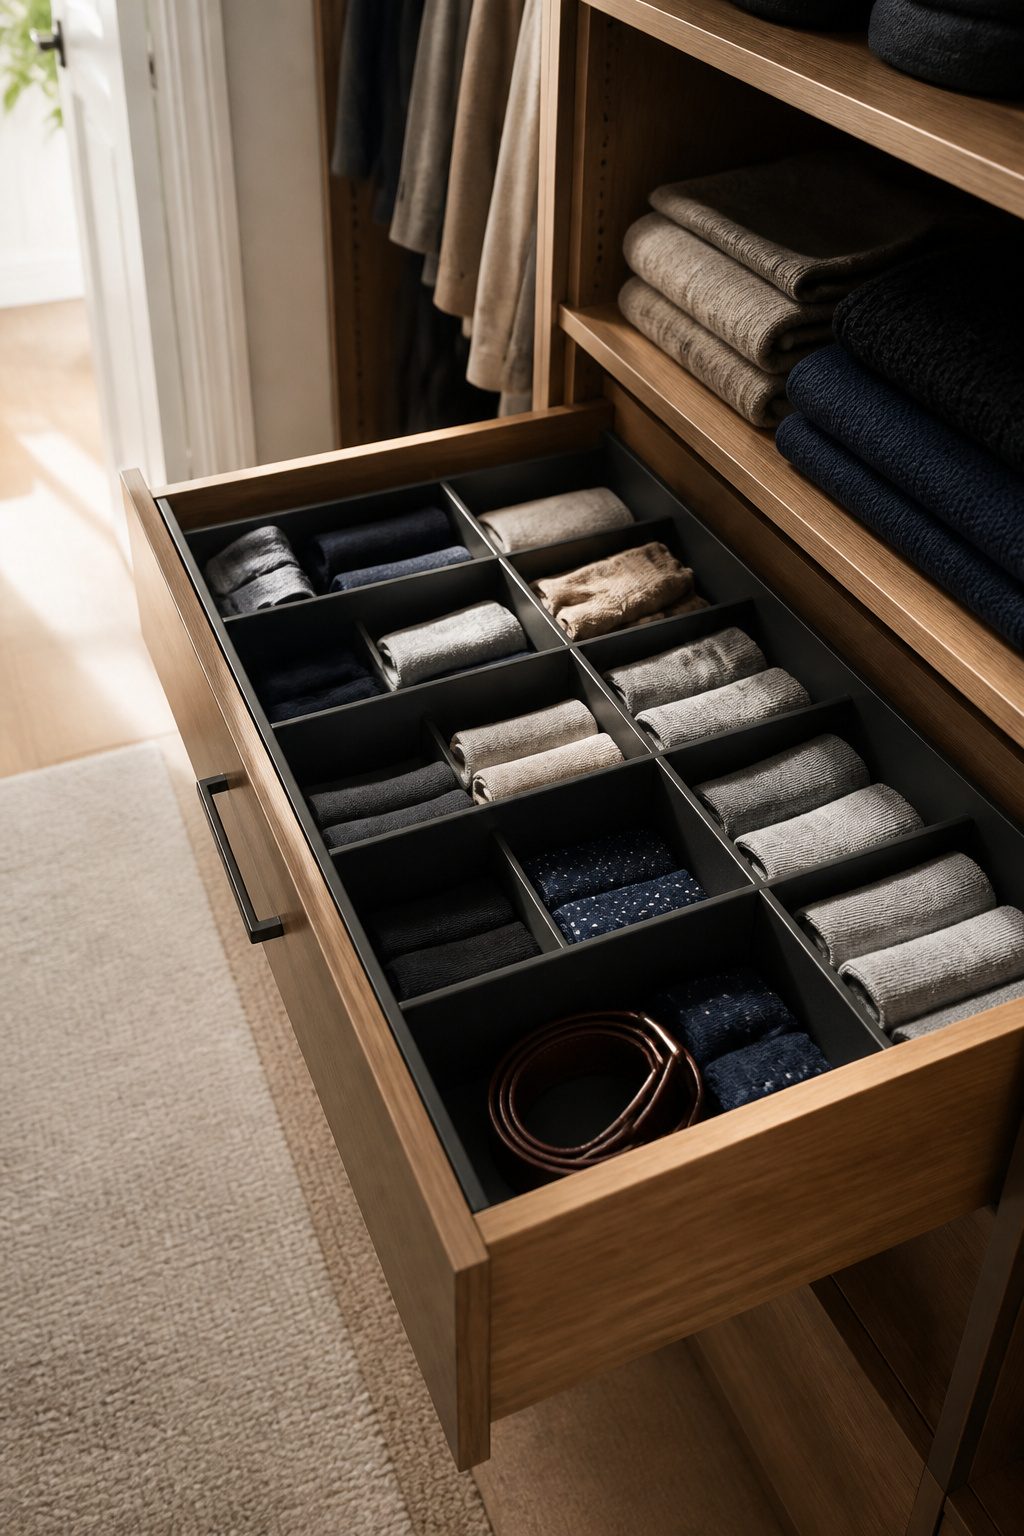
Drawer dividers only work if they stay where you put them. The cheap spring-loaded ones I tried first shifted every time I opened the drawer, and one plastic tab cracked within a month.
Coated heavy-gauge steel holds up, and shelves up to 0.75 inch thick will take a slim divider without chewing up space you need for clothes.
For drawers, the lock feature matters more than expandability; a divider that creeps under the pressure of socks and underwear is worse than none at all.
Thicker plastic costs more, around $27, but it will not snag or budge once set. If your drawer is narrow, skip subdividing and stick with a single sturdy pair rather than a flimsy grid that collapses the first time something catches.

Size: 17.3(L)×11.8(L)×7.8(H)INCH/ 44×30×20CM. Upgrade Wardrobe Clothes Organizer, a versatile and efficient storage solution for your folded clothes. With its strong shape and support-based design, this organizer ensures stability and durability, making it a reliable addition to your closet. Say goodbye to messy piles of clothes and hello to an organized wardrobe that's easy to navigate.

7 COMPARTMENTS: Countertops and closets stay clean and clutter-free with this compact clutch organizer with 7 separate storage slots; Store your daily go-to clutches and wallets vertically and keep them organized and easy to find to make your morning routine effortless

MULTI-PURPOSE: The lidded storage box is ideal for storing tea bags, socks, accessories, ties, and other clothing items in bedrooms, closets, nurseries, living rooms, garages, and more.
6. Shoe Storage Solutions
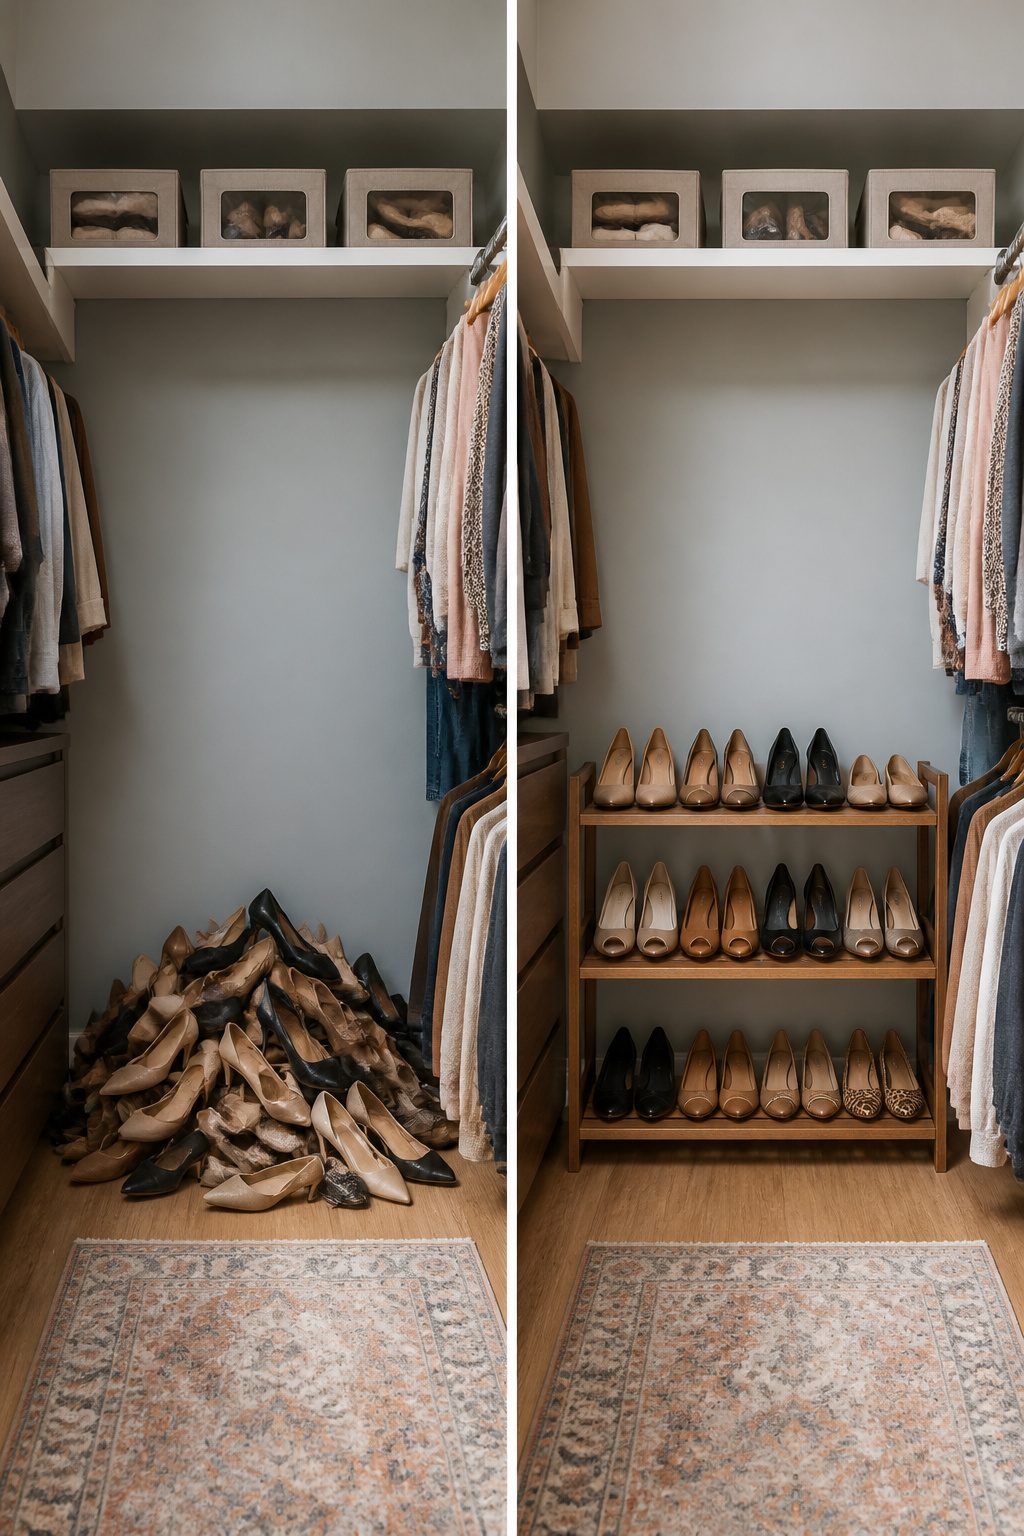
Shoes are the first thing to become a chaotic heap on a closet floor, and the fix depends on what you actually own.
A three-tier slatted rack keeps everything visible and grabs vertical space without hiding anything behind a front panel.
The wide, closely spaced slats hold heels and flats both, and you can stack a second unit if boots leave enough headroom above.
Drop-front boxes protect leather and keep dust off seasonal pairs, though they turn into a guessing game once you have more than a short stack.
I learned that one the hard way: stacking shoes I could not see meant wearing the same three pairs for a year while others sat forgotten.
Over-door mesh cubbies work for sneakers and slim sandals if the pair stays under a women’s size 11, but anything taller peeks out and catches the door frame.
Boots need that top shelf or floor space; a tall basket tucks into a corner if the closet has no door to swing.

INCLUDES: 50 suit clothes hangers in Ivory/Silver for keeping shirts, blazers, slacks, and more neatly hung and organized

Durable and Sturdy: Crafted from velvet and ABS Plastic; Steadily hold heavy clothing of up to 11lbs; As strong as wooden suit hanger but much thinner and lighter; Durable hanging bar with black velvet to hold your shirt, jeans and pants (Recommended for shirts, blouses, dresses, T-shirts, pants, and lightweight jackets. Not intended for heavy coats, bulky winter jackets, or oversized garments)

INCLUDES: 30 suit clothes hangers in Black/Silver for keeping shirts, blazers, slacks, and more neatly hung and organized
7. Labeling Systems
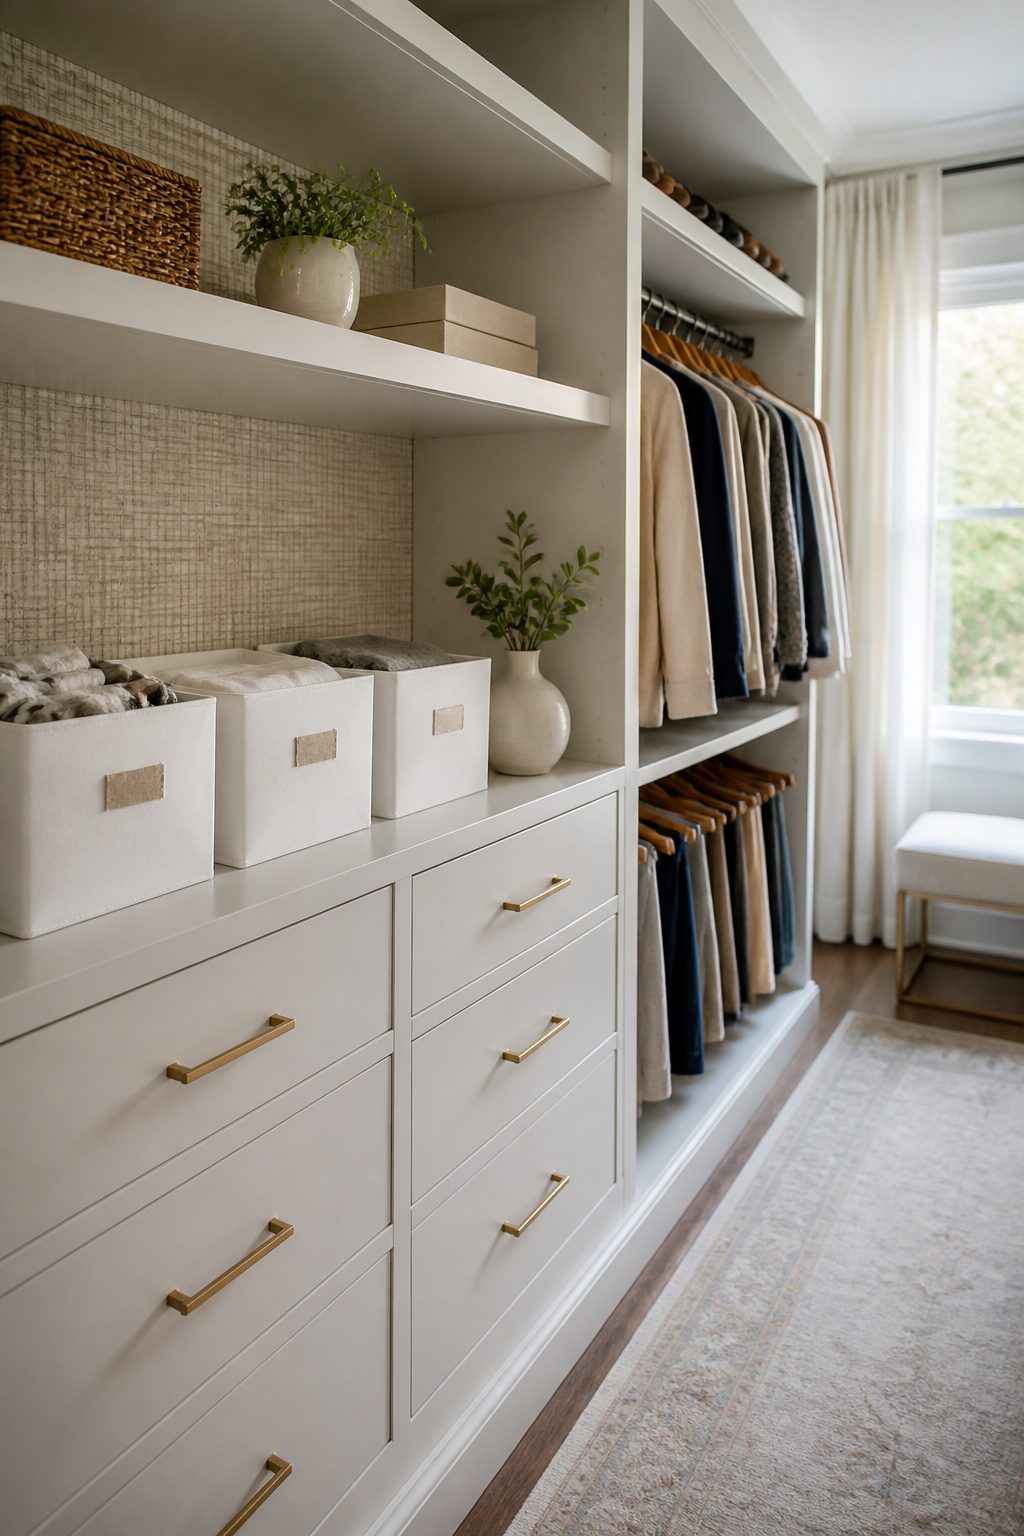
Labels earn their keep in a walk in closet organize project when they tell you where the off-season bin ends and the donate pile begins. Without that line, two identical white tubs become a guessing game every October.
I learned the hard way that thermal-transfer tape outlasts the direct-print kind by years. My first label maker used standard adhesive strips that curled at the edges inside six months, especially on fabric bins where the glue met dust.
The text stayed readable, but the label itself floated loose like a price tag on a thrift-store jacket.
For solid surfaces, painter’s tape with handwritten Sharpie works fine as a temporary fix while you test a layout.
It peels clean and lets you shift categories without committing. On wire baskets or velvet hangers, though, tape is overkill; you are organizing by sight and texture already, and any label fights the material rather than helping it.
The moment labels stop paying off is when you need them for single items, not groups. A tag on every sweater says you have too many categories, not too few.

【Durable and Heavy Duty Construction】 14.5"Lx 7"Hx 0.2"T,20-Pack,Black.Made of heavy duty ABS plastic and velvet, the premium metal gold hooks these hangers boast strong load-bearing capacity. 0.2" Thickened 80g trouser hangers is enough for holds up to 7lbs.13" use length is perfect for a variety of pants.They can hold multiple pairs of pants without bending or losing shape, ensuring long-lasting use.

OPEN ENDED PANT HANGERS – NO CLIPS, NO FUSS — slide pants on and off from the open side in one motion. The rubber non slip coating grips trousers, jeans, and slacks so they stay put all day, even in a packed closet — no creases, no marks, no pants on the floor.

Set of 30 clothing hangers with open side for use in closets, on rolling racks, and more
8. Seasonal Storage Strategies
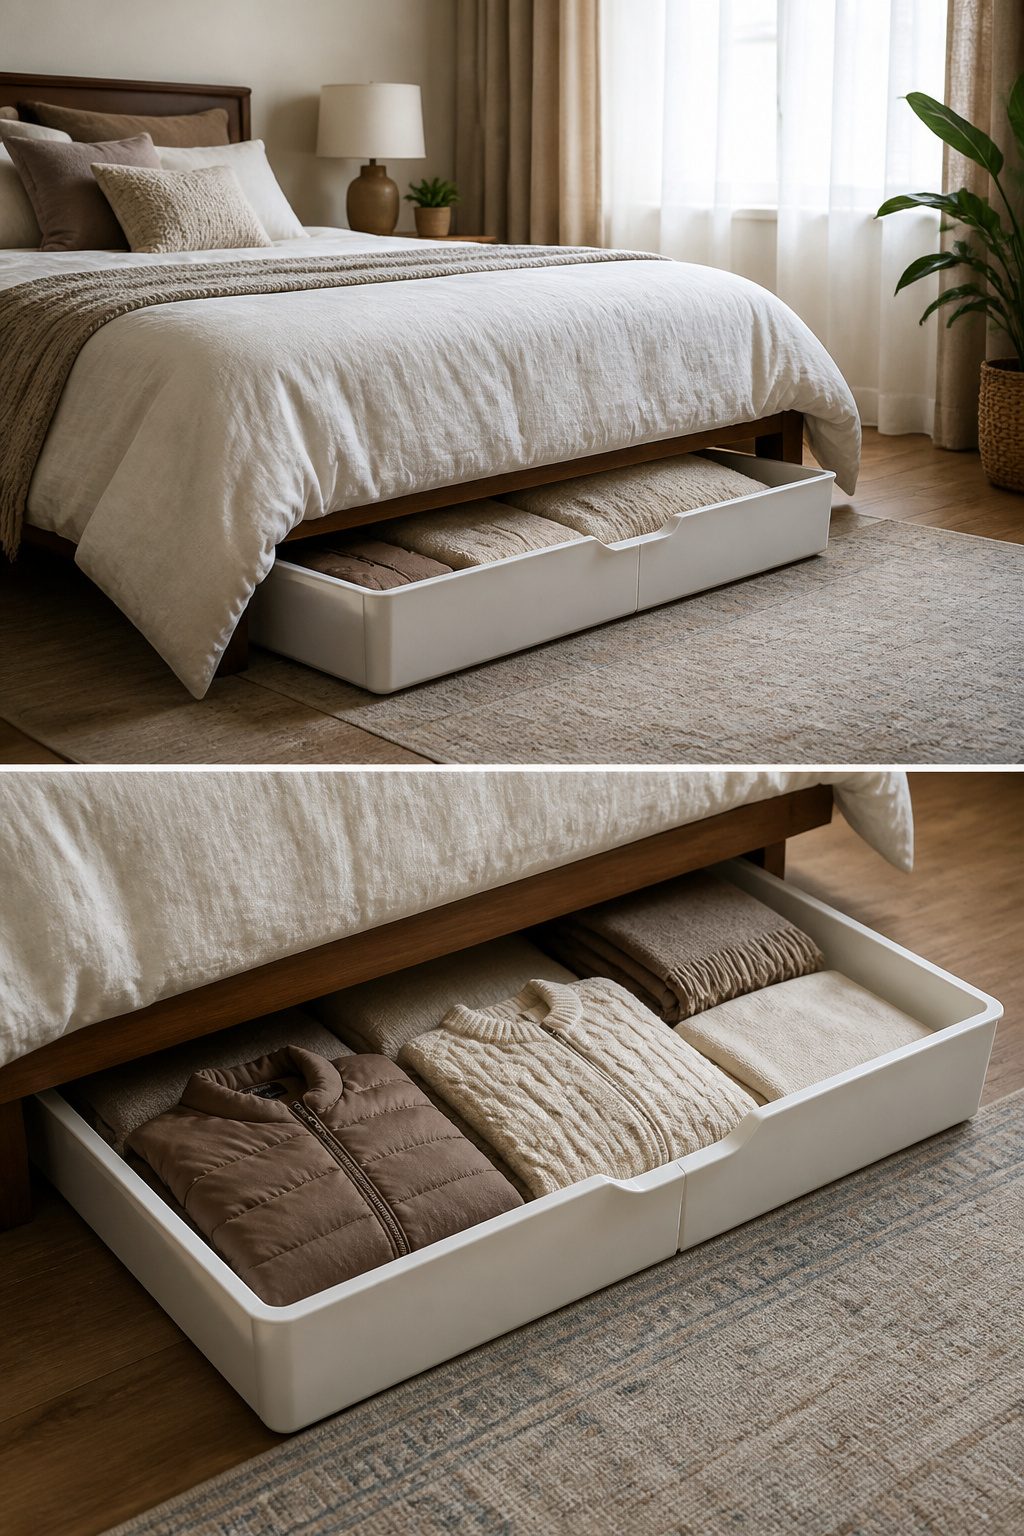
Prime closet space stays prime only if you treat it that way. Off-season pieces belong in bins on a high shelf, under the bed, or in another room entirely.
The Iris Under Bed Drawer glides in and out easily at just under 6 inches tall and 30 inches deep, so it tucks beneath most beds without a fight.
I kept winter coats hanging through July once, and by August the linen shirts I actually needed were buried behind wool I couldn’t wear.
Swap when the temperature holds steady for two weeks, not when the calendar says so. That drawer tips forward slightly if you overfill it or yank too far, so pack lighter than the capacity suggests.

SLIP FREE GRIP - We made these skirt and pants hangers non slip to ensure you never stress over falling clothes again! Made of quality metal, the smooth texture of our pants hangers with clips will keep your clothes securely in place.
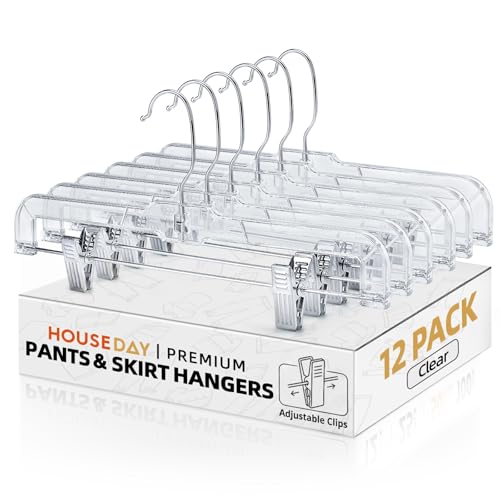
Heavy Duty Pants Hangers - Made of durable plastic, Our pant hangers with clips can hold 5lbs things in each side easily without deformation. These plastic pant hangers proved to be sturdy enough.They not only can hold jeans and skirts, tank tops, dress, ties, belts, nightgowns, shawls, also great for hanging your value clothes like suit ,coat ,shirt.

Space Saving Hangers:Our space-saving clothes hangers feature built-in hooks, allowing you to maximize vertical space by stacking them vertically.This hanging closet organizer ideal for optimizing closet storage.If you struggle with organizing clothes and lack closet space, our hangers space saving can help. They keep your wardrobe neat and orderly while maximizing closet storage space. Provides the useful for space saving hangers for clothes.
9. Utilizing Vertical Space
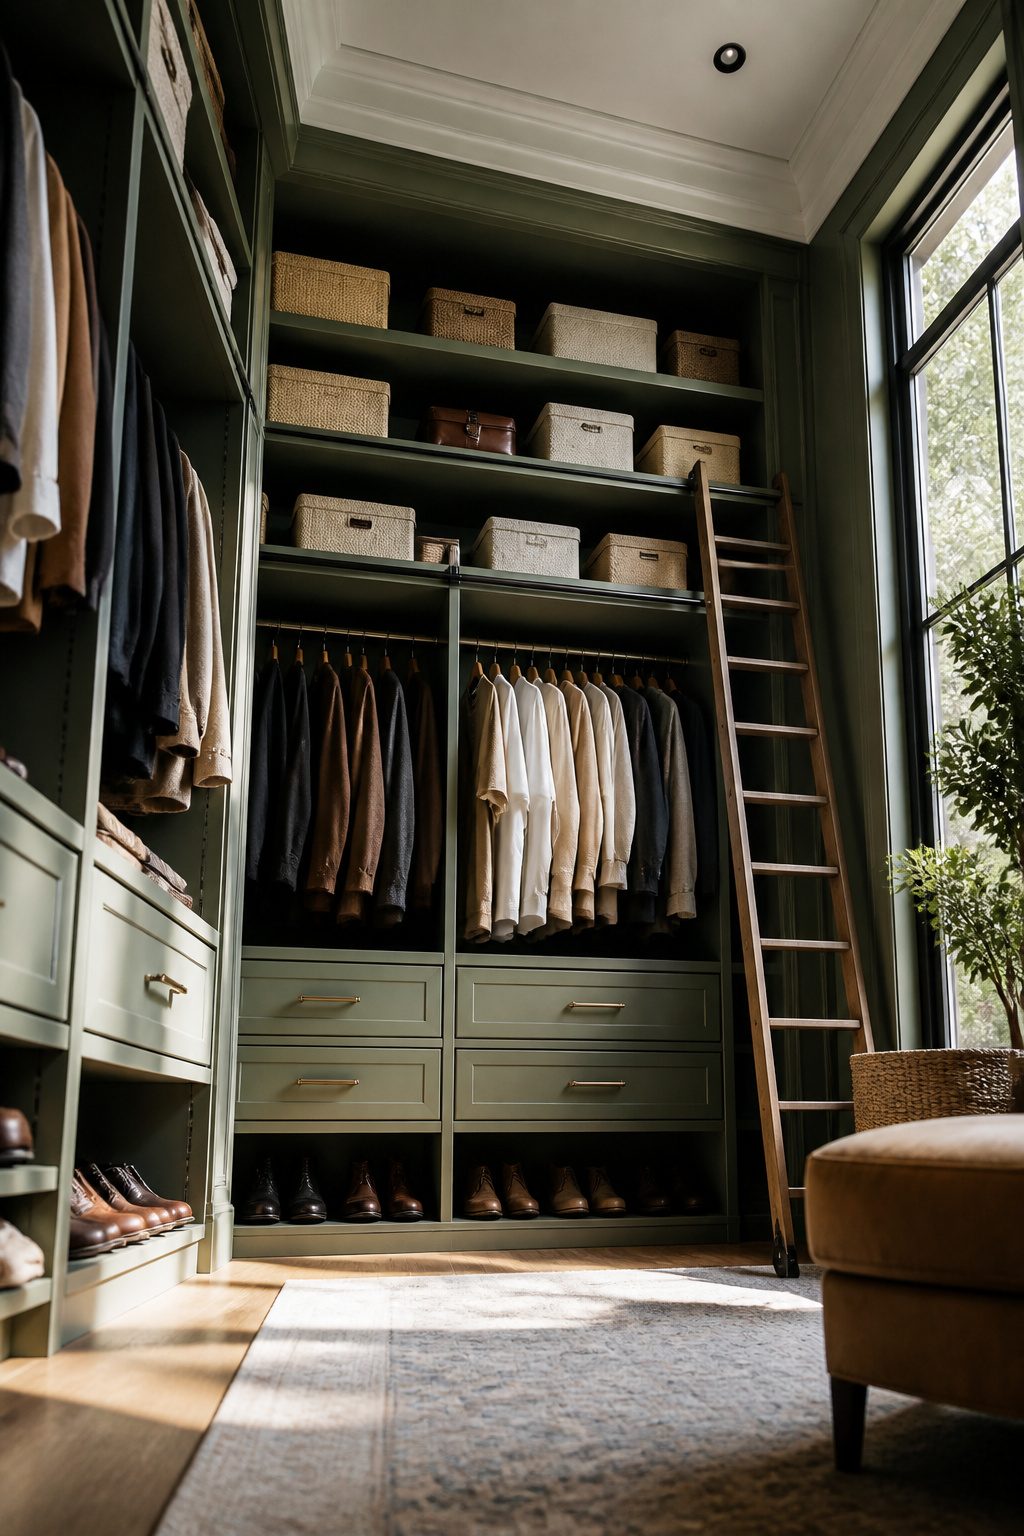
Shelves set 12–18 inches below the ceiling catch the dead zone most closets leave untouched.
That measurement came from my first attempt, where I eyeballed the height and ended up with a ledge I needed a step stool to reach. Everything I stored there became invisible, which meant it became unused.
The fix was measuring downward from the ceiling, not up from the floor.
The top rung holds the out-of-season pieces and the suitcase I pull down twice a year. Eye level keeps the sweatshirts and pants I fold rather than hang, the ones I reach for on actual mornings.
Two narrow tall bookcases filled the gap beside my hanging rod and forced the stacks neat by limiting how wide each pile could sprawl.
If you hang everything, that high shelf still earns its keep. The space costs nothing extra to include, and leaving it bare is a choice to store air.

Unique Trapezoid Design: Our closet bins feature a unique trapezoid design with a lower front for easier visibility and access. The Homsorout shelf organizers now come in 10 new colours, offering more options for your space

【4PACK LINEN CLOSET STORAGE with SEE-THROUGH WINDOW】Each linen closet organizers and storage box features a clear window, allowing you to see the contents at a glance, making it super convenient to find what you need in no time.

【MULTI-PURPOSE】 Our 4 pcs closet storage bins are home essentials to save storage space and keep everything organized. Large enough baskets for organizing clothes, kid’s toys, nursery room items, extra linens, laundry, towels, sheets, pantry and more.
10. Color Coding and Categorizing
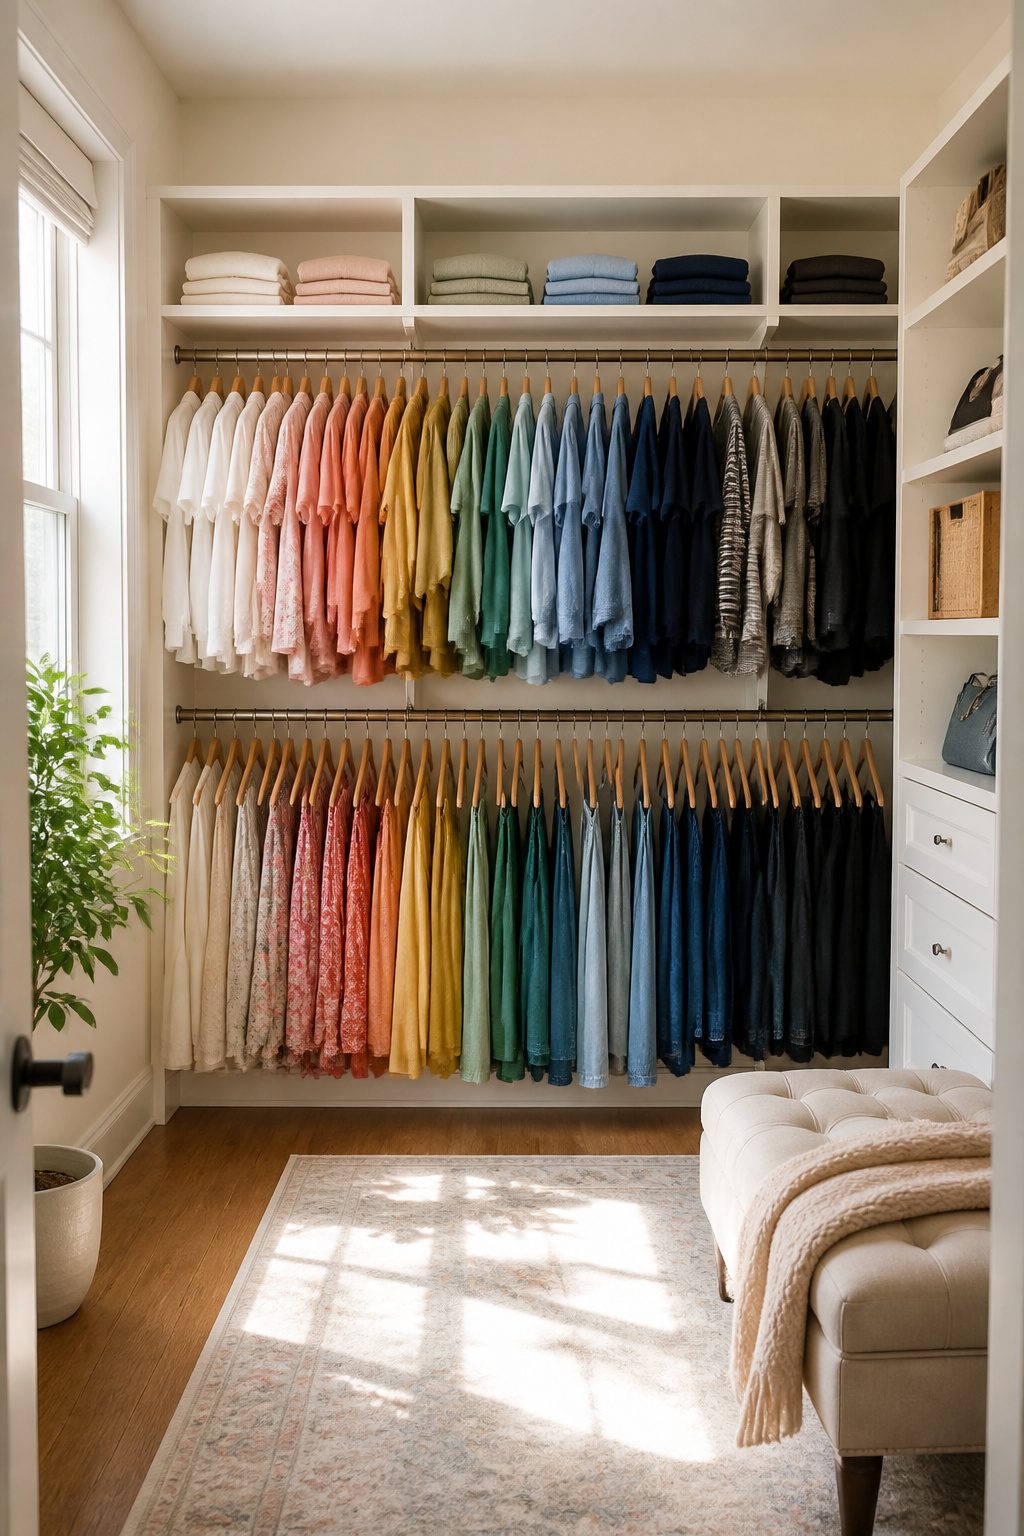
Grouping by category first and color second is the system that actually holds up once the novelty wears off. Short sleeve shirts with short sleeve shirts, skirts with skirts, then each stack runs light to dark.
The color coding isn’t decoration; it’s the fastest way to find the one navy top you own without pulling half the rod onto the floor.
What broke this down for me was the in-between stuff. A cardigan that works over a tee but also under a jacket doesn’t sit cleanly in one category, so it kept migrating.
Same with the one pair of jeans I owned that wasn’t quite ankle length and wasn’t quite boot cut. The system works until an item fits two categories, and then you need a rule you can actually stick to.
I ended up filing by the way I actually reached for things: work tops together, weekend tops together, and color only within those zones.
Jeans I finally split by length on the shelf, ankle in one stack and boot cut in another, because folding them together meant I never wore the pair buried in the middle.
The one-in-one-out rule keeps the categories from bleeding into each other, which is where most closets fall apart. If the rod is full, color coding becomes meaningless because you can’t slide anything to see it.
What to Measure Before You Buy
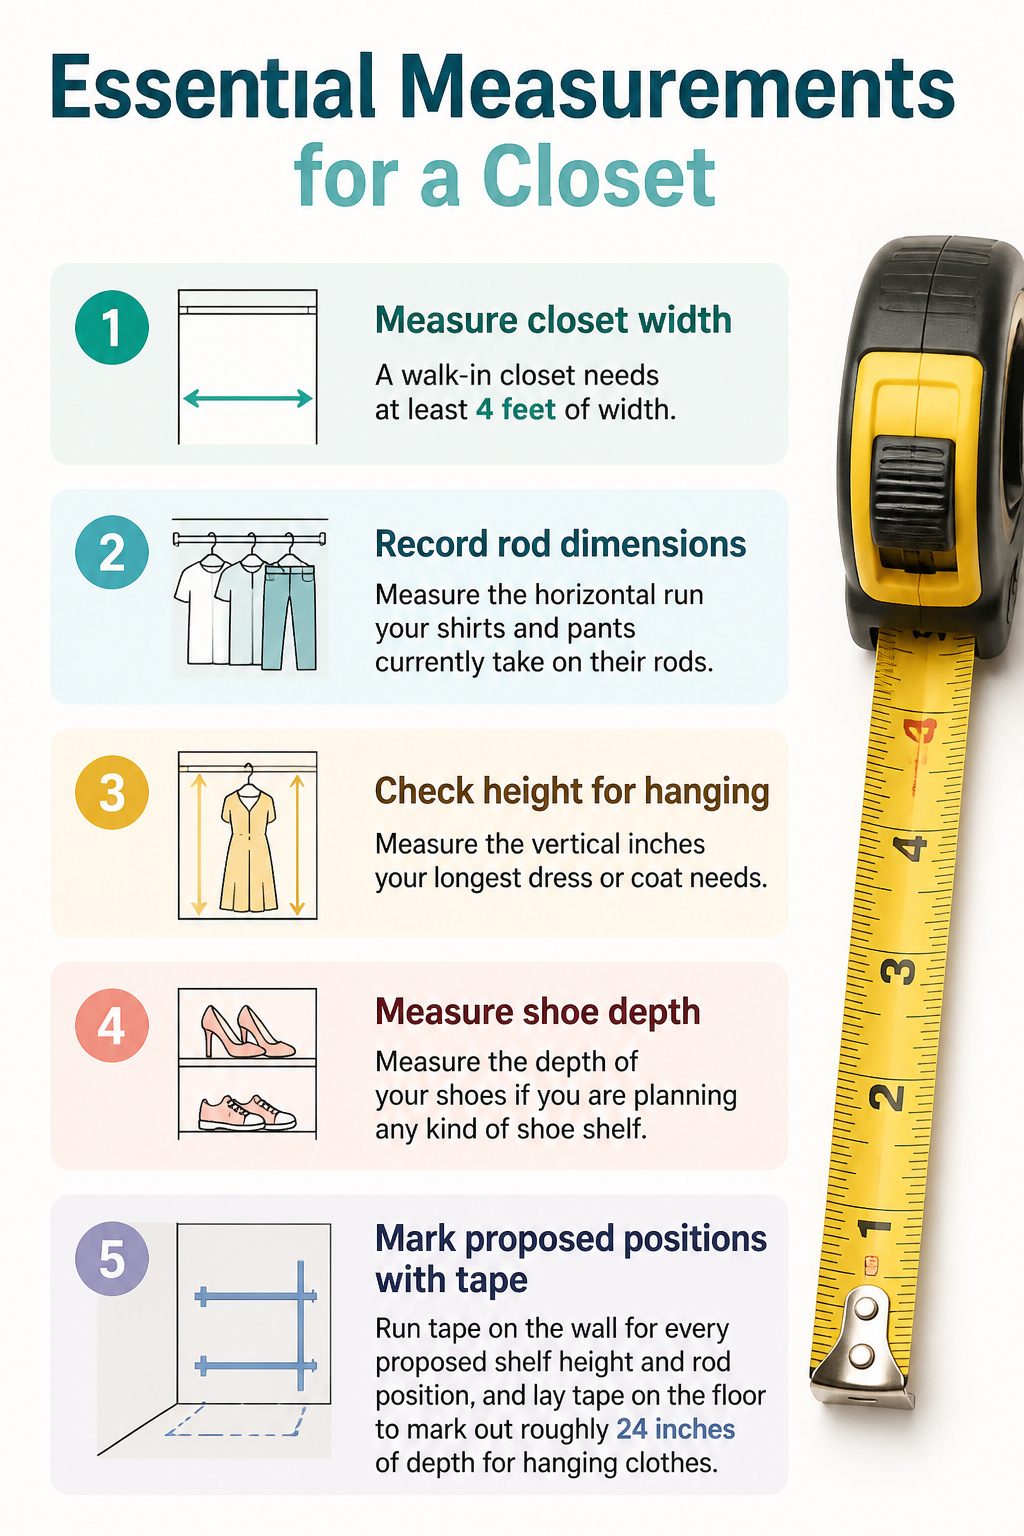
A walk-in closet needs at least 4 feet of width to function as more than a reach-in with extra depth. That gives you roughly 2 feet for a hanging rod and enough floor space to stand in front of it.
Before buying a single shelf bracket, pull out your tape measure and record what you actually own.
Measure the horizontal run your shirts and pants currently take on their rods, the vertical inches your longest dress or coat needs, and the depth of your shoes if you are planning any kind of shoe shelf.
In a shared closet, do this separately. Your hanging height needs and your partner’s may not match.
Once you have those numbers, blue painter’s tape becomes your cheapest planning tool.
Run tape on the wall for every proposed shelf height and rod position, and lay tape on the floor to mark out roughly 24 inches of depth for hanging clothes.
Step into the space. Reach for where the rod would be.
If the aisle feels tight or a shelf blocks a door swing, peel the tape and move it. This is the moment to catch a bad call, not after the holes are drilled.
Bins, Drawers or Hooks: Where Each Wins
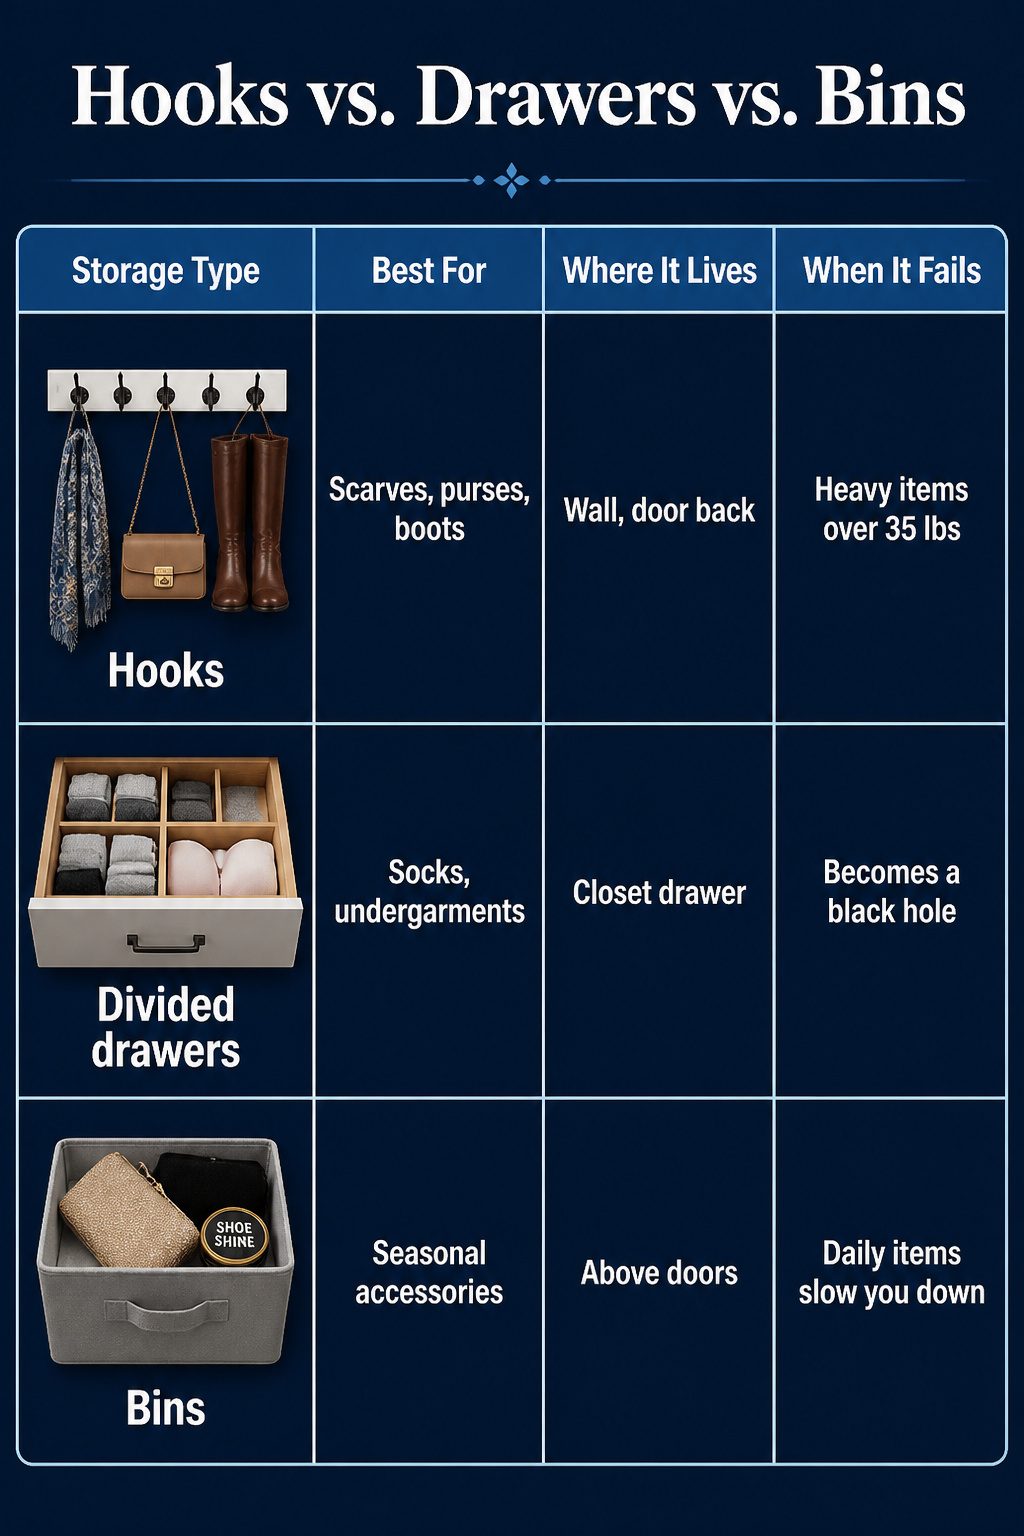
The trick with a walk-in closet is matching the container to the thing you’re actually storing.
Hooks win for anything that slumps, tangles, or begs to be seen: scarves, purses, tall boots that flop over on a shelf, even jeans hung by the belt loop.
S-hooks or C-hooks on a rod turn dead air into display space, and a five-pack of simple wall hooks runs about $9–$10 if you want belts, necklaces, or caps off the dresser and onto the wall.
Drawers, meanwhile, only earn their keep once they’re divided. A raw drawer swallows socks whole; dividers let you see where everything sits at a glance.
Bins belong up high, on shelves above the door or over the long-hang rod, holding small accessories like evening purses and shoe shine kits you reach for once a month.
Boots stacked front-to-back on a 24-inch deep shelf use the full footprint; the same boots in a bin just lean and crease.
| Storage | Best for | Where it lives | When it fails |
|---|---|---|---|
| Hooks | Scarves, purses, boots, belts, caps, jeans by belt loop | Hanging rods, wall, door back, above entry | Heavy items beyond 35 lb capacity; snags delicate fabric |
| Divided drawers | Socks, undergarments, small folded items | Built-in dresser or closet drawer | Undivided; becomes a black hole |
| Bins | Seasonal accessories, shoe kits, overflow hats | Top shelves, above doors, above rods | Daily-use items; the lift and reach slow you down |
When the Layout Fails
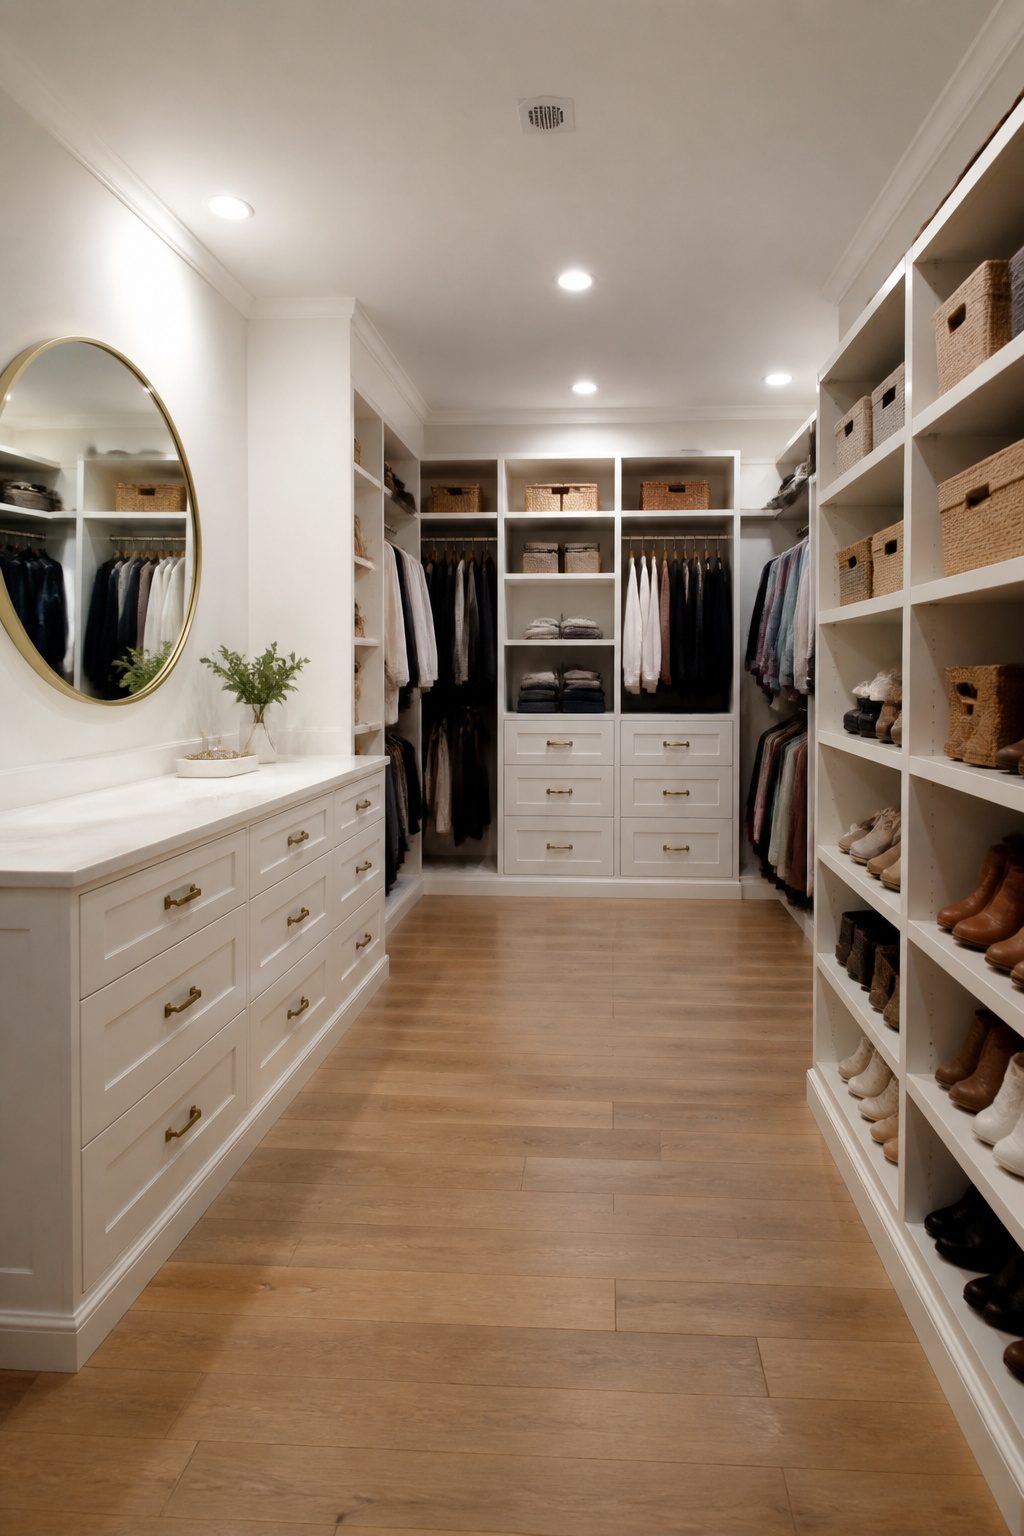
The first rods I mounted went in at a standard 66 inches, which felt right until I tried to hang a shirt while standing on the floor.
My shoulders are not tall, and reaching up to that bar every morning turned the closet into a minor daily annoyance. Lowering the rod by four inches put everything at a natural grab height, and the difference was immediate.
Shelves are where I really misjudged. I installed the top row at the common recommendation, 12 to 18 inches below the ceiling, and filled them with off-season bins.
Two months later those bins had not moved; the step stool lived in the garage, and the closet felt smaller because the storage was technically present but practically dead.
I dropped that shelf to eye level, moved the bins down, and accepted that the high space would stay open. The closet works better with empty air above a usable shelf than with a full shelf I never touch.
If you already drilled the brackets, you do not need to start over.
A single hole patch with spackle and a quick repaint takes twenty minutes. The hardware cost nothing extra; it is the same brackets in a lower position.
The only material I needed was a slim step stool for the remaining high shelf, one I actually keep inside the closet now because the door swing does not block it.
Budget Weekend Projects That Look Built-In
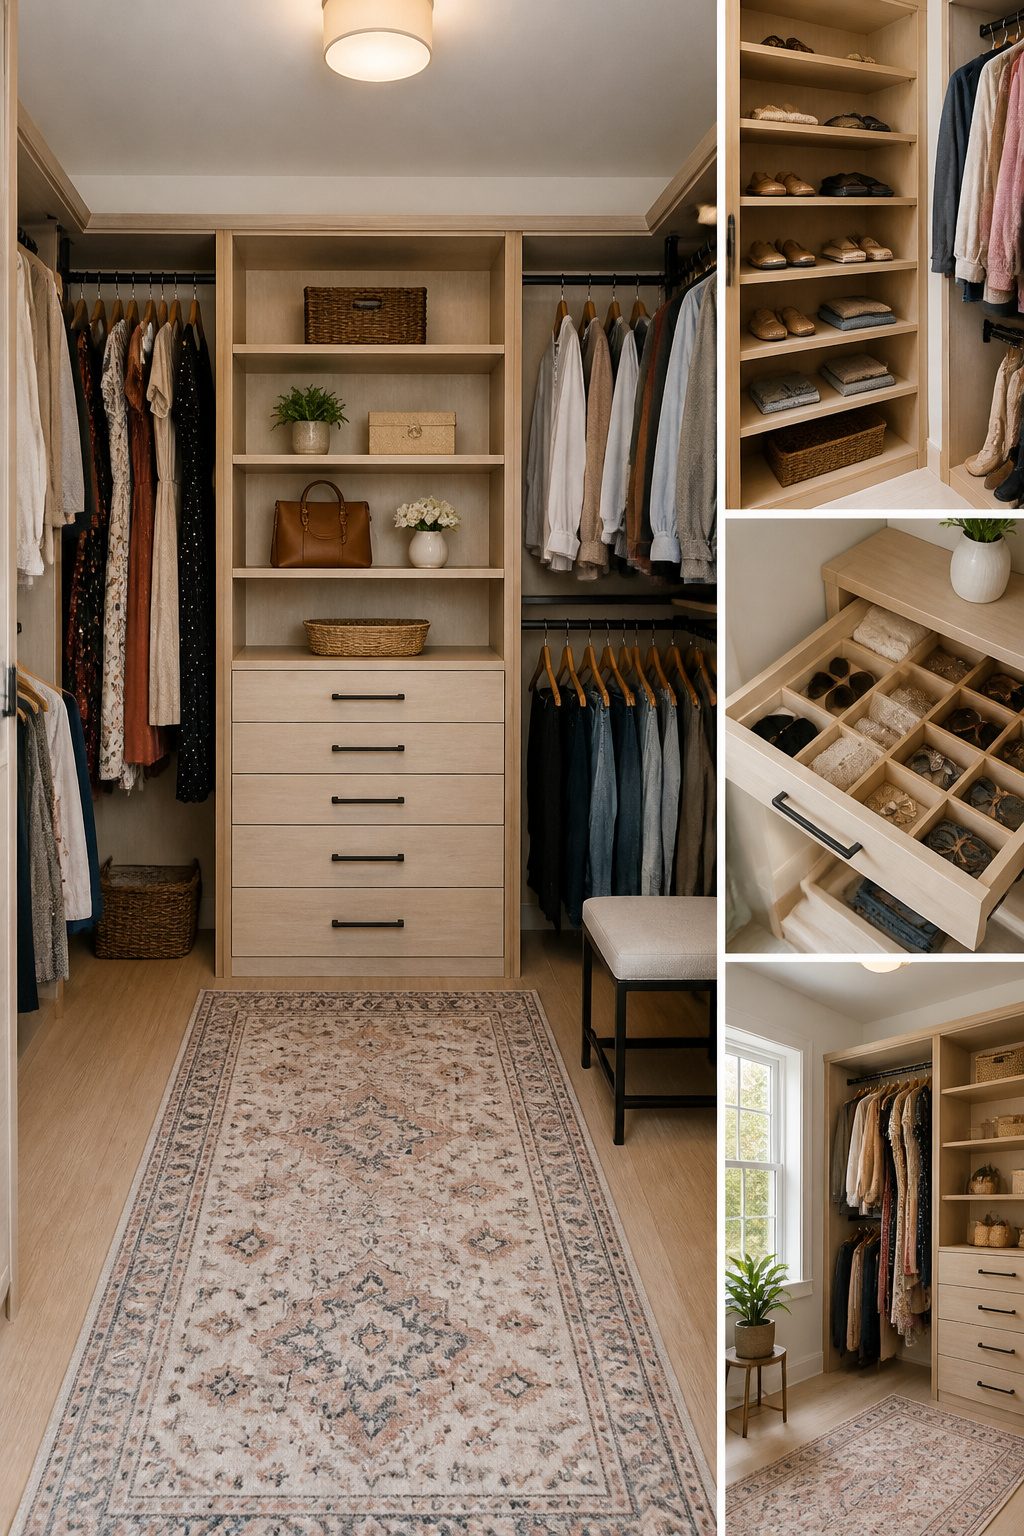
The DIY closet systems that read as built-in share one trait: they borrow the visual language of permanent millwork without requiring a trim carpenter.
Paint the wall behind the shelves a contrasting color, black against white components, and the gaps between units disappear into shadow. The hardware-store pieces stop looking like hardware-store pieces.
A full system can run under $250 if you piece it together from stock parts rather than buying a kit.
That figure comes from a real build: remove the builder-grade wire shelving first, patch the anchor holes, then install vertical standards and adjustable brackets in the same footprint.
The trick is treating the wall as part of the design, not just the surface you bolt to.
Painted walls also forgive the slight irregularities in level that show up when floors settle and ceilings aren’t square. A coat of paint costs little and buys you tolerance the prefinished systems don’t offer.
Adjustable shelving gets recommended everywhere, and the flexibility is real. But if the budget is tight and your needs are stable, fixed shelves built from common board cost less and waste no space on mounting hardware.
The choice is between adaptability and the clean line of shelves that appear to grow from the wall.
The Decorative Touches That Stay
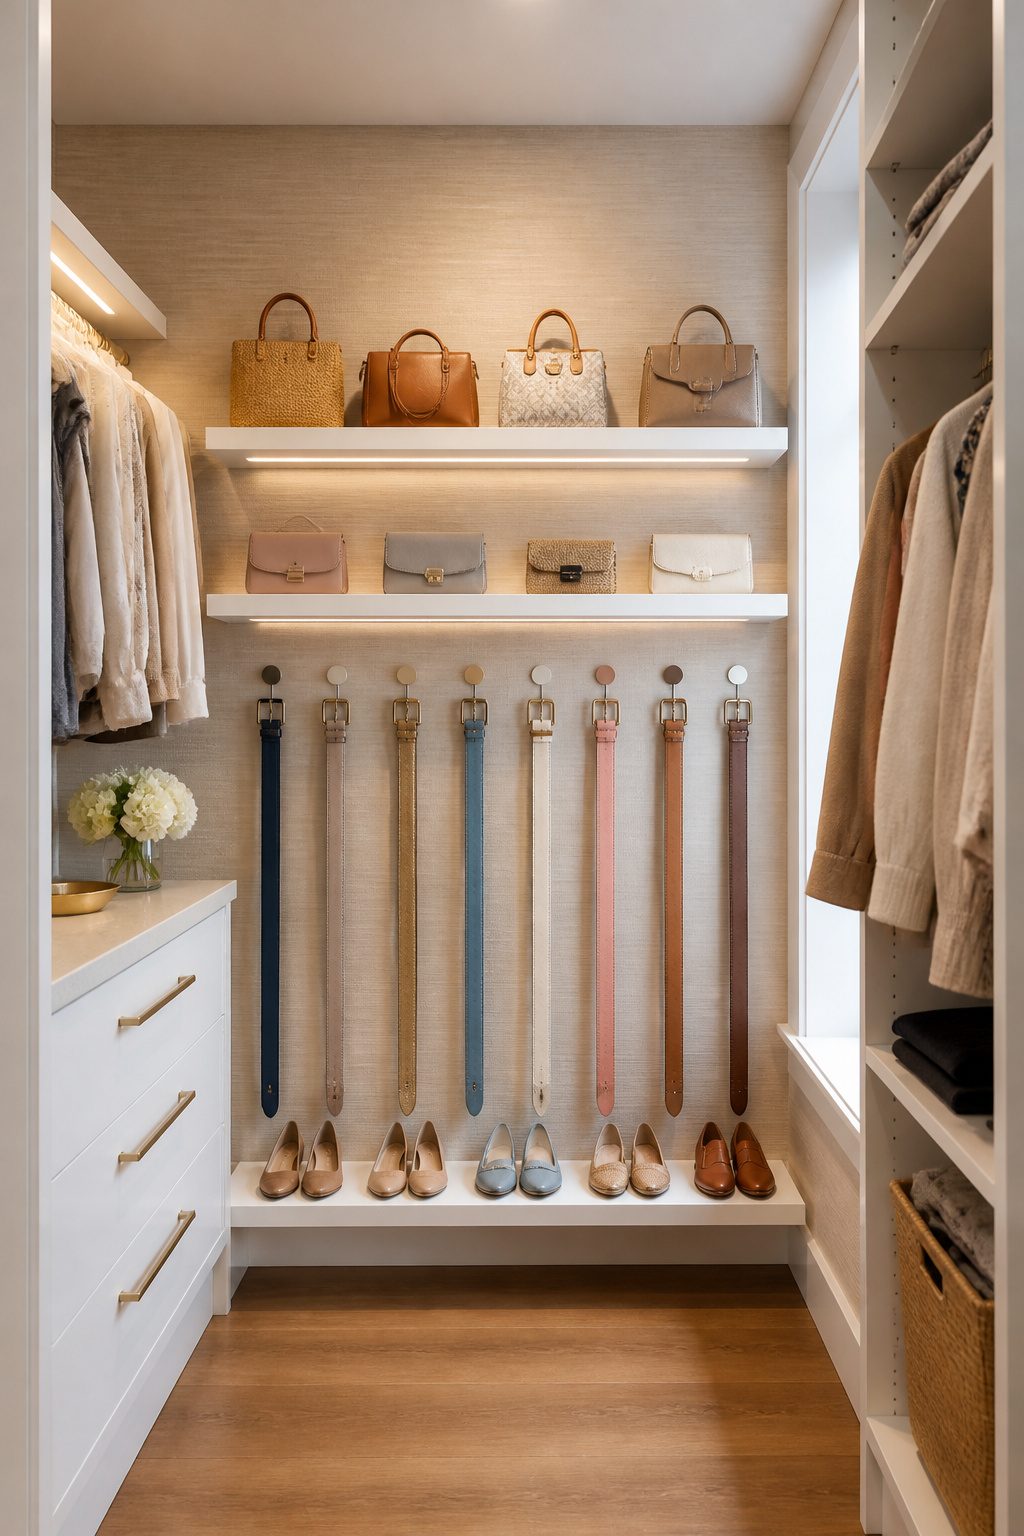
Peel and stick wallpaper on the back wall of a closet sounds like one of those ideas that stays on Pinterest, but the grasscloth version actually handles real life well.
I put it above the tallest shelves in my own space, where no hanger would ever catch the edge, and two years in it still looks intentional rather than like a rental hack.
Hooks are where I had to make the harder call.
The Drop Metal Modern J Hook runs about $15 from an Alabama maker and comes in ten powder-coated colors; the 2-inch depth holds belts or a loaded tote without looking like hardware store afterthought.
I almost bought the Franklin Brass five-pack for $9 instead, and for basic closet walls or the back of a door they do the job quietly, especially in white against white paint.
But the weight limit drops when you miss a stud, and I knew I’d overload them.
I stopped at three hooks total, not the gallery wall some blogs suggest. After that, pretty starts fighting practical: every bag on display is a bag off the shelf, but also a bag collecting dust.
The wallpaper stays because it asks nothing of me. The hooks earn their spot one item at a time.
Frequently Asked Questions
What is the smallest size for a walk-in closet?
A walk-in closet needs at least 4 feet of width to function as more than a reach-in with extra depth.
That gives you roughly 2 feet for a hanging rod and enough floor space to stand in front of it. Anything narrower and you are working in a storage nook, not a closet you can step into.
How do I organize a small walk-in closet?
Use vertical space all the way to the ceiling, categorize items by how you actually reach for them, and match containers to what you own rather than what you wish you owned.
Bins on high shelves hide off-season pieces, hooks on walls or doors keep daily accessories visible, and drawer dividers stop small items from becoming a jumbled mess.
A small closet also benefits from slimline velvet hangers, which cut bulk in half compared to standard hangers so more fits on the same rod.
What are the best storage solutions for a walk-in closet?
Hooks win for anything that slumps or tangles: scarves, purses, boots, belts, and caps.
Divided drawers keep socks and undergarments sorted; undivided drawers become black holes. Bins belong on top shelves for seasonal accessories and overflow items you touch once a month.
For shoes, a three-tier slatted rack keeps pairs visible, while drop-front boxes protect leather but risk hiding what you own. The 12-inch shelf depth is what actually fits standard baskets without wasted space behind them.
How can I maximize space in my closet?
Install shelves 12–18 inches below the ceiling to catch dead zone space, measure downward from the ceiling so the height stays usable. Slimline velvet hangers roughly halve the bulk of standard hangers, letting more garments fit the same rod.
S-hooks or C-hooks on rods turn dead air into display space for bags and scarves. Two narrow tall bookcases beside a hanging rod force folded stacks neat by limiting how wide each pile can sprawl.
Before buying anything, record what you actually own: the horizontal run your clothes take, the vertical inches your longest dress needs, and the depth of your shoes.