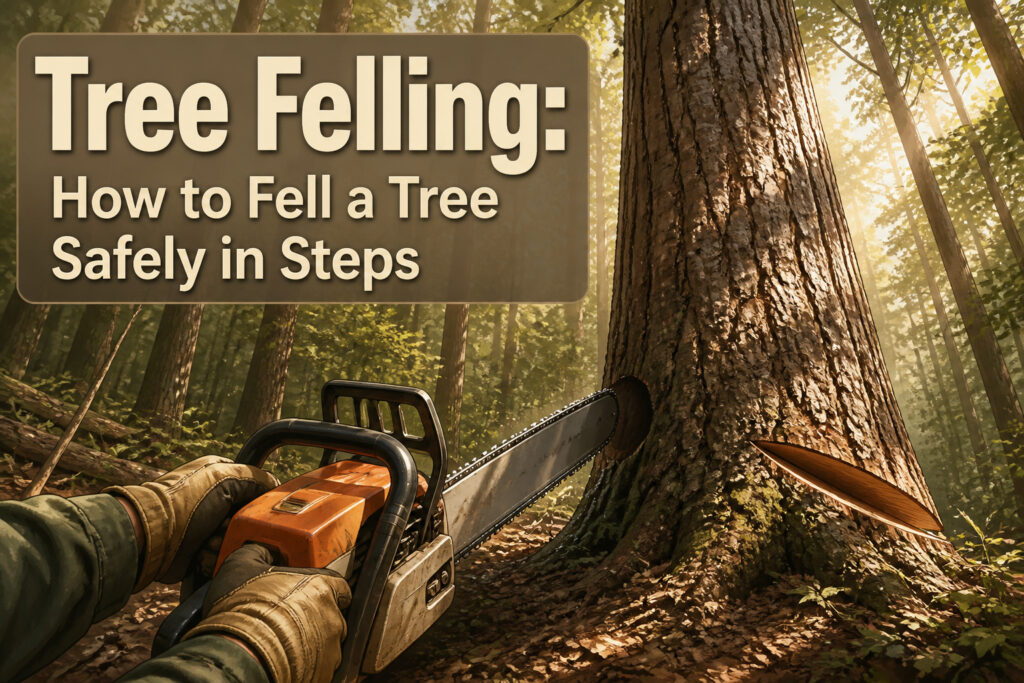
Tree felling is the controlled cutting of a standing tree so it lands where you choose. The catch is that gravity and fiber tension have their own ideas, and the difference between a clean drop and a hospital visit is usually decided before the saw starts. The 90-15-5 rule makes that real: ninety percent of felling accidents happen within fifteen seconds of the tree moving and within five feet of the trunk. That is why the first step is not a cut at all. Walk the full drop zone twice, measure height with a 32-inch stick held at arm’s length, and clear two escape routes at 45 degrees from your fall line before the chain ever touches wood.
[link-whisper-related-posts]1. Assess the Tree

A hard hat and five minutes of walking around the tree will save you from the worst mistake in felling: dropping it on something you cannot move. Height comes first, because the trunk length tells you where the tip lands. The stick trick costs nothing: find a straight stick about 32 inches long, hold it vertical at arm’s length with your arm level to the ground, and move forward or backward along your intended fall line until the tree’s tip lines up with the stick’s tip. Where you stand is roughly where the top hits. If the tree leans forward, that estimate runs high; lean back, and the tip carries farther than your mark. A clinometer does the same job more precisely, and either beats guessing by eye.
Obstacles sit in three zones: the trunk itself, the canopy above, and the full radius of the fall path. Dead branches hung up in neighboring trees, power lines you forgot ran behind the property line, a fence you cannot see from the stump side. The natural lean matters most here. A tree already tilting toward open ground wants to go that way; fighting it with wedges and back cuts is possible but not where a weekend project should start.
Determine the height of the tree. This can be estimated quite accurately using one of these methods: Pro-Sight method, Clinometer method, Axe handle method.
The Pro-Sight and Axe handle methods work on the same geometry as the stick trick, just with different tools in hand. Pick one, get your number, then walk the full drop zone twice before the saw starts.

Includes one pair of Husqvarna Functional Apron Chainsaw Chaps with adjustable waist size up to 38 inches and a 32-inch inseam. These chaps are made to wear while operating chainsaws

Husqvarna Classic Personal Protective Power Safety Kit includes: one pair of Husqvarna classic chaps (homeowner) (36 to 38 inches, 32-inch inseam), one Husqvarna functional forest helmet, and one pair of Husqvarna classic work gloves (large)

2. Gather Equipment
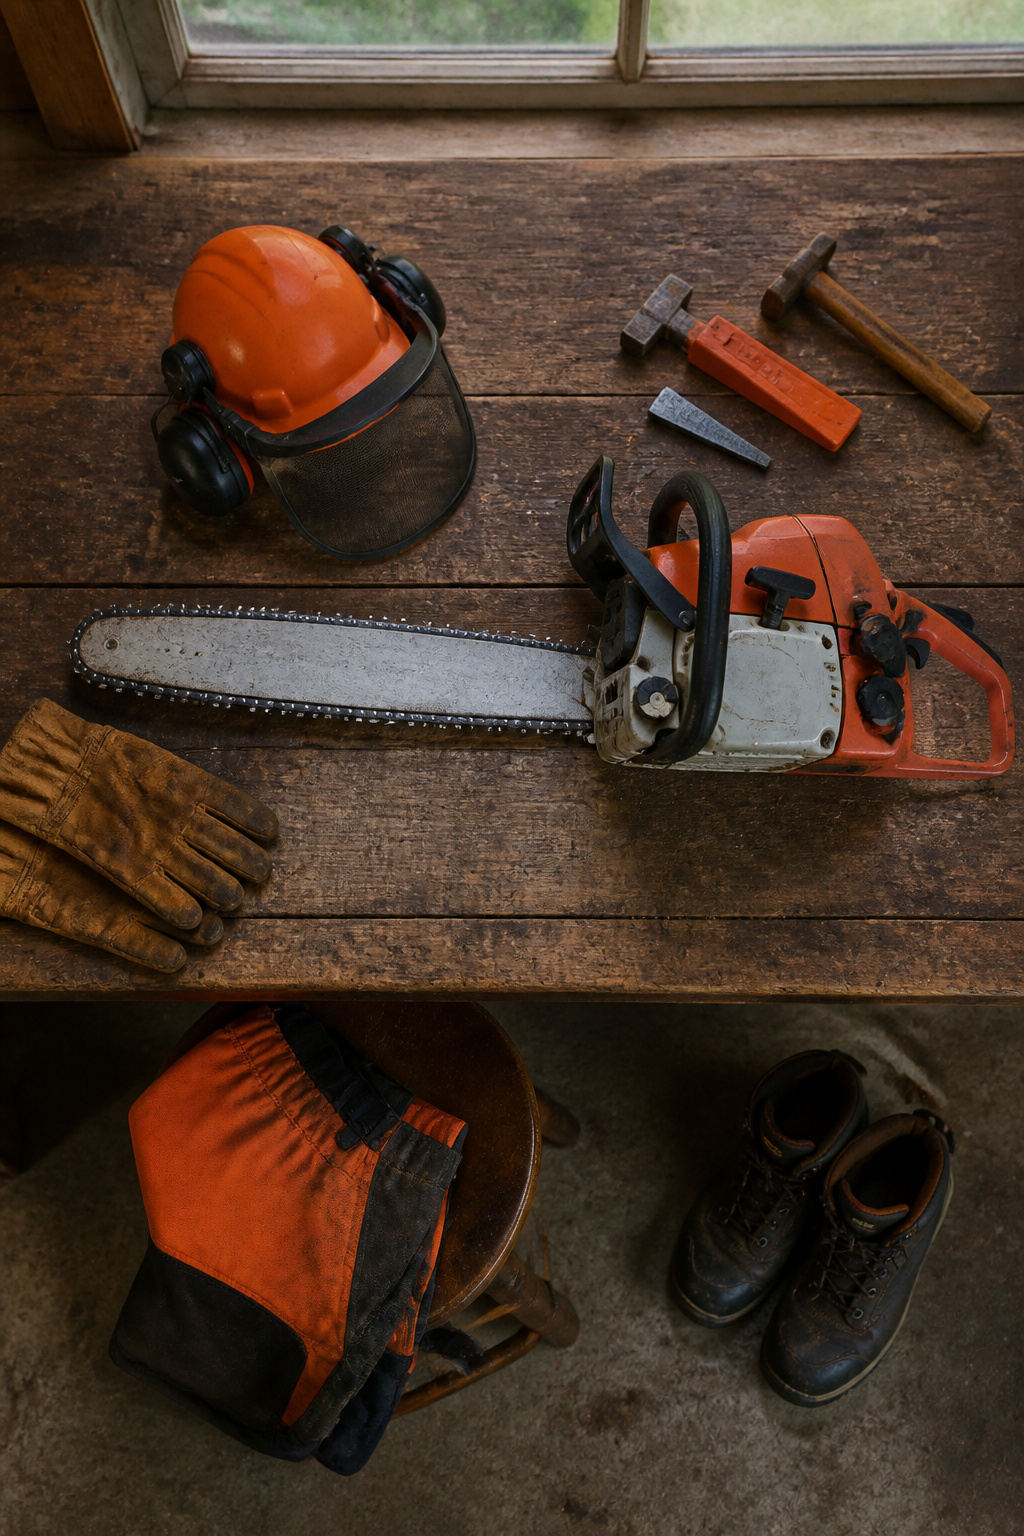
A chainsaw with a bar slightly longer than the tree’s diameter and a sharp, well-maintained chain sits at the center of every felling job. Before starting, I check the fuel and oil levels and run my finger along the chain to confirm the tension is right. A loose chain will derail mid-cut; a tight one burns the bar.
The personal protective equipment is not where I cut corners. A hard hat with a face shield, hearing protection, leather gloves, chainsaw chaps, and steel-toed boots are the baseline. OSHA regulation 1910.266 requires this full kit for professional operators, and the same logic applies in a backyard. Chaps in particular are worth the investment. A momentary slip brings a running chain toward the legs faster than reaction time allows.
Wedges belong on-site every time. I drive them into the back cut with an axe or hammer, even when the tree leans the direction I want. For trees with back or side lean, a throw line or rope with mechanical advantage helps pull things over true. If any of this gear is missing or questionable, the job waits for another day.

HARD HAT WITH FACE SHIELD AND EAR PROTECTION - This all-in-one chainsaw protective gear comes with a hard hat, an adjustable metal mesh visor, a polycarbonate face shield, and adjustable 25.9 dB SNR ear muffs. Great as a logging helmet, arborist helmet, or for any lumberjack or forestry professional looking for complete chainsaw safety gear.

Impact resistant helmet with 6 ventilation holes for high breathability

【Forestry Helmet System with Accessories】:GREEN DEVIL 3 in 1 safety helmet comes with ABS helmet, adjustable/removable earmuffs, and mesh visor, providing dynamic protection for any job.Equipped with a pair of 25 dB NRR earmuffs that help block out tool and engine sound noise for hearing protection.Easy flip-up metal mesh provides good visibility and debris protection.The accessories is easy to assemble,come with detailed installation instructions.
3. Plan Escape Routes

The 90-15-5 rule is what made me take escape routes seriously: ninety percent of tree felling accidents happen within fifteen seconds of the tree moving and within five feet of the trunk. Two cleared paths at 45 degrees away from the direction of fall give you options when adrenaline hits and your first route turns out to be blocked by a branch you didn’t notice.
Brush, roots, and debris have to go. The ground should be clean enough that you can move without looking down, because your eyes stay on the tree until you’re well clear. One route is not enough. A second snag might drop into your first path, or the tree might kick back the other way. Walk both routes, then run them; the footing changes when your stride does, and a rock that was nothing at a walk can twist an ankle at speed.

UNCO tree felling wedges package offers a versatile assortment of 4 high-quality wedges (2 small, 2 large) perfect for loggers, arborists, or DIY enthusiasts needing control in wood splitting or felling trees.

Prevent trees from pinching your chainsaw bar when felling or bucking and help them fall the right way with this Oregon 8 inch felling wedge

EFFECTIVE TREE WEDGES: Safety is everything in the tree cutting business, so protect yourself and your employees with a high-quality set of tree felling wedges designed with raised spikes to carefully lift and direct the tree to the safest direction of your choosing.
4. Make the Notch Cut
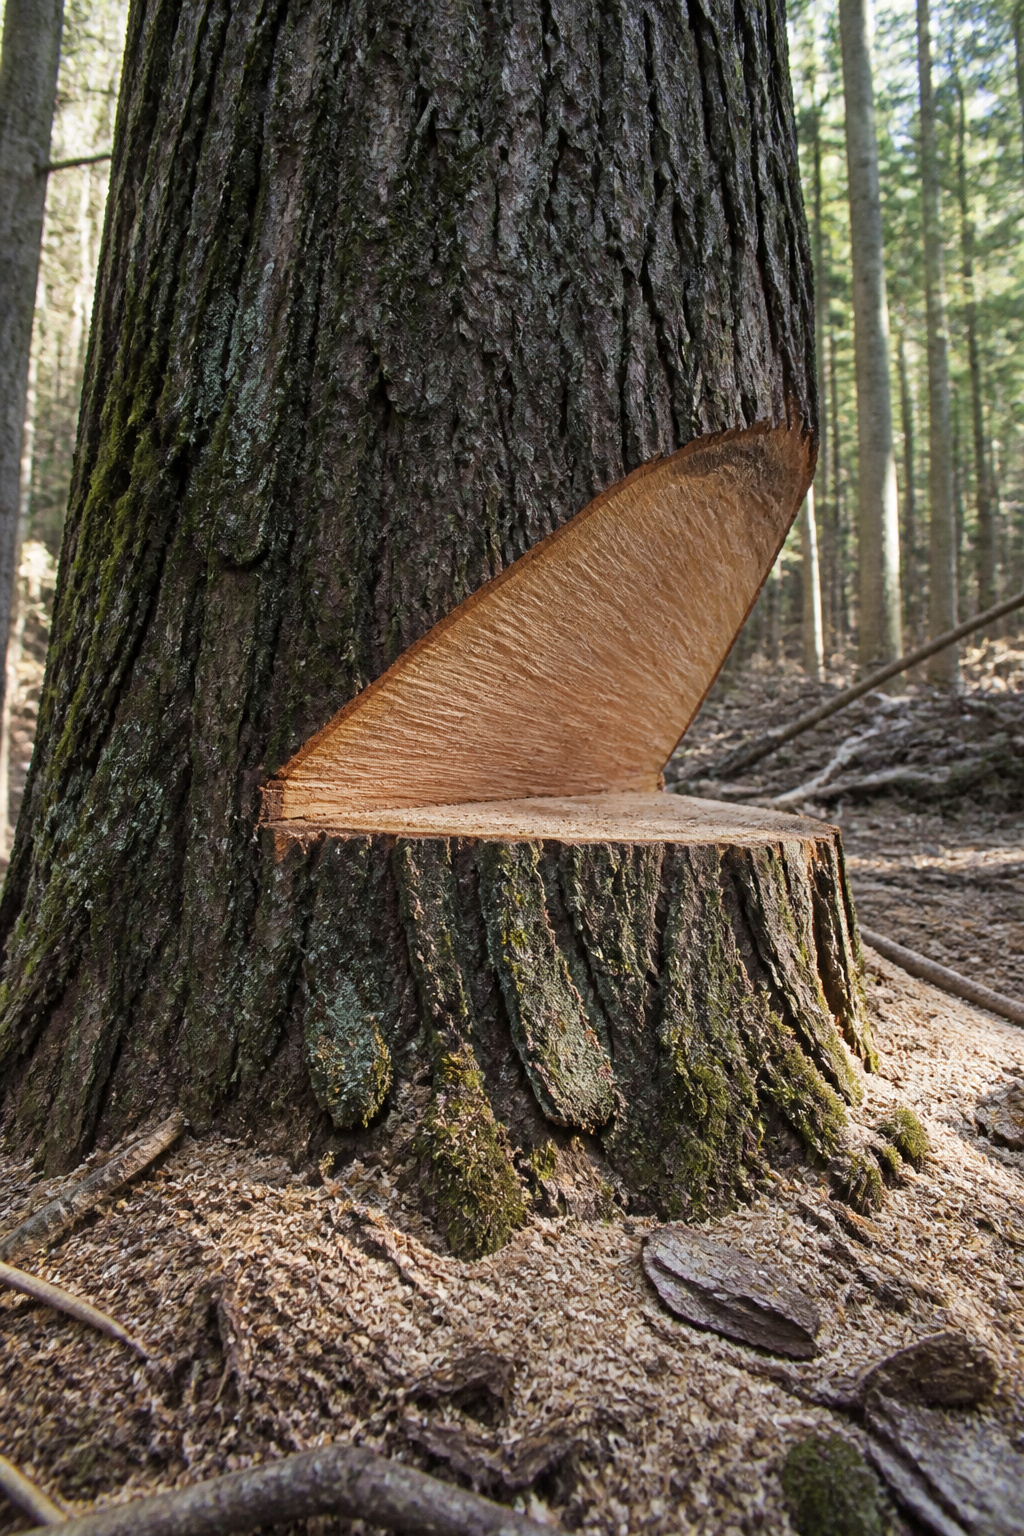
The directional notch goes on the side facing where you want the tree to land. Make the horizontal bottom cut first, then the angled top cut, and keep the total notch depth to about one-third of the trunk’s diameter. Any deeper weakens the hinge; any shallower and you lose control of the fall.
Three notch shapes cover most situations. The conventional notch sits at roughly 45 degrees and works fine for straightforward residential drops where you have room to spare. The open-face notch opens wider, past 70 degrees and up to 90, and that extra width buys you longer control while the tree pivots on the stump. For tight spaces or delicate ground, the open face is worth the extra cutting. The Humboldt notch flips the geometry, with the horizontal cut on top and the angle below. West Coast timber fallers use it to save more usable lumber from the stump and to keep a tree from rolling downhill on steep slopes. It pushes the trunk away from you as it goes, which matters when your escape routes are limited.
Each notch demands the same thing: accuracy on the first cut, because the second cut has to meet it cleanly. A gap or offset in the notch transfers into a crooked fall.

ACCURATE TREE HEIGHT MEASUREMENT – Forestry Suppliers Tangent Height Gauge helps quickly measure tree heights using a simple tangent method ideal for forestry, surveying, and educational fieldwork

Sighting Altimeter used to measure height and slope, great for backpacking, hiking, adventure, exploration, field work, etc

Handheld Clinometer: Utilizes a high-definition dial with a deflection angle lens for swiftly measuring target height and slope. Features dual centimeter and inch scales to suit various measurement needs.
5. Make the Back Cut
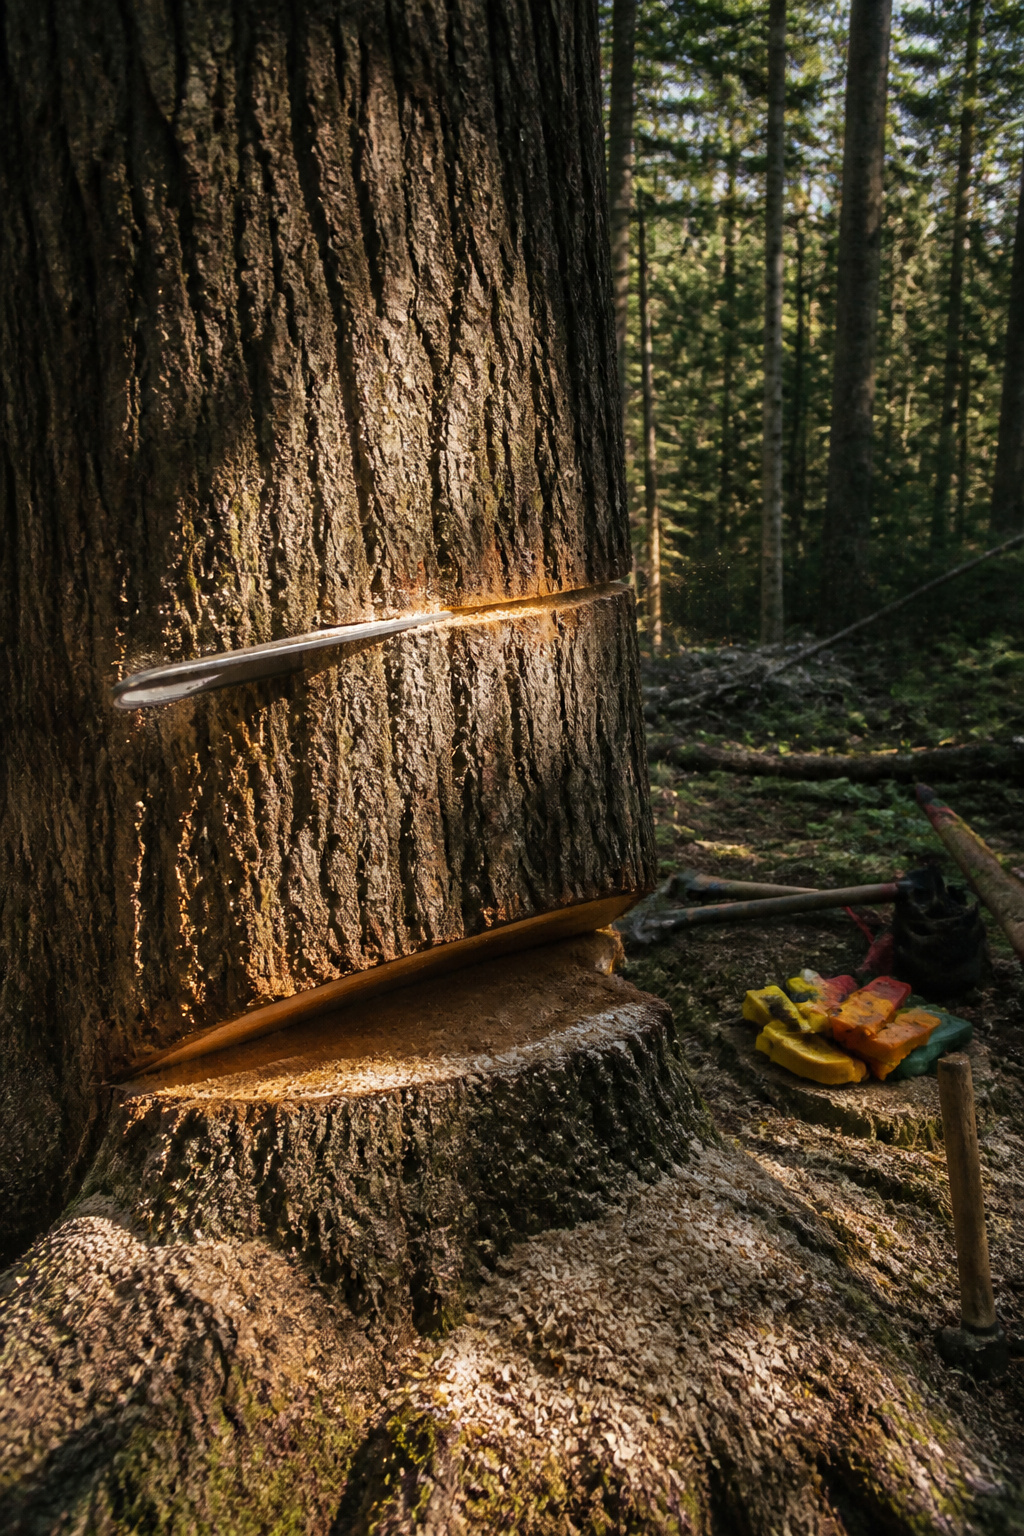
The back cut lives on the opposite side of your notch, positioned slightly above the notch floor so the tree releases cleanly and falls along the hinge wood you leave behind. Stop cutting while enough solid wood remains to guide the direction; overcut here and the tree decides where it wants to go.
A standard back cut runs straight through from behind, bar level, squaring to the hinge. That works fine on straightforward trees. But on a heavy leaner or something with unpredictable weight, I prefer the bore cut once I understood what it does. You start the cut by boring horizontally into the tree’s center, at a plane just above the notch, then work back toward the hinge from inside the wood rather than slicing through from the rear. The saw never fully severs the back until you’ve already established your holding wood on both sides. Some crews run matching bore cuts from each side, meeting in the middle and leaving a back strap that gets released last with a horizontal cut an inch or two below the bores. The tree drops on your hinge, not on surprise fiber tension you didn’t see coming.
Felling dogs help here more than anywhere else in the process. They give you a pivot point against the trunk so the bar stays steady while you ease the cut forward, and they spare your arms the wrestling match that straight-arming a running saw always becomes.
ADJUSTABLE FOLDING WALKING CANE AND WALKING STICK foldable cane and walking stick easily adjusts from 32 to 37 inches in 1 inch increments to fit most people, eliminating uncomfortable bending or awkward slouching while walking.

Reliable and Durable: Our pine tree animal wall stickers are made of vinyl, ink and adhesive, it's easy to peel and stick, removable and waterproof. Also they are durable and fade resistant, can withstand daily wear and tear, as well as minor cleaning without losing their appearance.

Christmas Tree Display Set: Please note that this product only has one wooden frame and does not include the decorations on top. This kit only includes 1 base plate, 2 long columns, and 8 wooden sticks, fully equipped and easy to install
6. Escape as the Tree Falls
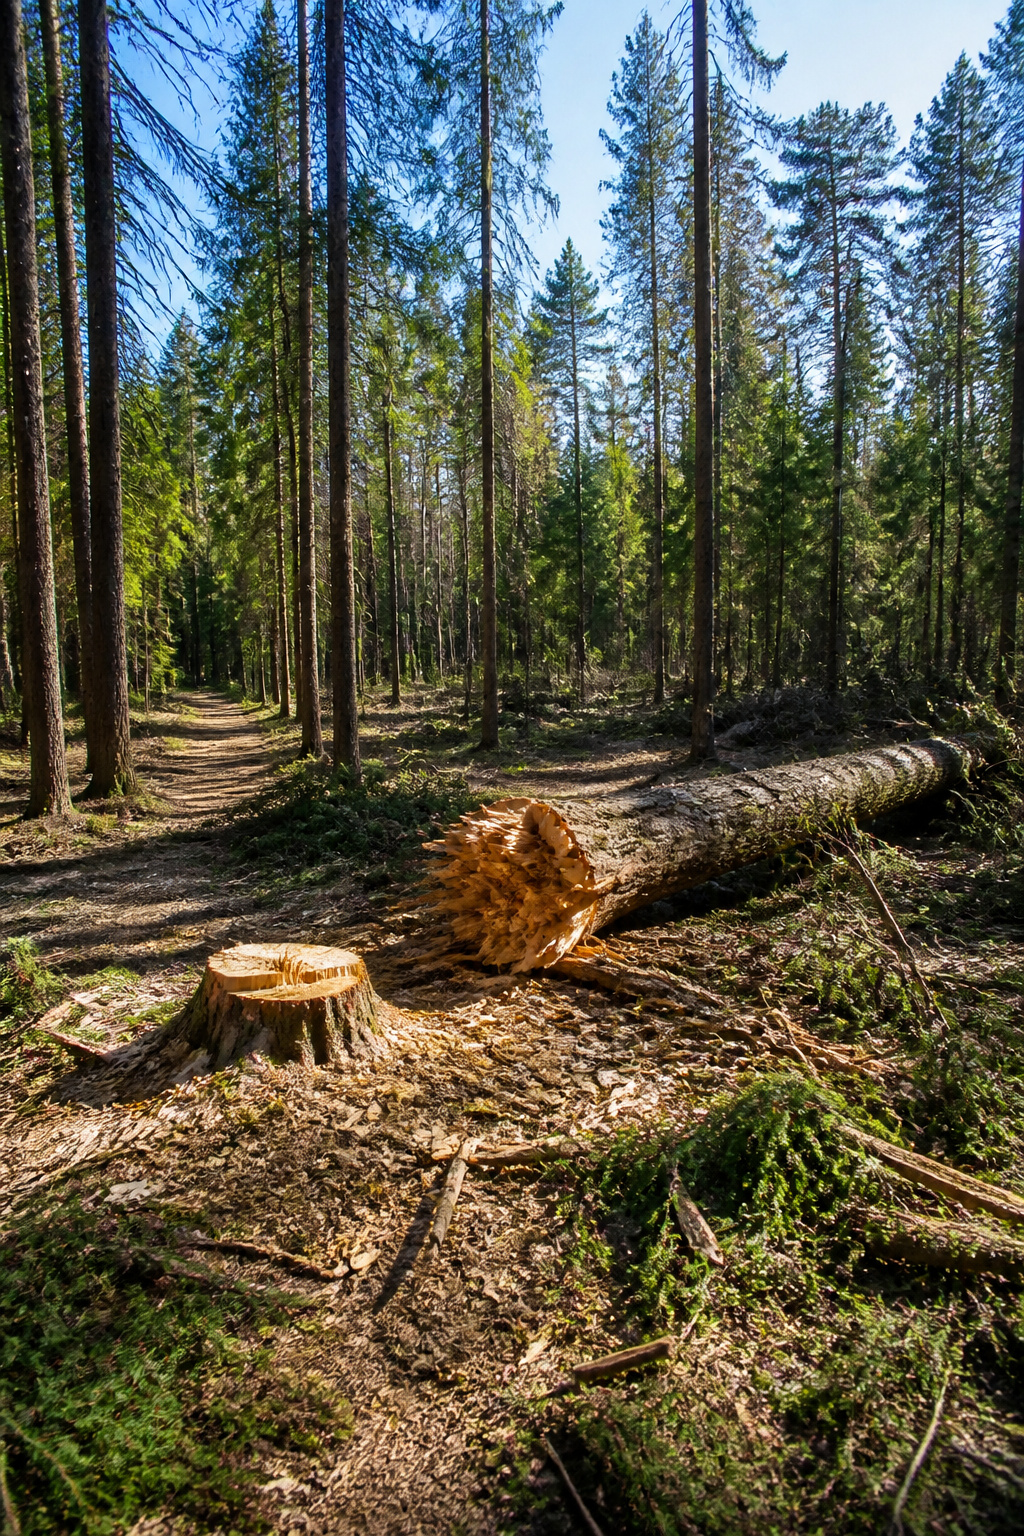
The crack comes before the fall. That is the detail that stuck with me, reading through accident reports and felling guides: the tree makes a sound, a pop or a crack from the fibers tearing in the hinge, and then you move, before you can even see it lean. Waiting for visual confirmation costs the fifteen seconds where ninety percent of felling injuries happen, most within five feet of the trunk. They call it the 90-15-5 rule, and it is not a trivia fact. It is the window you are trying to beat.
Your first escape route angles forty-five degrees from the line of fall, cleared of branches and debris because you will not be looking at your feet. You will be watching the tree, and the debris coming down with it. The second route matters when the tree shifts or kicks back, which a back-cut tree can do if the hinge fails unevenly. Walking both routes beforehand is standard advice; running them is better, because leg spacing changes and the rocks you stepped around at a walk become something else at speed. One source noted that a twisted ankle in the drop zone turns a controlled retreat into something worse.
Get off the stump. Keep eyes on the tree until it settles, and give it time after it lands. Branches can fall several seconds later.

MAXIMUM SAFETY THAT MEETS PROFESSIONAL STANDARDS - Forester Chainsaw Chaps meet OSHA 1910.266 standards for chainsaw operators, ASTM F1897 specifications for leg protection, and CAN/BNQ 1923-450 M91 39JY CLASS B safety standards - giving you the same level of protection trusted by professional loggers and arborists.

Includes one pair of Husqvarna Technical Apron Wrap Chainsaw Chaps with adjustable waist size up to 42 inches (overall length is from waist to ankle)

Product 1: Husqvarna Classic Personal Protective Power Kit includes: one pair of Husqvarna classic chaps (homeowner) (36 to 38 inches, 32-inch inseam), one Husqvarna functional forest helmet, and one pair of Husqvarna classic work gloves (large)
Five Cuts Compared
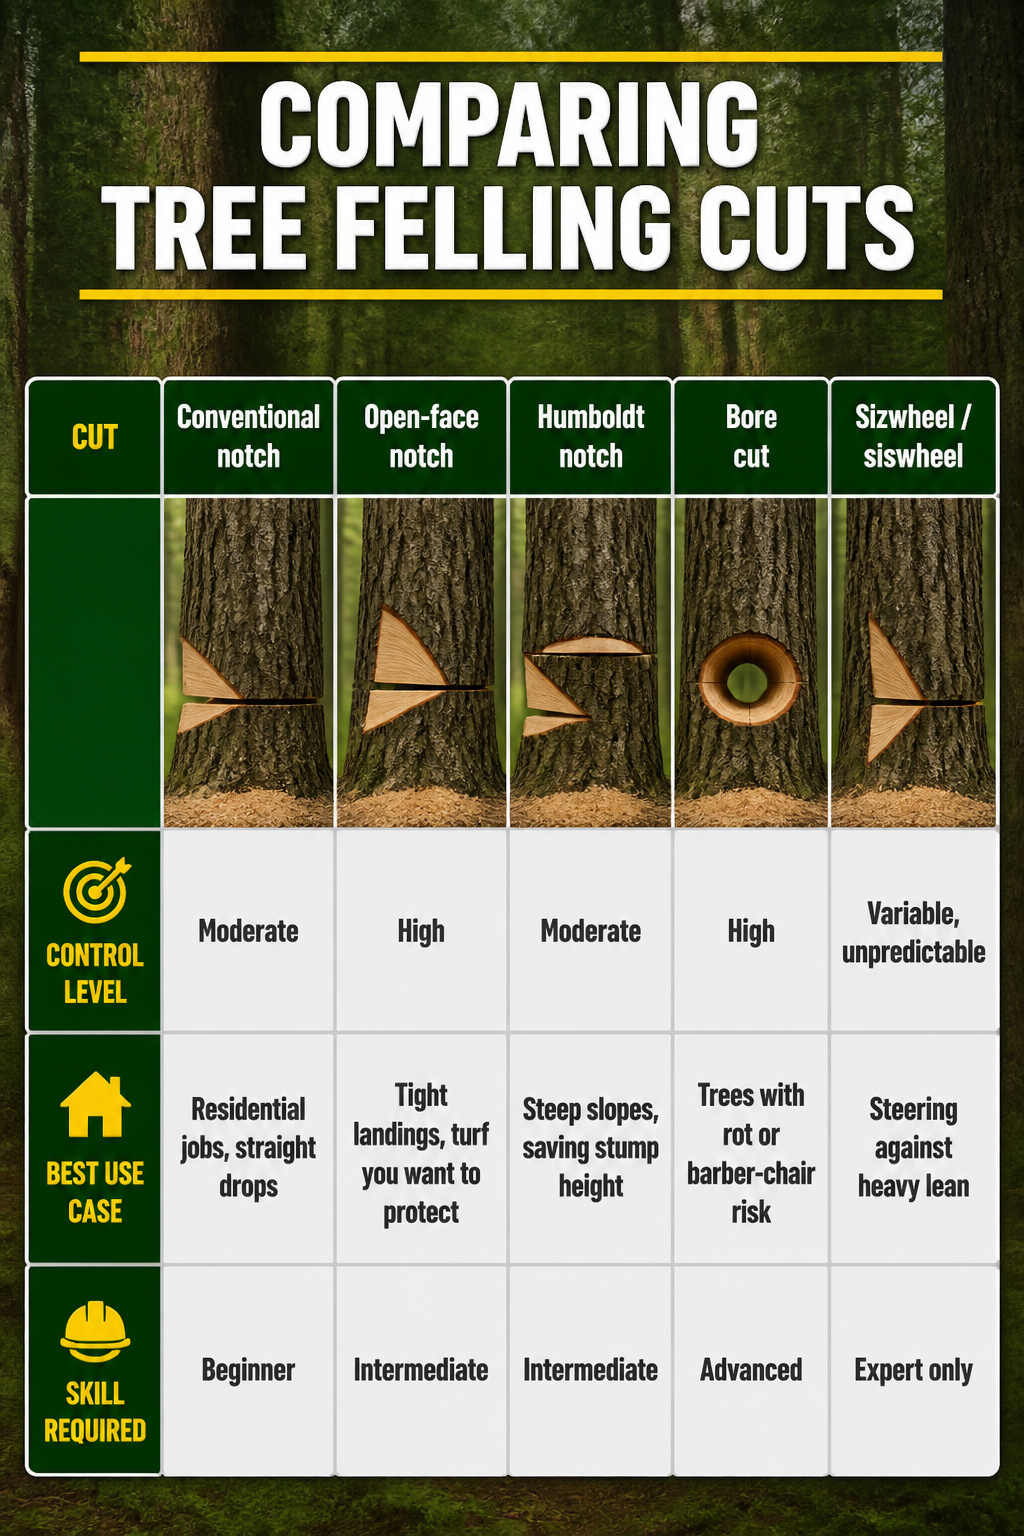
The notch you choose matters more than the saw you run it with. An open-face notch at 70 to 90 degrees keeps the hinge alive until the tree is on the ground; the conventional 45-degree notch can snap that hinge early and send the trunk anywhere.
| Cut | Control Level | Best Use Case | Skill Required |
|---|---|---|---|
| Conventional notch | Moderate | Residential jobs, straight drops | Beginner |
| Open-face notch | High | Tight landings, turf you want to protect | Intermediate |
| Humboldt notch | Moderate | Steep slopes, saving stump height | Intermediate |
| Bore cut | High | Trees with rot or barber-chair risk | Advanced |
| Sizwheel / siswheel | Variable, unpredictable | Steering against heavy lean | Expert only |
The Humboldt flips the conventional cut, horizontal on top and angled below. West Coast loggers built it for hillsides where a rolling trunk is the danger, and it leaves shorter stumps if you are selling timber. The sizwheel, called sizwell or sizzle depending on where you ask, removes hinge wood from the heavy side so the remaining fibers pull the tree around against its lean. It can rip the whole stump from the ground, which is why it stays off residential sites no matter how badly the trunk is leaning the wrong way.

【Forestry Helmet System with Accessories】:GREEN DEVIL 3 in 1 safety helmet comes with ABS helmet, adjustable/removable earmuffs, and mesh visor, providing dynamic protection for any job.Equipped with a pair of 25 dB NRR earmuffs that help block out tool and engine sound noise for hearing protection.Easy flip-up metal mesh provides good visibility and debris protection.The accessories is easy to assemble,come with detailed installation instructions.

All-in-one Chainsaw Protective Gear:This helmet is constructed with heavy duty, impact resistant ABS materials that provide long service life and protection.Combinaton with face shield ,bulit-in visor and noise reduction ear muffs that provide protection you need when you are working in chain sawing,hedge trimmers,shrub trimmers,bush-cutters that require face,ear, eye and head protection,making it an ideal choice for forestry and industrial workers who require safety gear for various hazards.
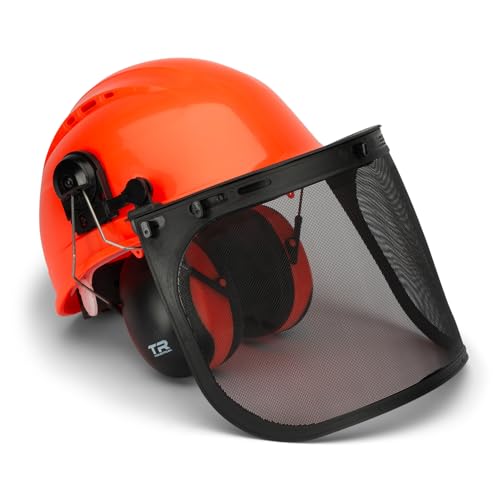
The forestry safety helmet and hearing protection system includes a durable hard hat, adjustable and removable earmuffs, a plastic visor, and a mesh visor, providing dynamic protection you need for forestry work
What the Sources All Say About Safety
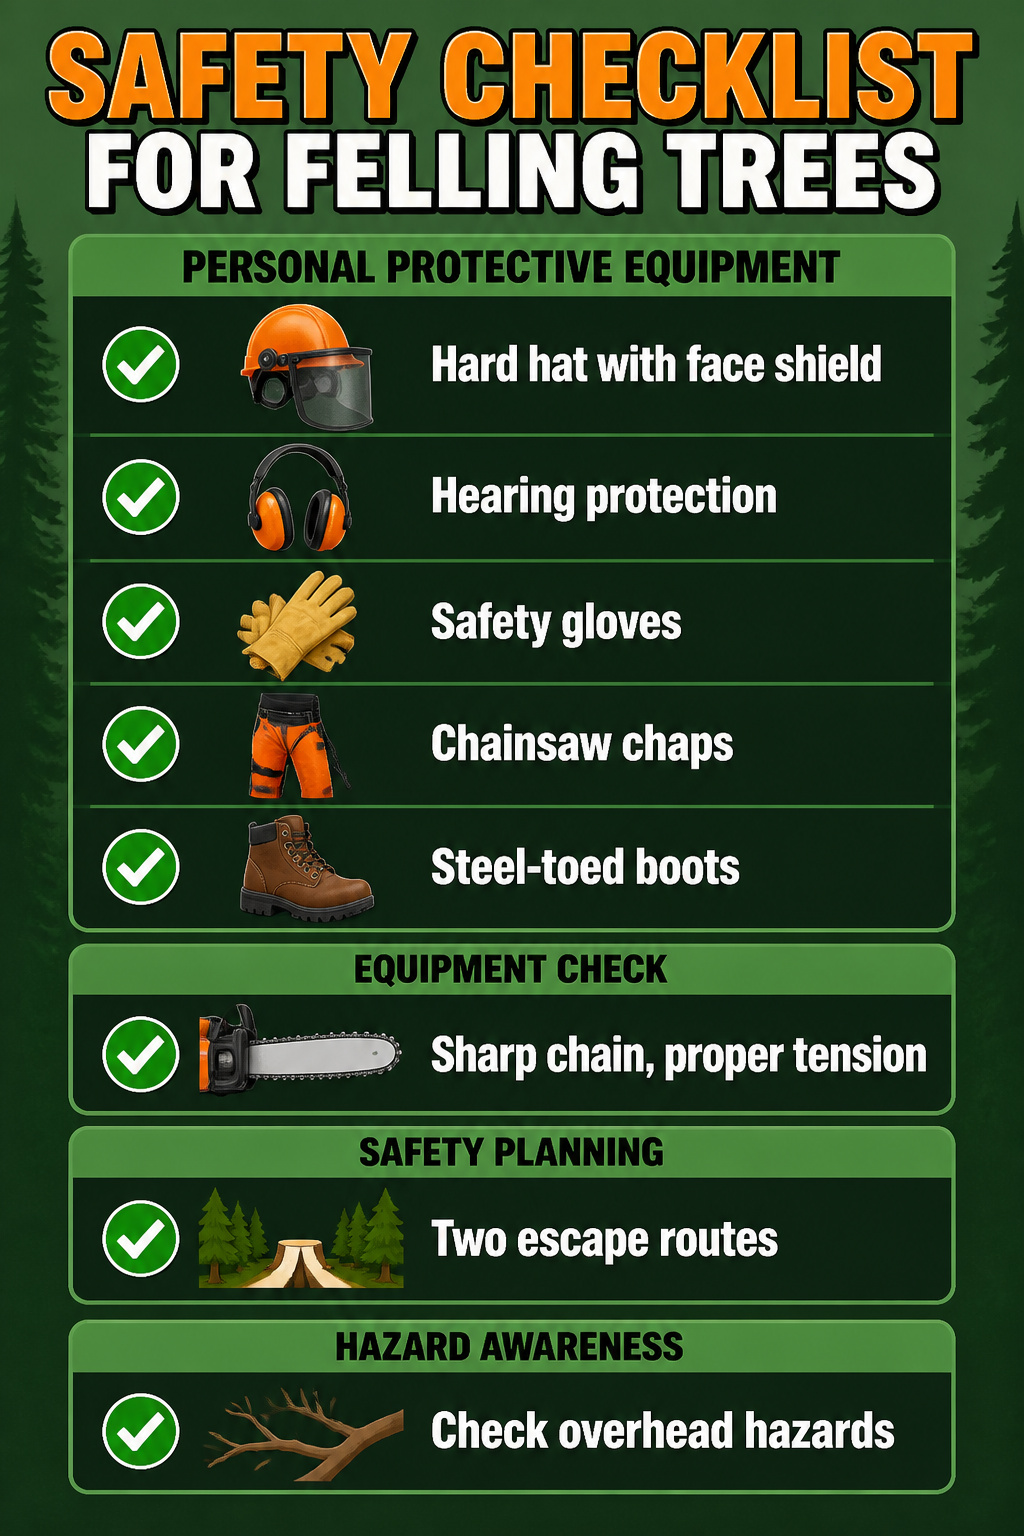
A hard hat with face shield, hearing protection, gloves, chainsaw chaps, and steel-toed boots are the baseline every guide repeats without hedging. The face shield matters more than most people think; flying chips at chain speed will find your eyes before you know to blink. I used to assume my regular safety glasses were enough until I read the detail about double protection, safety glasses plus the shield, being standard on commercial jobs where someone else signs the checks.
Sharp chain, proper tension, fuel and oil full. A dull chain binds, kicks, or wanders off the line you planned, and the cut you get is never the cut you wanted. The bar needs to be slightly longer than the tree diameter, or you are already in compromise territory.
Two escape routes, cleared and memorized, heading opposite from the felling direction. Wedges on hand every single time, even when the lean looks obvious. Walking away because the right equipment is not there is not a failure; it is the rule professionals follow. Keep bystanders and pets back at a distance that feels excessive, then add a little more. Overhead hazards, power lines, dead branches called widowmakers, all get checked before the saw starts.

UNCO tree felling wedges set includes 6 premium wedges, specifically designed to enhance safety and efficiency during tree felling for both professionals and DIY enthusiasts.

We are located locally and will deliver the product to you as quickly as possible.

EFFECTIVE TREE WEDGES: Safety is everything in the tree cutting business, so protect yourself and your employees with a high-quality set of tree felling wedges designed with raised spikes to carefully lift and direct the tree to the safest direction of your choosing.
Read the Lean and the Wind

The lean of a tree tells you where it wants to go, but wind decides where it actually lands. Stand back and look through a circle made with your thumbs and index fingers to sight the trunk against the sky. If the top sits more than 3 feet off center from the base, the tree will not follow your notch where you want it.
Wind that pushes with the lean can speed things up more than you planned. Wind against the lean is worse. Gusty conditions can override whatever direction you chose, and the sources are unanimous on this point: never fell a tree into or against the wind. That is the day to walk away, even if you cleared your Saturday for it.
I read enough accounts of experienced sawyers using ropes, wedges, and mechanical advantage to force a direction that I trust the math. A lean under 3 feet, you can compensate with the notch. Beyond that, you need gear most weekend cutters do not own, or you need a new tree. Side lean is the one that gets people, because the face looks straight until you check it from 90 degrees. Measure twice, cut once, and if the wind picks up, measure a third time from inside the truck.

Accurate Measurement: Designed for precise measurement of tree height, diameter, height difference, and volume, making it essential for forestry and agricultural applications.
When the Tree Leans Wrong
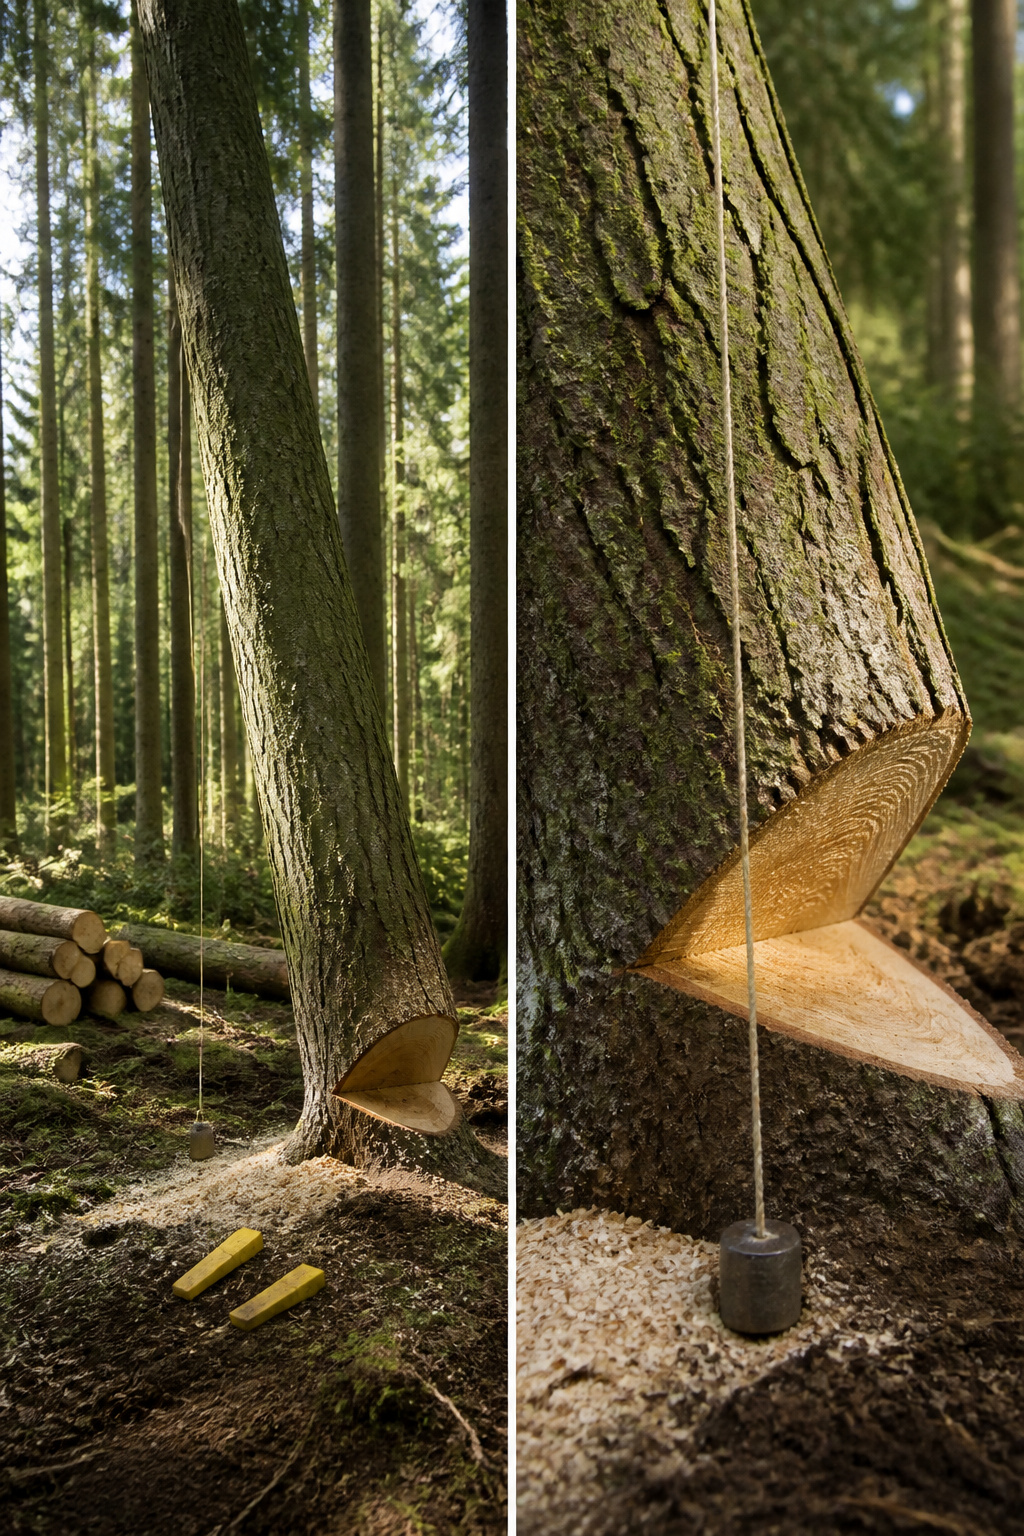
A tree leaning away from where you want it to fall has back lean, and the math matters more than muscle. Sight up the trunk with a weighted string from 90 degrees off your intended direction; the distance from where the plumb hits the ground to your notch apex is what the wedges must overcome. On a 60-foot tree with 18 inches of stump diameter, that gives you 40 segments to work with, and each segment’s weight multiplies the problem fast.
Wedges help when the lean is modest. Drive them into the back cut as you saw, lifting the trunk until its center of gravity crosses the hinge and gravity finishes the job. Two inches of lift is the practical limit for most weekend work; beyond that, the forces outrun what you can safely control with hand tools.
Side lean is different. The bore cut buys control here because it lets you establish the hinge first, cutting horizontally into the center before releasing the back. That holding wood at the rear keeps the tree from drifting sideways while you finish.
The line is simple: if you are calculating segments and measuring plumb lines on a trunk you cannot reach around, you are already past the weekend project. Heavy forward leaners, side-scarred bark that weakens the hinge, or any lean that needs more than those two inches of wedge lift means calling an arborist. The cost of professional help is fixed; the cost of guessing is not.
Frequently Asked Questions
What is the safest way to fell a tree?
Work through six steps in order: assess the tree for height, lean, and obstacles; gather your chainsaw, PPE, wedges, and ropes; plan and clear two escape routes at 45 degrees from the fall line; make a directional notch about one-third of the trunk’s diameter on the facing side; execute a back cut slightly above the notch floor while leaving solid hinge wood; and move immediately when you hear the crack, before the tree visibly leans. The 90-15-5 rule says ninety percent of felling injuries happen within fifteen seconds of movement and five feet of the trunk, so speed and distance matter more than watching the fall.
How do I determine the lean of a tree?
Stand back and frame the trunk between your thumbs and index fingers against the sky to see where the top sits relative to the base. If the top is more than 3 feet off center from the base, the tree will fight your notch direction. For a quick height-and-lean estimate, use the stick trick: hold a straight 32-inch stick vertical at arm’s length with your arm level, move along the intended fall line until the stick tip lines up with the tree tip, and your position marks roughly where the top lands. Forward lean makes that estimate run high; backward lean carries farther than your mark.
What equipment do I need to fell a tree?
A chainsaw with a bar slightly longer than the tree’s diameter and a sharp, properly tensioned chain sits at the center. The personal protective equipment baseline is a hard hat with face shield, hearing protection, leather gloves, chainsaw chaps, and steel-toed boots. Bring wedges for every job, plus a throw line or rope with mechanical advantage when the tree has back or side lean. Check fuel, oil, and chain tension before starting; if any piece of gear is missing or questionable, wait for another day.
How deep should the notch cut be?
Cut the directional notch to about one-third of the trunk’s diameter. Any deeper weakens the hinge that controls the fall; any shallower and you lose steering authority. The notch goes on the side facing your intended fall direction, with the horizontal bottom cut made first and the angled top cut meeting it cleanly. A gap or offset between those two cuts translates directly into a crooked fall.