The ideas below run from a few hours with lumber scraps to full built-ins that take a weekend and a trip to the lumberyard.
Whether your stairs face the living room or sit behind a closed door decides how finished the thing needs to look; open stairs call for something that reads as part of the house, not a weekend project left out in public.
I would raise every bottom panel on a 2-inch toe-kick or a strip of treated lumber either way, because plywood and MDF both fail faster when they sit straight on the floor.
[link-whisper-related-posts]1. Sliding Drawers
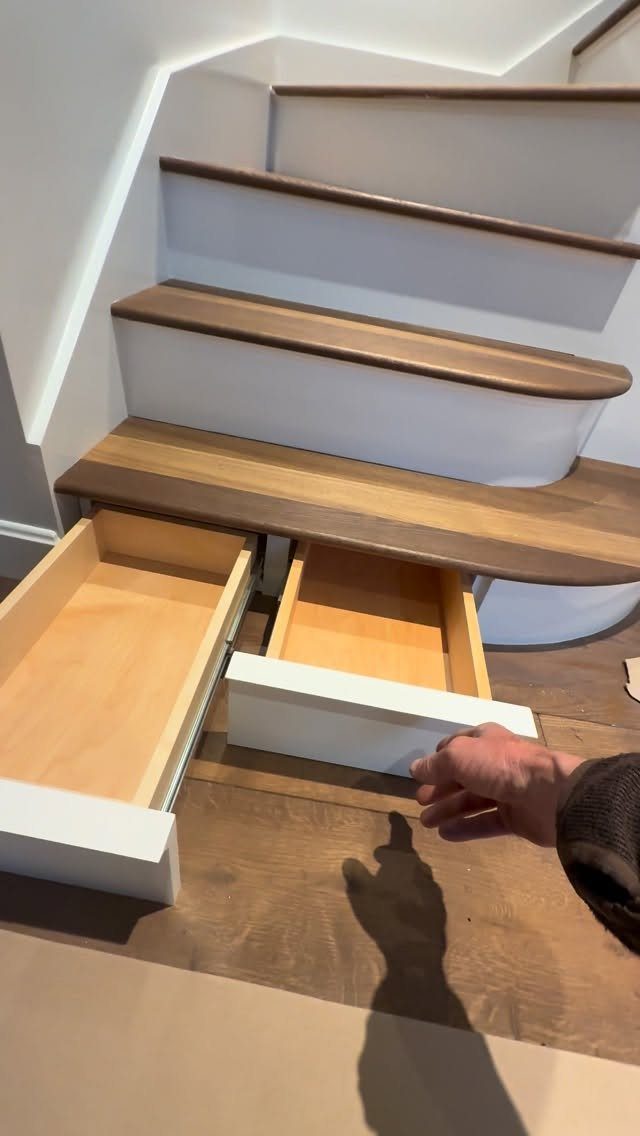
Sliding drawers turn each riser into a stealth storage bin you pull out by the tread above it. I like the version where the drawer face matches the stair skirt, so closed it reads as ordinary millwork.
The hardware matters more than it looks: full-extension glides cost a little more than 3/4 extensions, and that last bit of reach changes how usable the deepest corner feels.
Best for items you grab often, shoes off the floor or leashes by the door. The trade is that every drawer needs clearance in front; a tight entry with a door swing can block half the stack.
2. Bespoke Cabinets
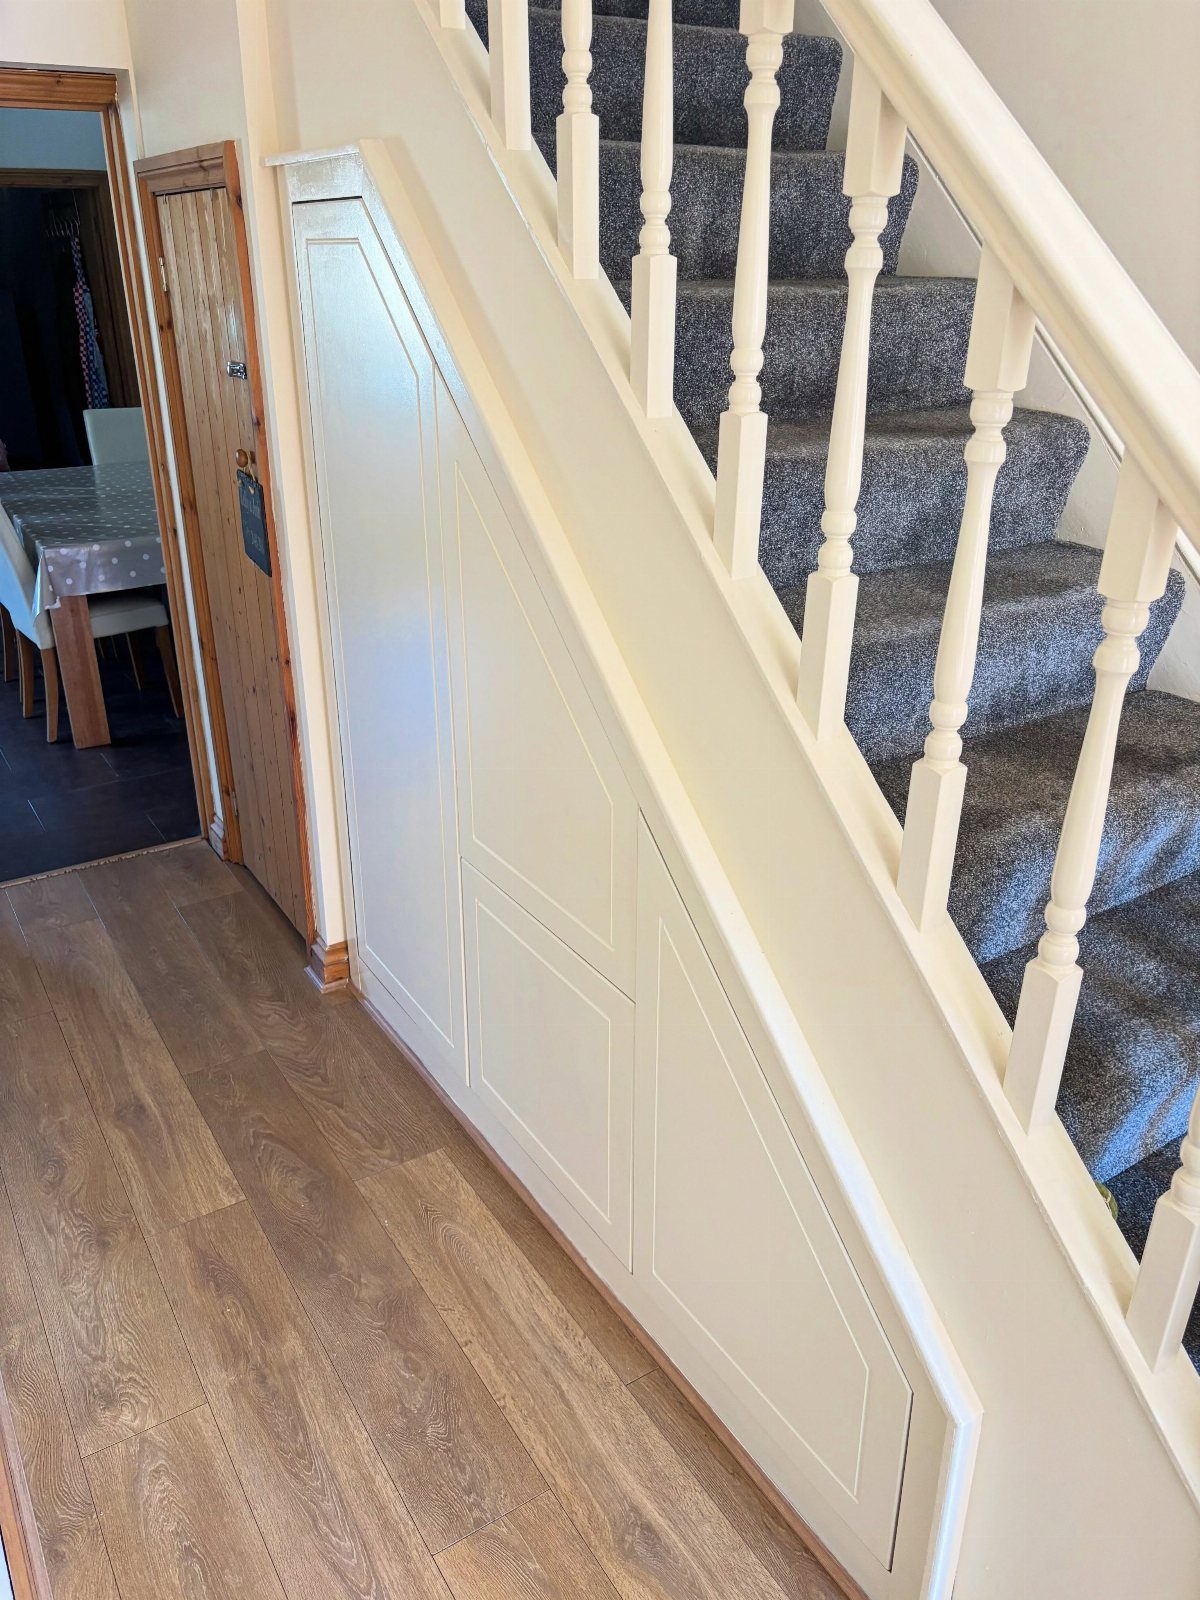
I would go for push-latch hardware and skip pulls entirely; the uninterrupted rail lines keep the face reading as architecture, not cabinetry.
The inside is where you save: melamine shelves instead of plywood, adjustable pins every 32 mm. Paint the interior the same color as the face and even open doors look considered.
Expect to lose a weekend to fitting the angles, or hire the job out and budget by the foot instead of by the day. Best when the stair is already in a public room you want to look finished.
3. Minimalist Storage Unit
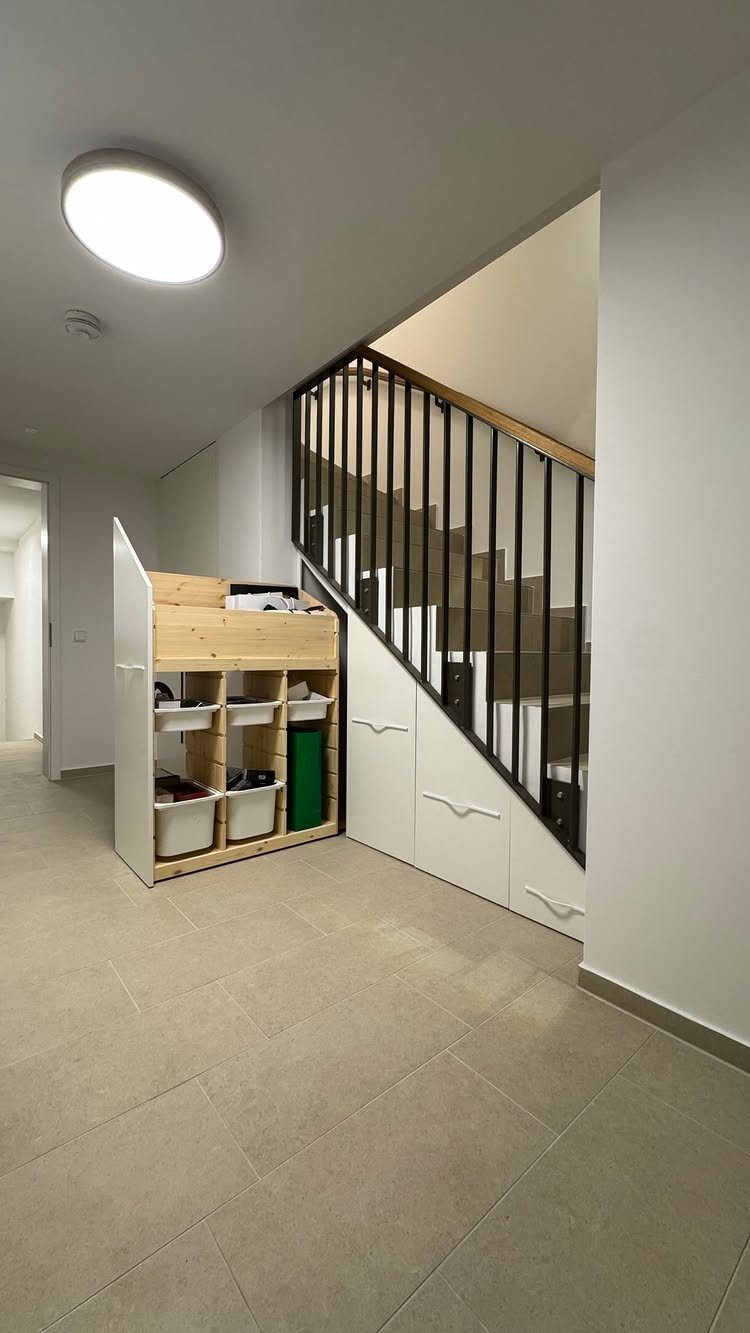
A white bank of pull-out bins reads as wall until you need it, then opens to sorted categories: gloves, bills, mail to file.
I prefer the cubby version shown to cabinet doors here; the open row at counter height is grab-and-go, and the tall pull-outs below swallow larger parcels.
Cost stays low if you stick to 3/4-inch MDF for the boxes and a single veneered face sheet for show.
Black or aluminum rail stairs against all that white is the combination that makes it look intentional rather than apologetic. The clean front means nothing can sit out; this one rewards the already tidy.
4. Built-In Bookshelves
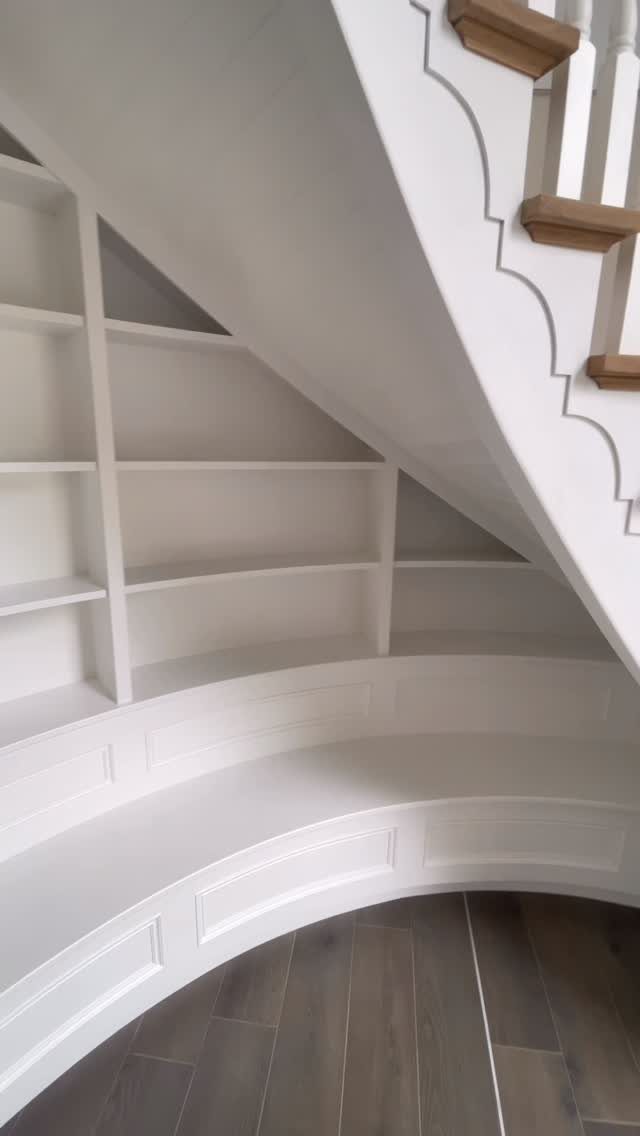
A curved bench and tiered shelves follow the stair slope exactly, turning the triangle into a reading nook.
I would angle the lowest shelf to meet the floor and give the base a toe-kick; otherwise dust collects where the horizontal meets the diagonal.
Depth is the limit: shallow enough shelves and you can still reach the back, and the visual weight stays light. White paint keeps an under-stair mass from reading as a bunker.
Best for homes where the stairs open to the living room and you want the storage to perform as seating. Not the choice for deep storage, but the one I would build for daily life in sight.
5. Under Stair Shoe Shelving
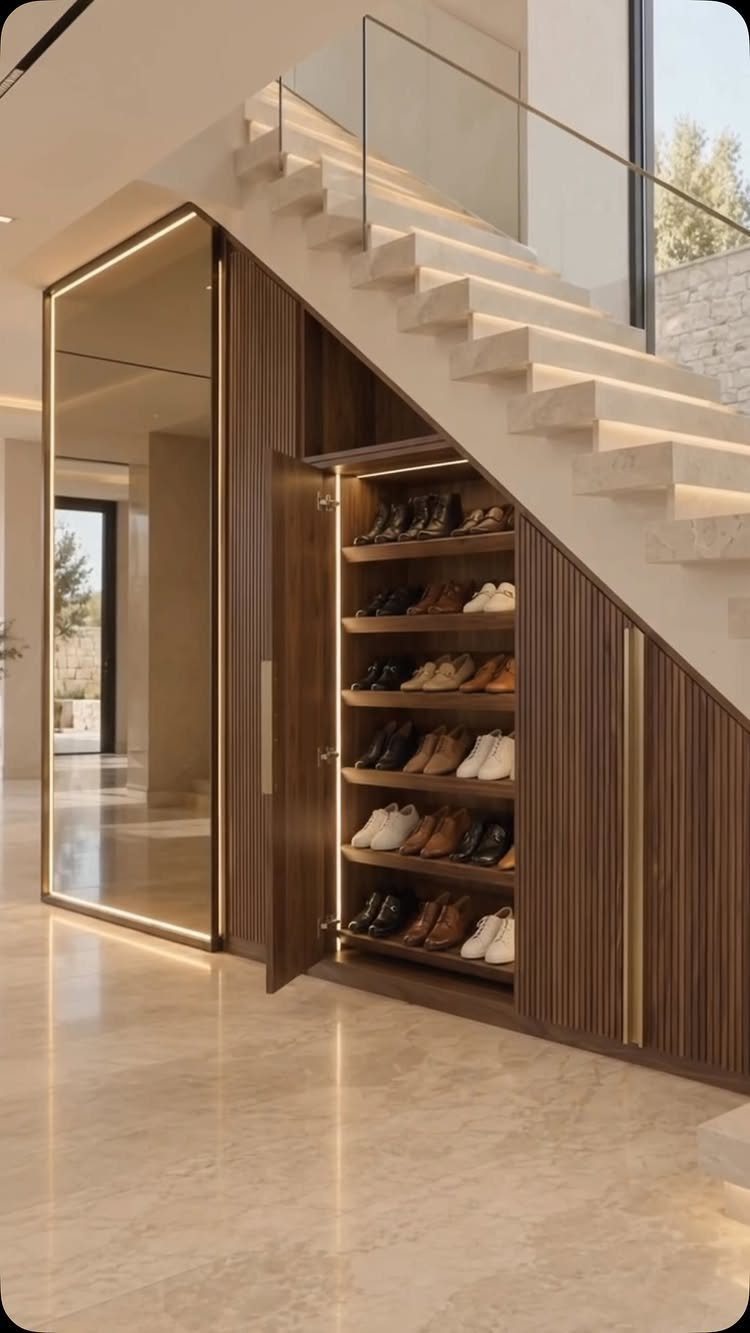
Illuminated shoe shelves beside a mirror turn a foyer into something like a boutique dressing room. The light inside matters more than the mirror finish; warm LED strip shows color true without the heat that warps leather.
I would keep the shelf depth one shoe deep, not double-row: the second row hides behind the first and you forget what you own.
The mirror tall beside it doubles the sense of volume in a tight entry. This is the version for someone who rotates shoes seasonally and wants the current pair visible, not buried.
6. Under Stair Desk
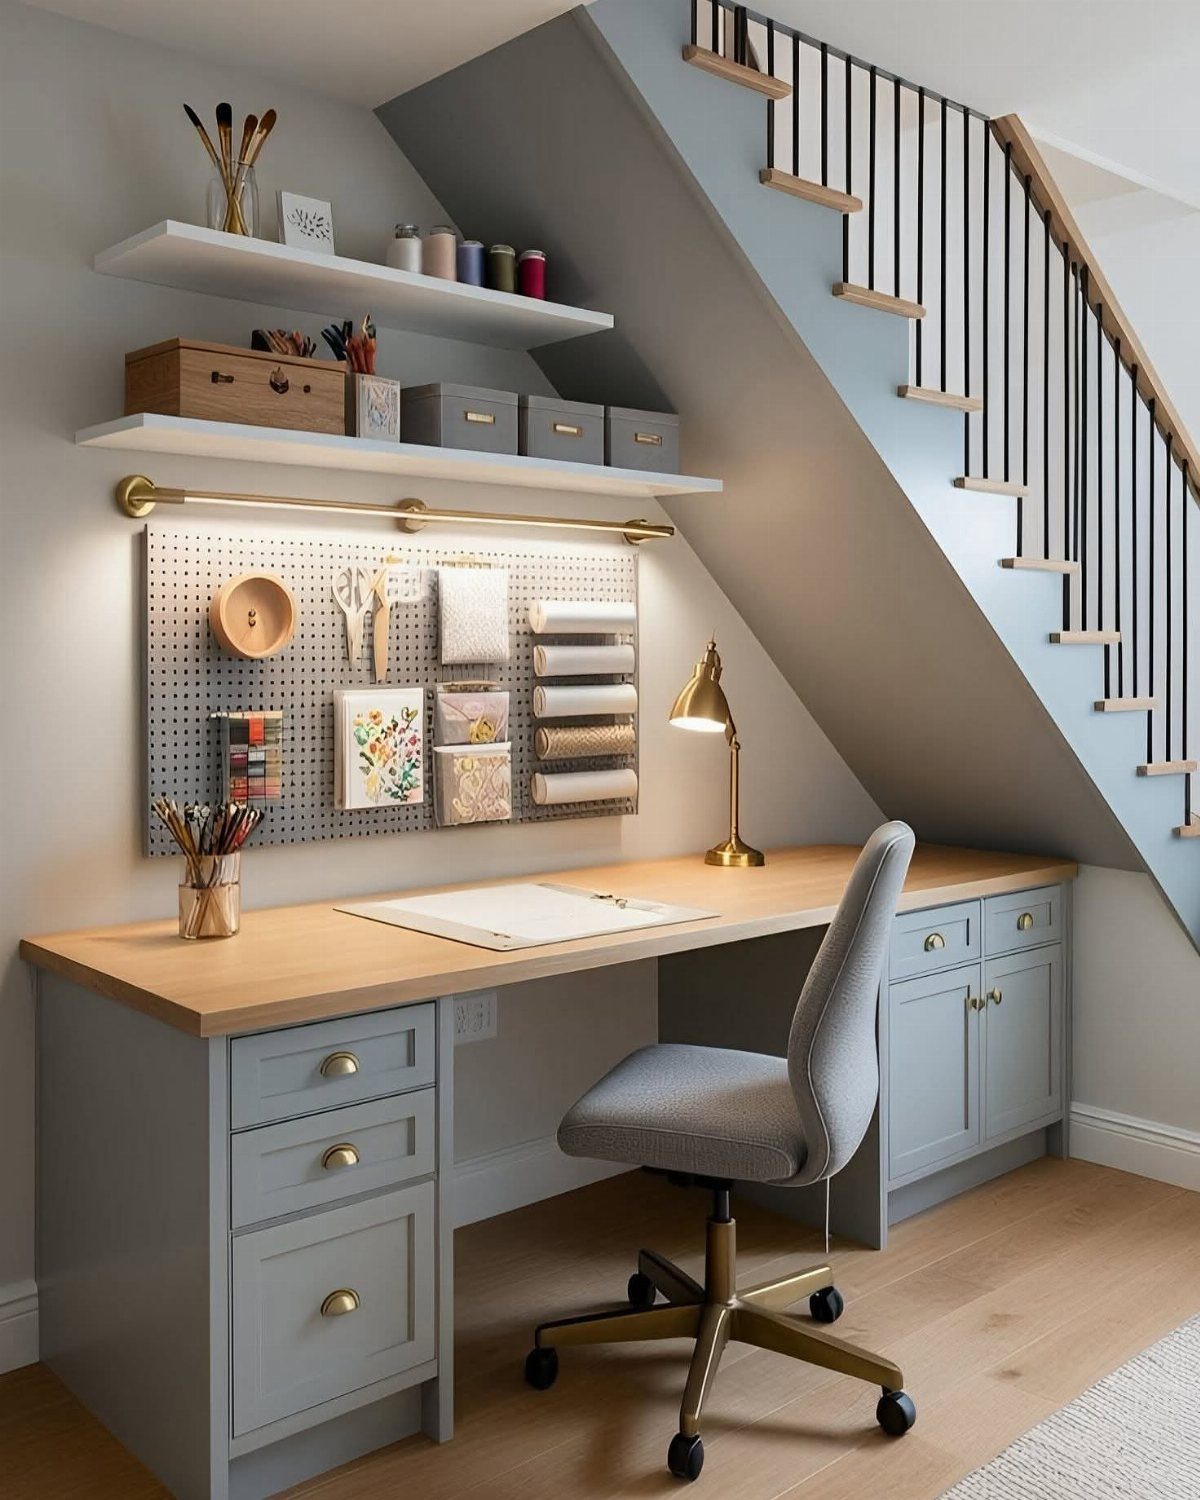
A desk tucked under the open stringer uses every vertical inch the stairs leave behind. The drawer stack on one side, pegboard on the other, gives the two zones any desk needs: tools in reach, files buried.
I would set the work surface at standard desk height, and run a ledge above the desktop for the monitor eye line, using the stair slope as your upper cabinet.
The open banister is the thing that makes this feel like a room, not a closet; if your stair is enclosed, add a light fixture overhead first or the space turns cave.
Weekend builds can use wall-mounted drawer units slotted into a frame; the custom version with fitted cabinets runs a lot more in a city shop.
Choosing Materials
Plywood or MDF both work for the carcass; I reach for plywood when the unit takes weight, MDF when the face needs a paint job that reads smooth.
Both materials last longer if they aren’t sitting right on the floor, so I raise the bottom panel on a 2-inch toe-kick or a strip of treated lumber.
Metal slides earn their place in any drawer under stairs.
The angle and depth of these spaces put lateral force on standard side-mount hardware that wood-on-wood tolerates elsewhere. A full-extension metal slide, even at the budget end of the range, keeps the box square through years of uneven loading.
I buy the slide before I build the box; the clearances it demands determine the wall thickness and the gap at each side, not the other way around.
Paint grade calls for filling every fastener hole before the primer coat. The slanted light across a stairwell reads shadow even where a standing lamp would forgive it.
Planning and Measurement
Measure the finished space, not the rough framing. Drywall and baseboard steal an inch or more from every dimension you read on a stud-to-stud tape, and a drawer built to the raw number binds or misses its recess.
I take 3 heights: at the front of the tread, at the back of the tread, and at the deepest point of the triangle against the wall.
The smallest of the 3 is your vertical limit. For width, the critical number is the narrowest point between the stair stringer and any opposing wall; the widest point flatters you with space you cannot use.
Depth under a stair follows a slope, so every horizontal shelf or drawer lands at a different height.
I set one datum, usually the desktop or the highest shelf I intend to use standing, and mark where that plane intersects the slope. Everything below hangs from that line; everything above is determined by headroom.
A plumb bob drops the stair nosing line to the floor so you know where the loading zone ends and the standing zone begins.
DIY Tips
A simple box on wheels, sized to the smallest stair you have, teaches you the angles before you commit the whole wall. Casters let you roll it out and rethink; a fixed build does not.
I frame with pocket screws because the joints stay hidden; the face sheet covers the holes you need, and the back against the wall needs none.
A brad nailer tempts speed but leaves the joint to the glue alone. For a bin that slides or carries weight, the mechanical fastener matters.
One rip of 3/4-inch material to width, crosscut to length, and you have the four sides of every box in the stack. A single sheet yields more boxes than most stair triangles demand.
The table saw or a circular saw with a straightedge guide is the tool that determines whether the job takes a morning or a weekend; hand-cut edges and out-of-square boxes show the moment the drawer face is mounted.
The frame carries the angle; the boxes stay rectangular.
Frequently Asked Questions
Can you buy ready made under stair storage?
Yes, though I focus here on built-in approaches you construct or commission yourself. Ready-made drawer boxes on metal slides, like the birch plywood systems from specialist shops, install into the stair structure after the fact.
The hardware is the part worth buying ready-built: a full-extension slide rated for the load matters more than whether the box came from your garage or a factory.
How to turn under stairs into storage?
You frame rectangular boxes to fit the triangular void, using the stair slope as your top boundary and a plumb line from the nosing to mark where standing space ends.
Casters let you test a single box before committing the whole wall; pocket screws keep joints hidden under the face sheet.
Start with the frame, then fit the boxes; the frame follows the stair angle while the containers stay square and slide in clean.
How much does under stairs storage cost?
DIY builds run from a few hundred to a thousand dollars, with single sheets of 3/4-inch MDF or plywood yielding most of the boxes in a typical stack.
Hiring out shifts the budget model to cost by the foot rather than by the day, and custom fitted cabinets in a city shop run substantially more than a weekend frame-and-box approach.
What is the storage underneath the stairs called?
It goes by under stairs storage, under stair cabinets, or the name of the specific system built into it: sliding drawers, built-in bookshelves, or the minimalist pull-out bin unit.
I treat these as types of millwork rather than a single category; a drawer that matches the stair skirt reads as architecture, while a desk under an open stringer functions as a room.