A British kitchen island usually looks like furniture someone moved into the room, not a cabinet glued to the floor, and the builders here carry that through to each leg, each joint, and each edge where stone stops and air begins.
Casters, split levels, and herringbone tile behind a navy raised face prove these 11 ideas come from kitchens 3,000 miles away, measured in 900 millimeter clearances and slabs matched across 1.5 meter depths.
[link-whisper-related-posts]1. Island with Integrated Banquette Seating
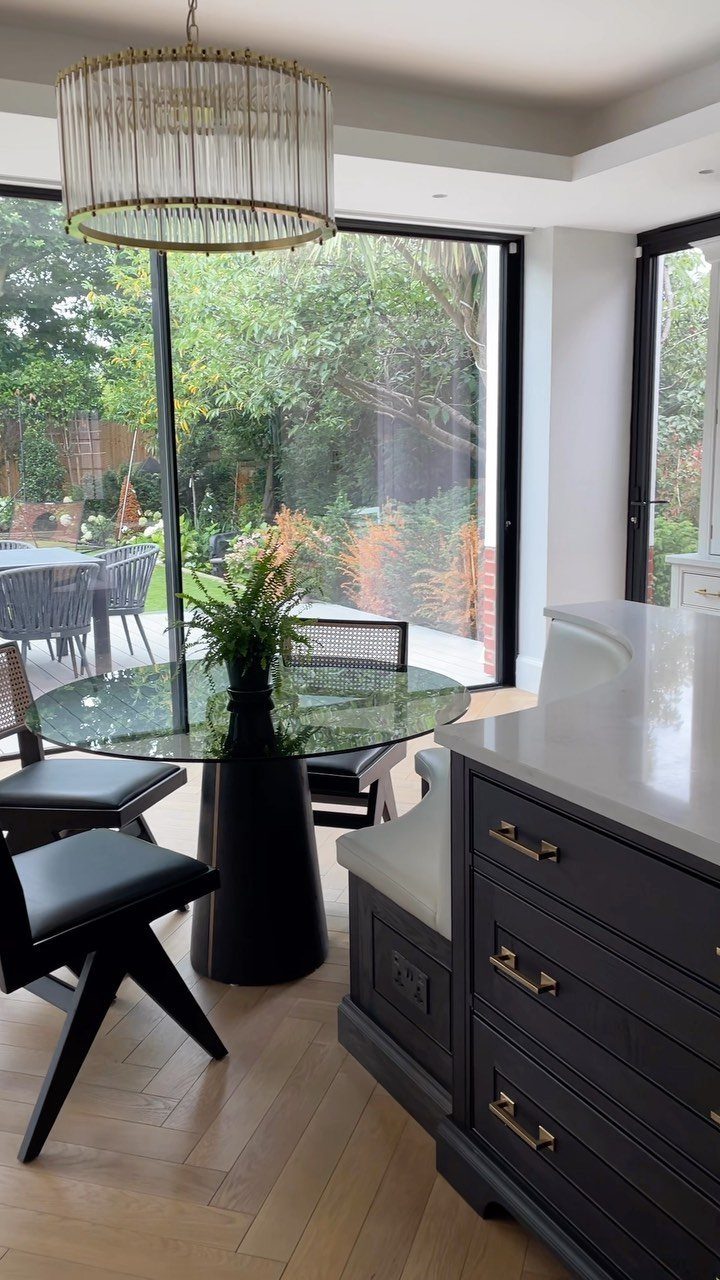
Banquette seating built into the island itself turns one piece of furniture into two. The curve lets the island face the dining area directly, so the cook stays in conversation instead of turning their back.
I like this most in kitchens that already open to another room; the island becomes the bridge.
The trade-off is countertop space given up to upholstery, so plan for at least 30 inches of working surface on the side facing the range.
2. No Seating Islands
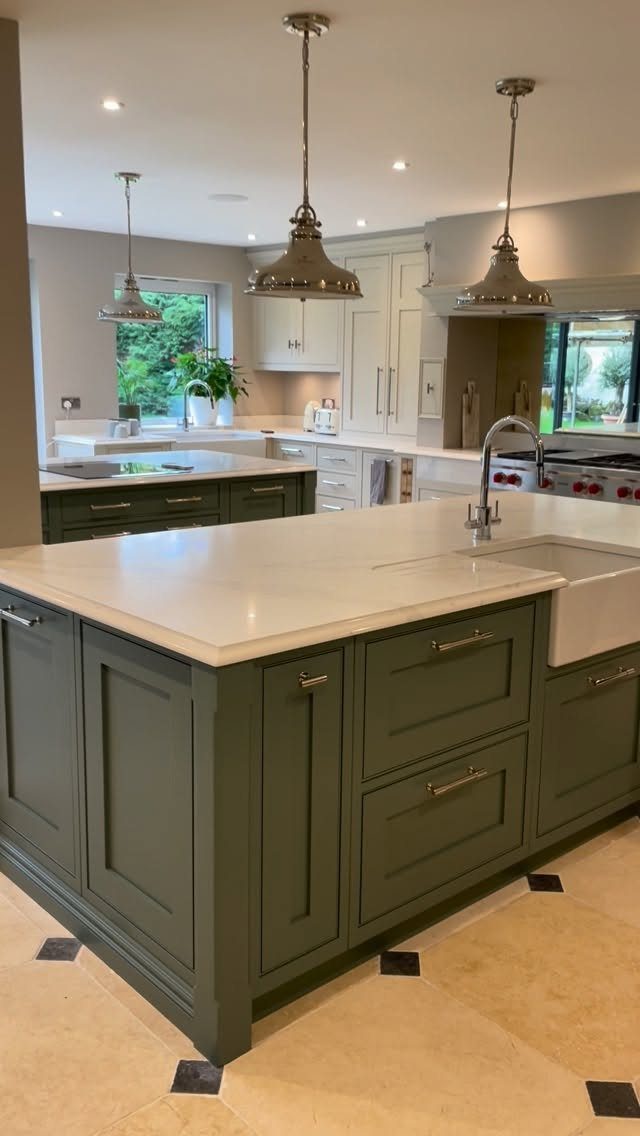
An island with nowhere to sit keeps the floor clear and the workflow direct. I use mine for folding laundry and staging groceries, never for lingering over coffee.
The olive green island runs long enough to handle prep near the cooktop and serving closer to the dining area without needing a second piece.
Two islands need more square footage than most US kitchens offer, but the logic holds even at one: decide what the island must do, then resist adding seats just because catalogs do.
A clean island suits cooks who move through a project rather than pause in the middle.
3. Island with Built-in Appliances
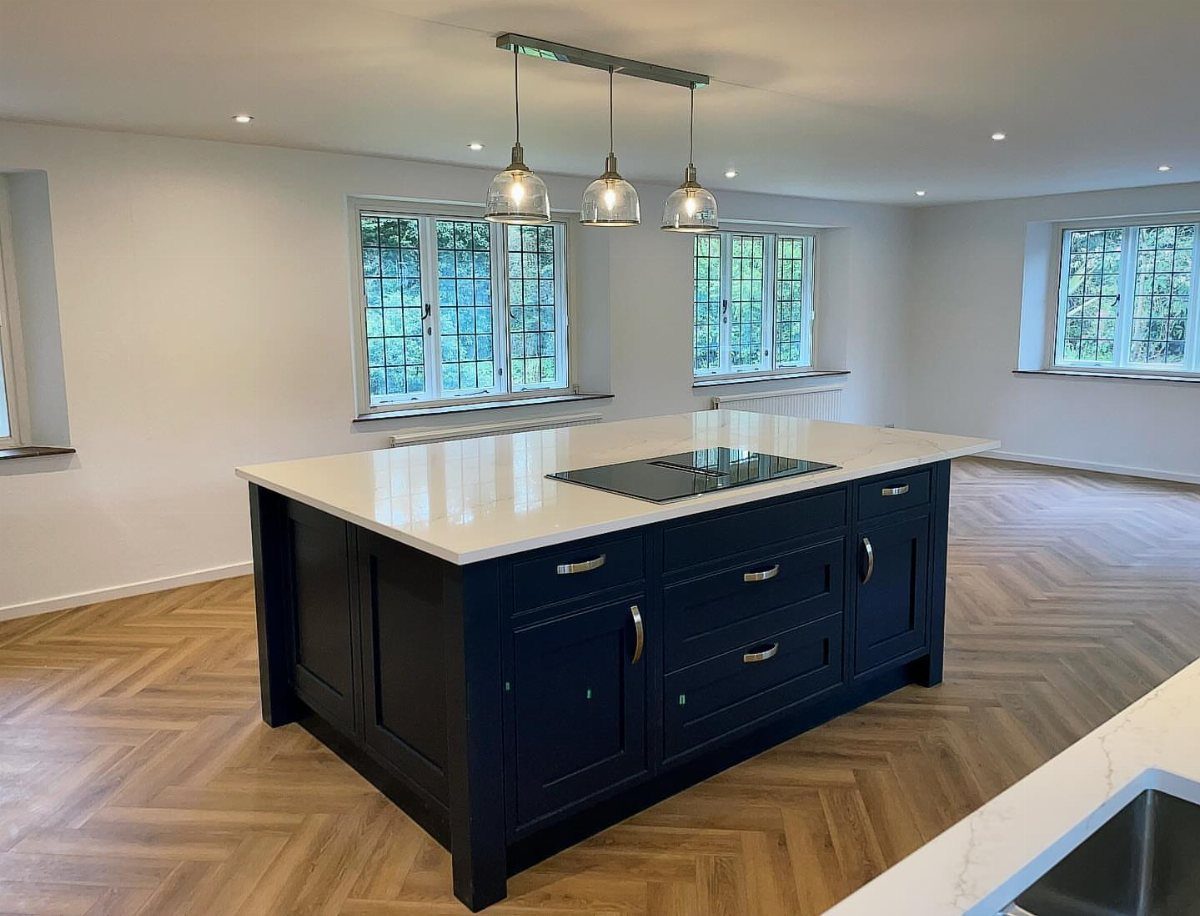
Building the cooktop into the island moves the heat and the steam to the center of the room, which changes your ventilation plan. A downdraft vent or an overhead hood on a ceiling mount works; a wall hood does not.
I would still keep the overhang for seating on the far side, away from the burners.
4. Island with Breakfast Bar Extension
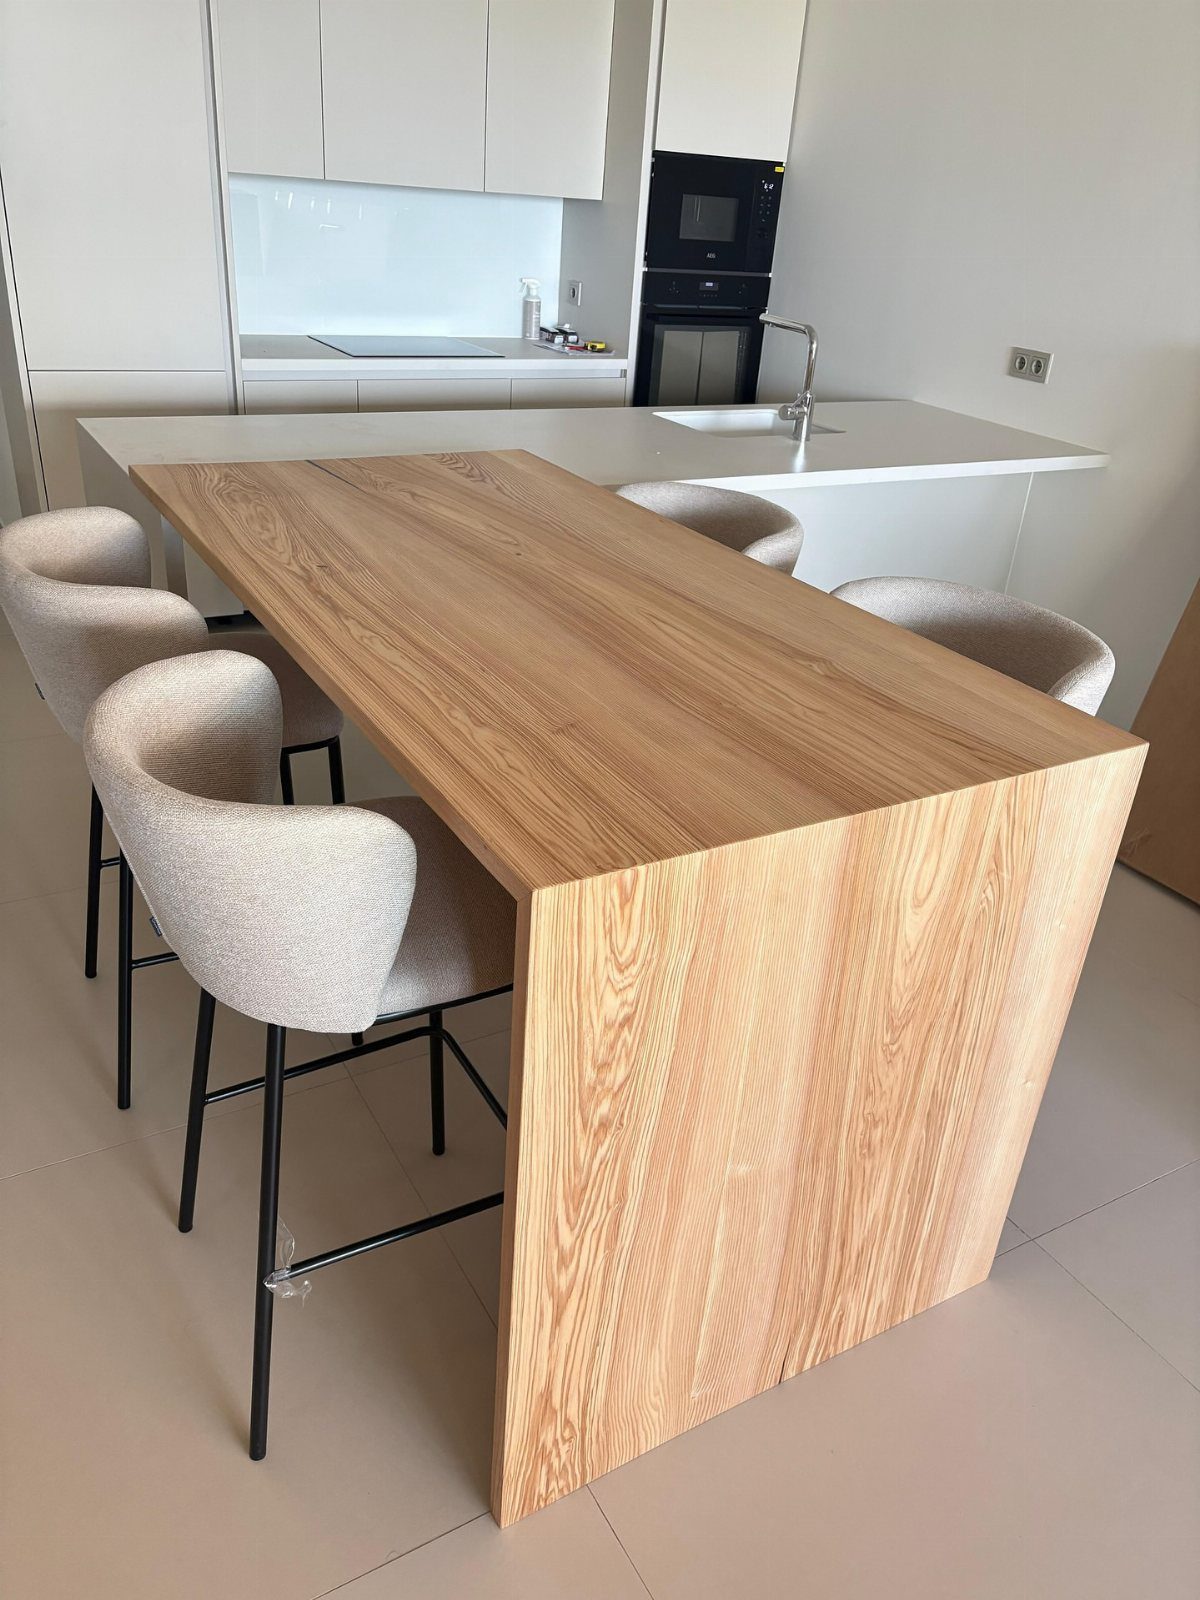
A wood extension bolted to the island gives you a breakfast bar without the bar-stool height. The stools sit at standard dining-chair height, which means older guests and younger children get up and down more easily.
I would build the extension narrower than the island base so knees fit and the walking aisle stays clear. Waterfall edges on the extension draw the eye; I prefer a simple butt joint for a piece that takes daily knocks.
5. Clean-lined Island with Overhang Seating
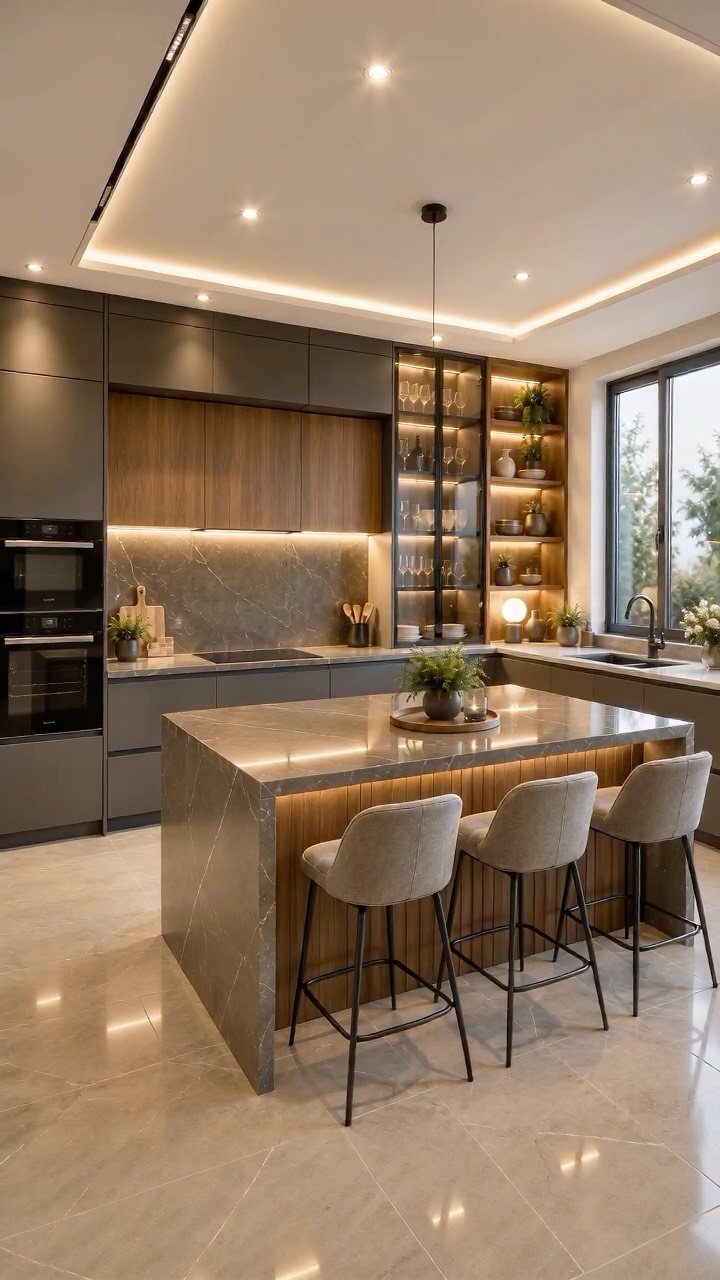
No corbels, no legs, no brackets: the countertop simply extends past the cabinet box, held by its own thickness and the hidden steel inside.
That ribbed wood paneling on the waterfall edge adds warmth without breaking the clean line. I would spec thick stone for this look; laminate or thinner quartz needs support and ruins the gesture.
6. Corbel Island
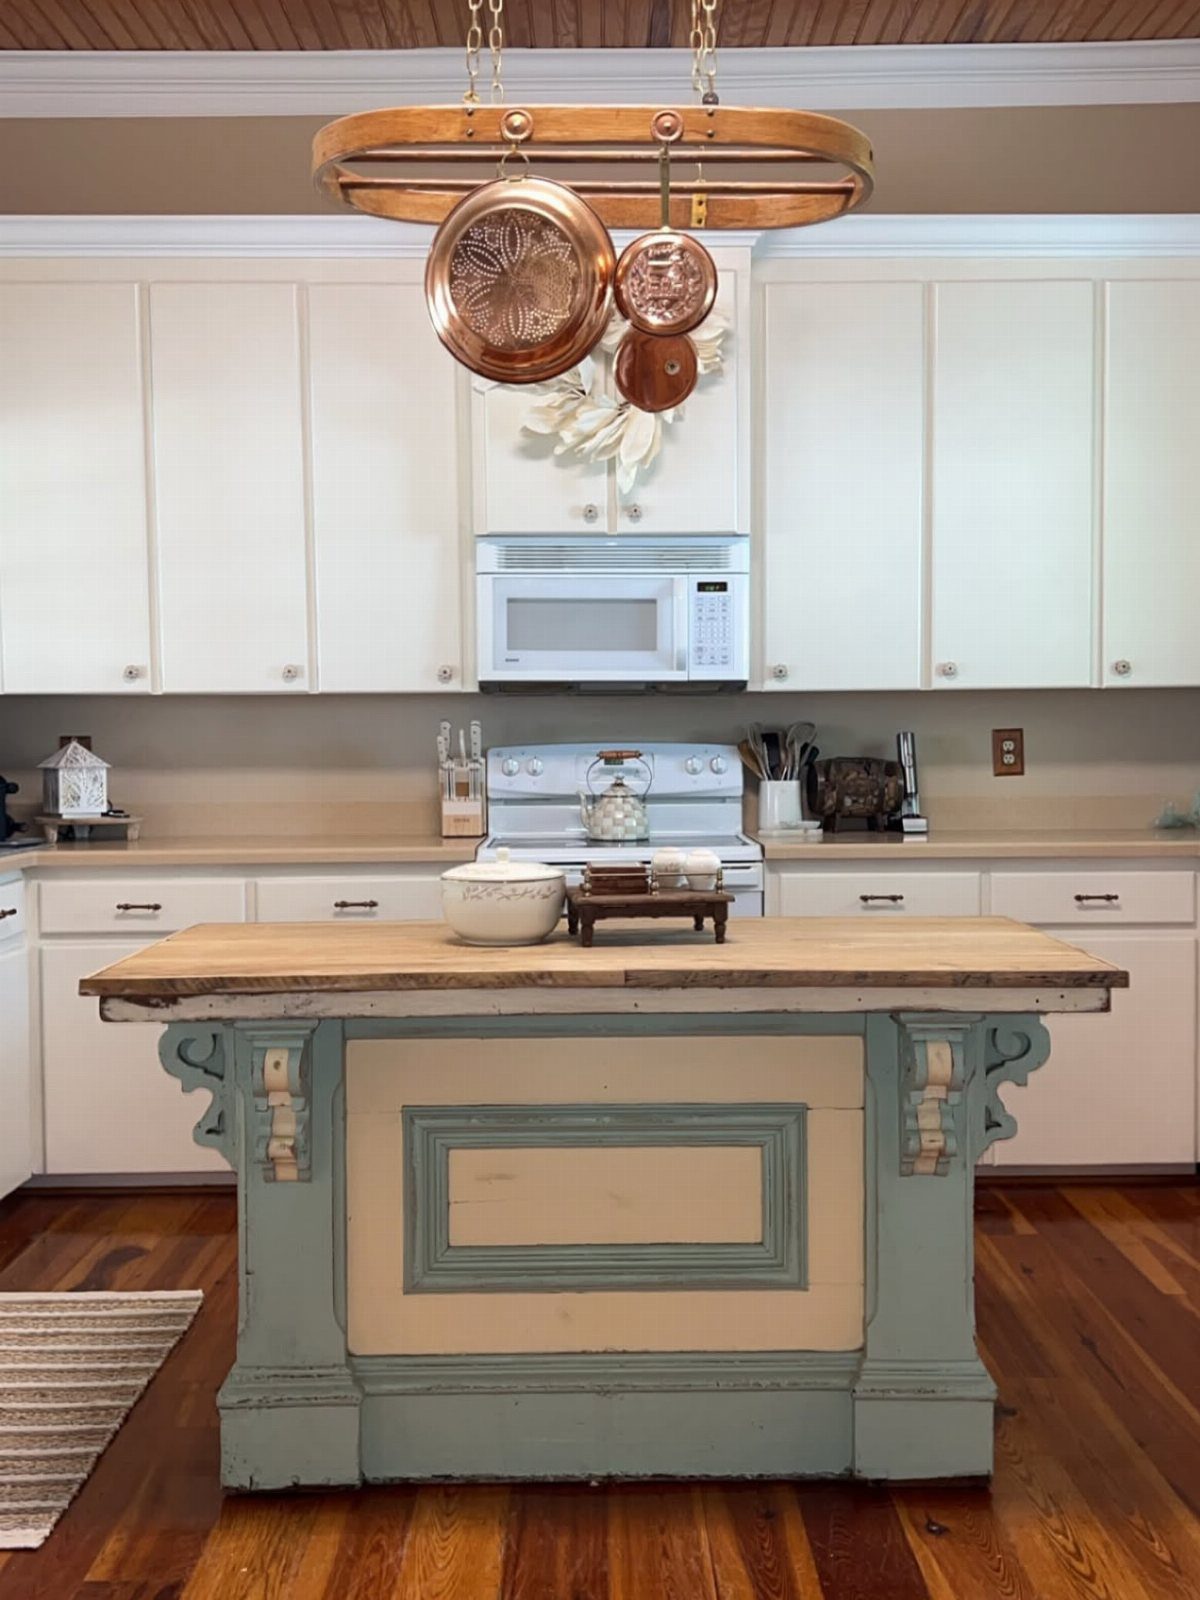
Carved corbels turn structural support into the island’s main event. The maker of this pale blue version chose wood corbels against a painted base, so the craft reads as furniture, not architecture.
I would order corbels sized to the overhang, never the other way around: a deep cantilever needs deep corbels, and I like them housed into the side panel so they do not look applied after the fact.
Copper pots hung above complete the period mood; stainless or black iron would fight it.
7. Closed Leg Island
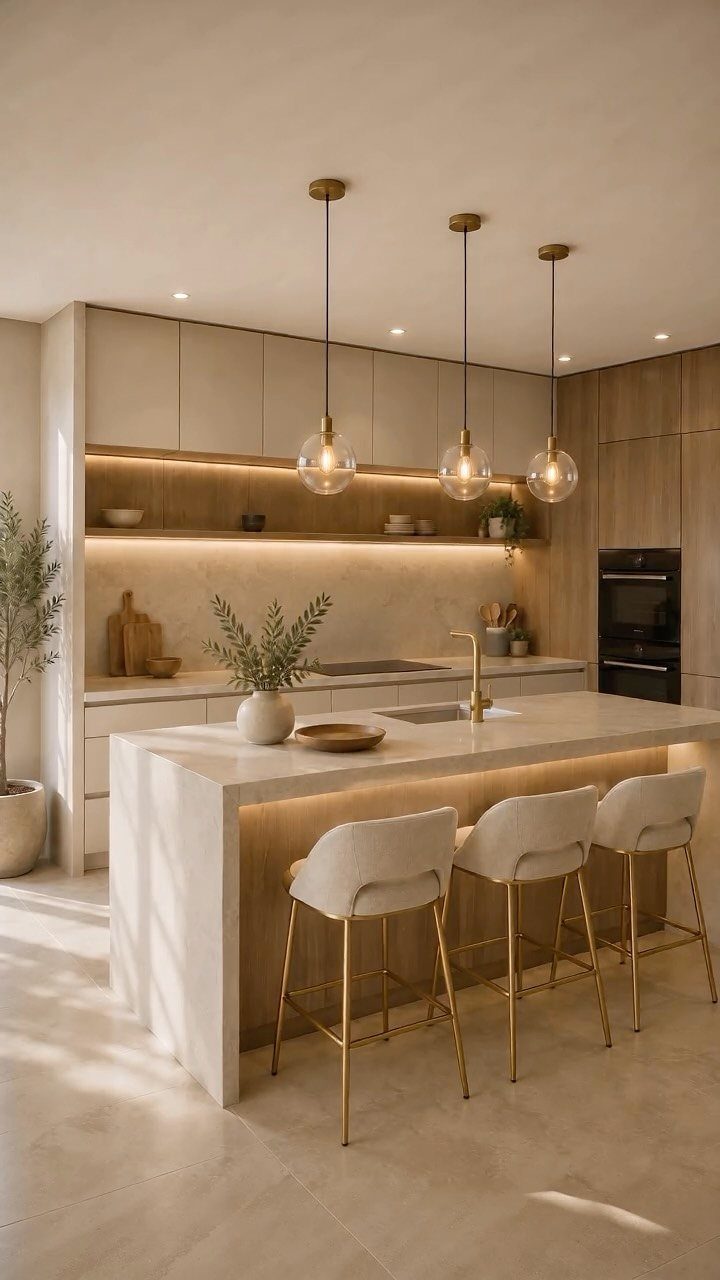
Cabinetry panels run past the counter edge to the floor, so the island reads as a solid piece of furniture rather than a box with a top.
The waterfall stone wrapping the end makes the leg feel of a piece with the counter.
I would keep sight lines open on at least two sides for bar stools to tuck in; a panel on all four sides turns the island into a room divider, useful only where the floor plan already demands one.
8. Two Tier Island
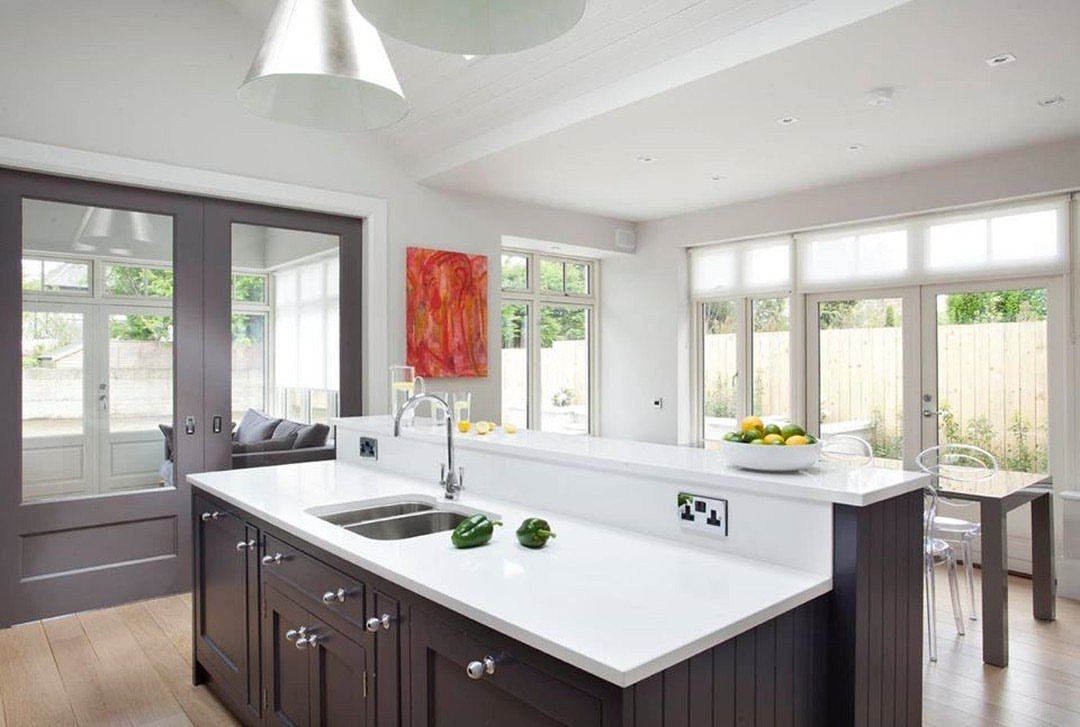
Two surfaces at two heights let the cook work at 36 inches while guests lean on 42.
The step between them hides the sink from the sofa across the room, a small move that matters in open plans.
I would run the lower tier in butcher block for warmth against stone above, since the taller tier already reads as the showpiece.
Dark base cabinets ground the white counters; swapping to pale lowers would float the whole island away from the floor.
9. Open Shelf Islands
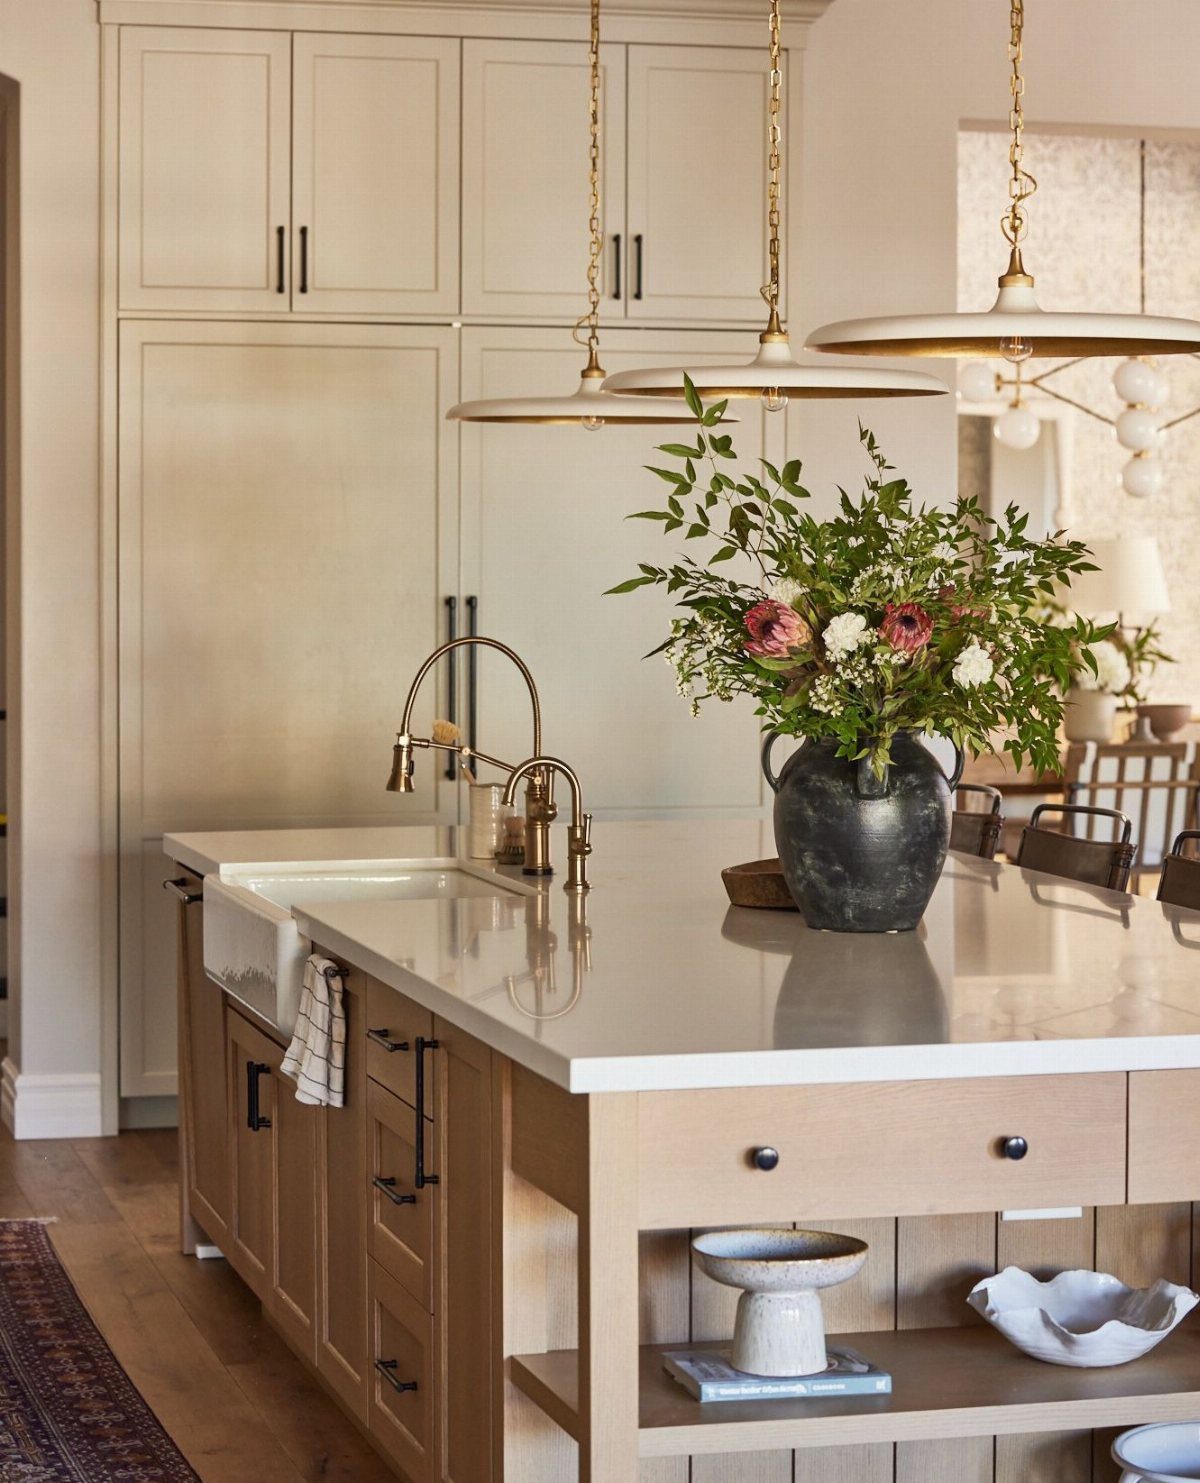
The open shelf replaces cabinet doors with nothing at all, so the island becomes a place to store what you do not mind seeing.
Wood bowls and a single book fill this one with calm; a packed shelf reads as clutter from every angle.
I would leave clearance above the stored items for the counter to function, and I would run the shelf back to the wall rather than stop it mid-island where dust collects on both sides.
10. Islands on Wheels
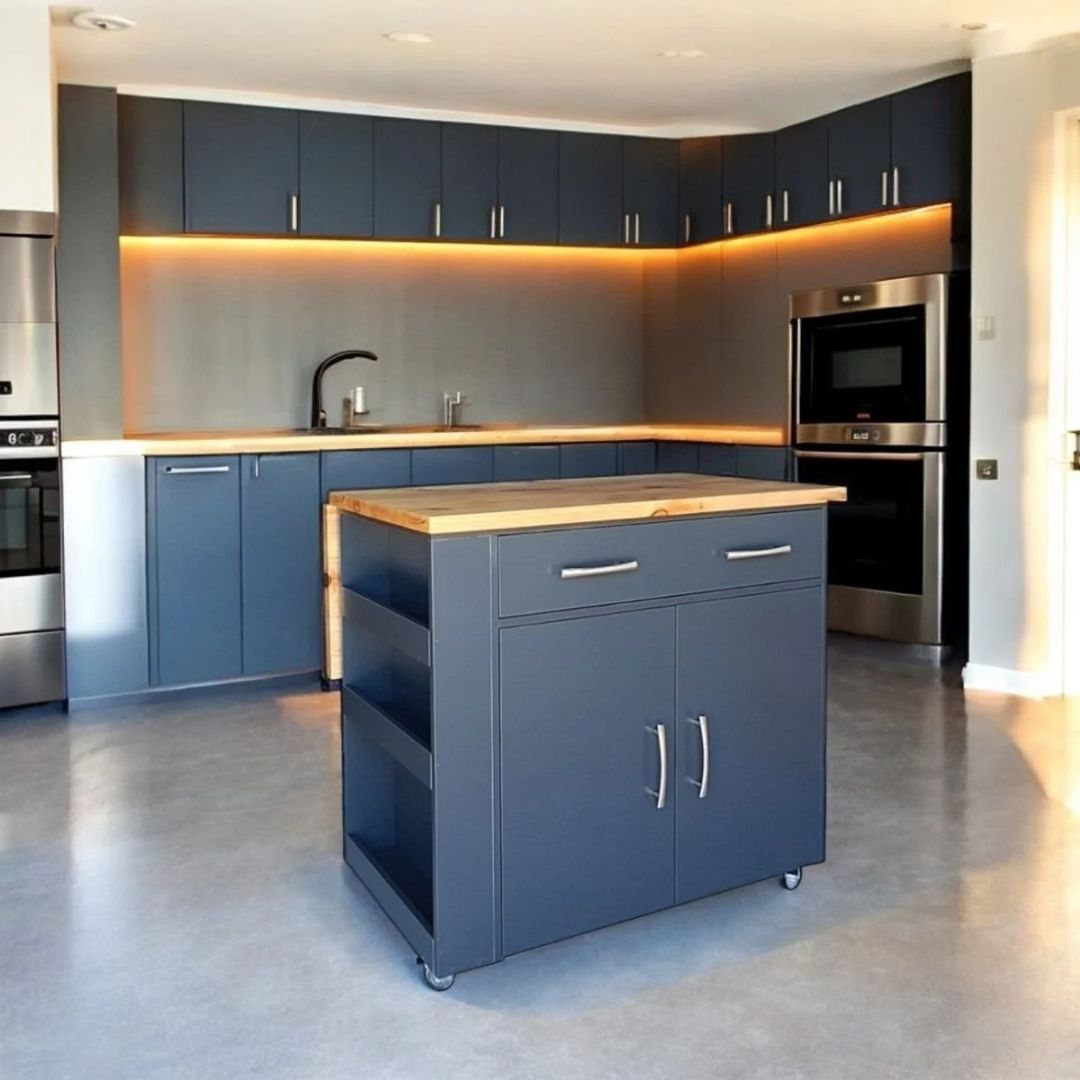
Casters turn the island into a cart that rolls to where the work is, then parks for the week.
Locking wheels rated for kitchen weight are worth the cost; cheap casters sag and drift. I would keep the top small enough to thread through a standard doorway when the party spills into the dining room.
11. Split Level Islands
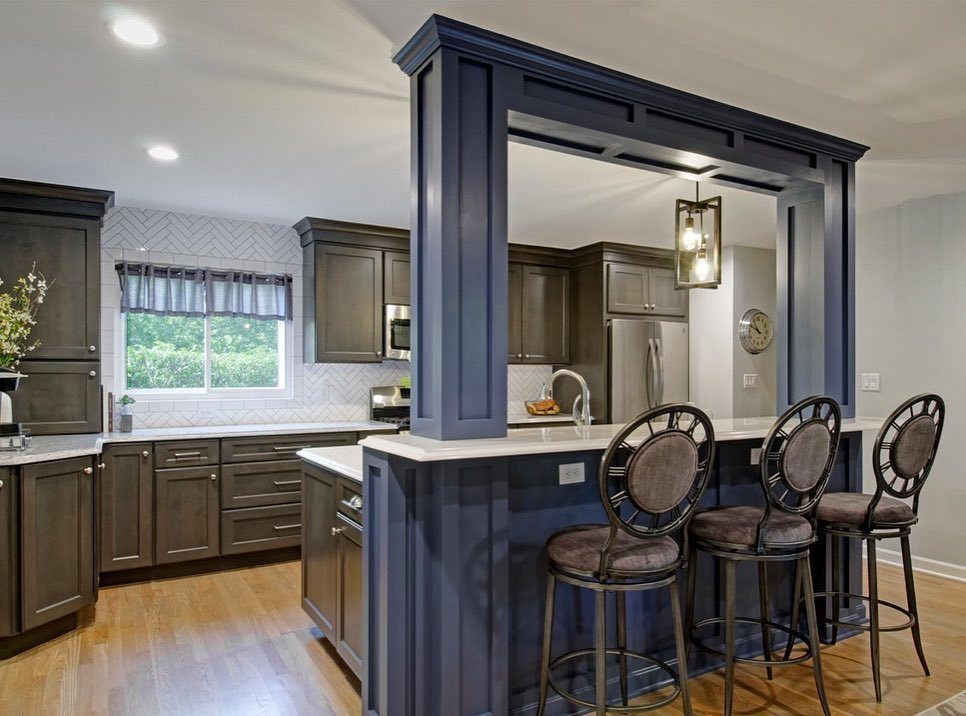
The split level works like two islands occupying one footprint: the lower tier for prep and cleanup, the raised tier for eating and hiding the mess.
The archway cut into the taller section frames the stools from the kitchen side, a piece of carpentry that costs less than the stone it replaces.
Herringbone tile and dark cabinets behind set a formal mood; I would keep the island’s raised faces in the same navy so the step reads as intentional architecture, not an afterthought.
Designing for Functionality
Decide what job the island must do before choosing any style. Seating, cooking, storage, or some combination of the 3 each pulls the design in a different direction.
Breakfast bar seating needs a depth and overhang that fit the stool height you pick; standard dining height suits more people than bar height.
A sink or hob in the island means running plumbing, gas, or electrical under the floor from the center of the room, which adds cost and limits where the island can sit.
A wine chiller or dishwasher needs its own circuit and water line nearby.
In a country-style kitchen, the island can read as freestanding furniture, more prep table than built-in cabinet. In other kitchens, a curve or a different shape from the run of wall cabinets works if the floor plan allows it.
A castor-mounted island rolls aside when the space needs to flex.
Space Considerations
An island needs at least 900 millimeters of clear space on every side. Less than that and two people cannot pass each other with the fridge door open.
Depth and length have practical ceilings. Anything past 1.5 meters in depth is hard to keep clean; you cannot reach the middle without crawling onto the counter.
Length past 3 meters means a second slab of stone, and matching color across two slabs of natural stone is difficult enough that most designers avoid it.
These limits are metric because the sources are British.
The island itself can be smaller, but the clearance around it should stay generous. Tight kitchens are better served by a rolling cart that moves than a fixed island that blocks the aisle.
Planning for Appliances
Routing utilities to an island in the middle of the room is the hard part.
Water, gas, and drain lines run under the floor, not along a wall, which means cutting concrete or building a raised plinth to hide the pipes.
A sink needs hot and cold supply and a drain; a hob needs gas or a dedicated electric circuit.
The dishwasher goes beside the sink, the warming drawer beneath the hob. Each choice adds a hole in the floor and a trade in cabinet space below.
A wine chiller works best on the far side of the island, outside the cooking zone, where someone seated at the breakfast bar can reach it without crossing behind the cook.
Plan these runs early. Moving them after the island is built means pulling stone and cabinets back out.
Frequently Asked Questions
Can hobs and sinks be placed in a kitchen island?
Yes, though fitting both usually needs an island longer than the average British kitchen allows.
The hard part is getting gas, electric, and drainage across open floor from the room’s center, which means either chasing concrete or building up the plinth to bury the runs.
Without a wall behind an island to hide the utilities, this legwork is baked into the job.
What size should a kitchen island be?
There is no standard size; the island follows the job you give it.
A sink wants depth for the basin and drying space; a hob needs counter on both sides for landing hot pans; seating flips the priority to legroom and knee clearance.
Leave 36 inches clear on every side so someone at the fridge can swing the door wide while another person walks past.
Depth past 60 inches puts the far corner out of easy reach; length past 10 feet forces a second slab, and matching veining or color across two stones is a lottery I would not volunteer for.