
These 8 indoor trellises run from a plank you lean against the wall to a bolted wire grid that holds hanging pots, and I build one or the other when my space is scarce on surfaces or scarce on walls.
[link-whisper-related-posts]1. Wood Plank

A rough plank, left unfinished or lightly sanded, gives climbers like philodendron something to grip that a slick bamboo stake never will.
This suits renters because one tall board leans against a wall and lifts out when you leave; no hardware, no holes.
If the grain splinters, a quick pass with 220-grit paper fixes it. I would seal the end grain with wax or matte polyurethane so water from the pot does not wick upward and rot the fibers.
2. DIY Moss Pole
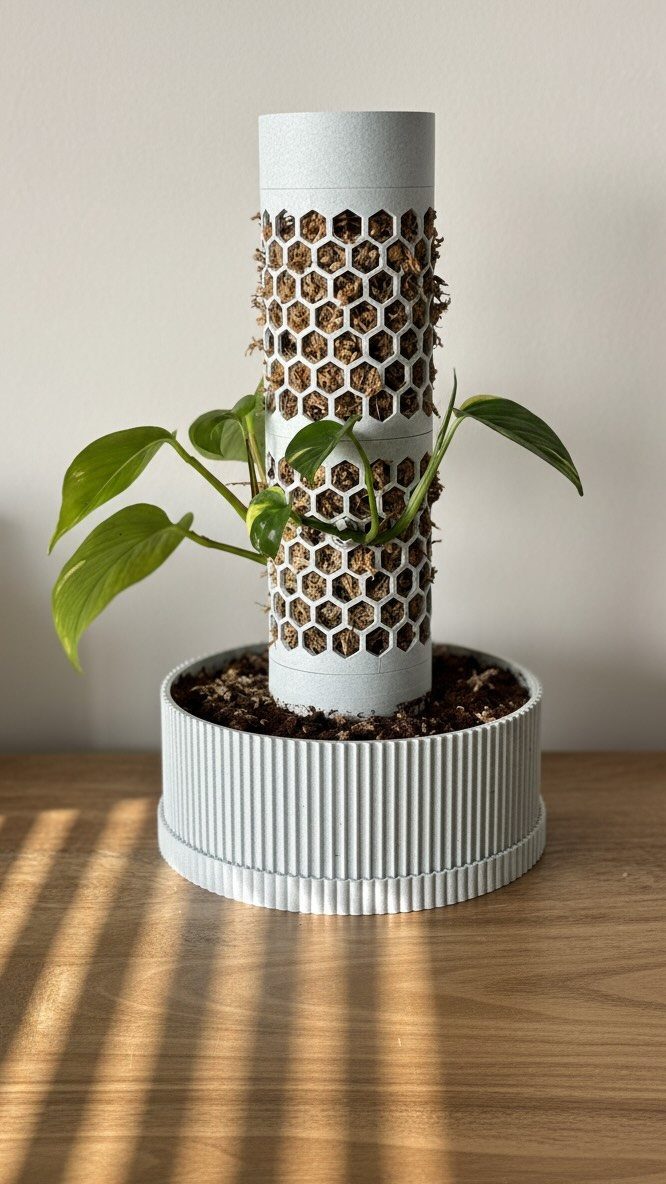
Sphagnum moss packed around a plastic core stays wet longer than bare stakes, which matters in dry winter air when a pothos pushes aerial roots.
The honeycomb sleeve you see holds the moss in place and keeps your hands cleaner than loose wraps.
To build one, soak dried sphagnum for an hour, pack it around a PVC pipe or stiff rod, and bind with fishing line or monofilament in spirals so tight the moss cannot shift.
Mist it twice a week; when it dries to tan, it has stopped doing its job.
3. DIY Coco Coir Pole
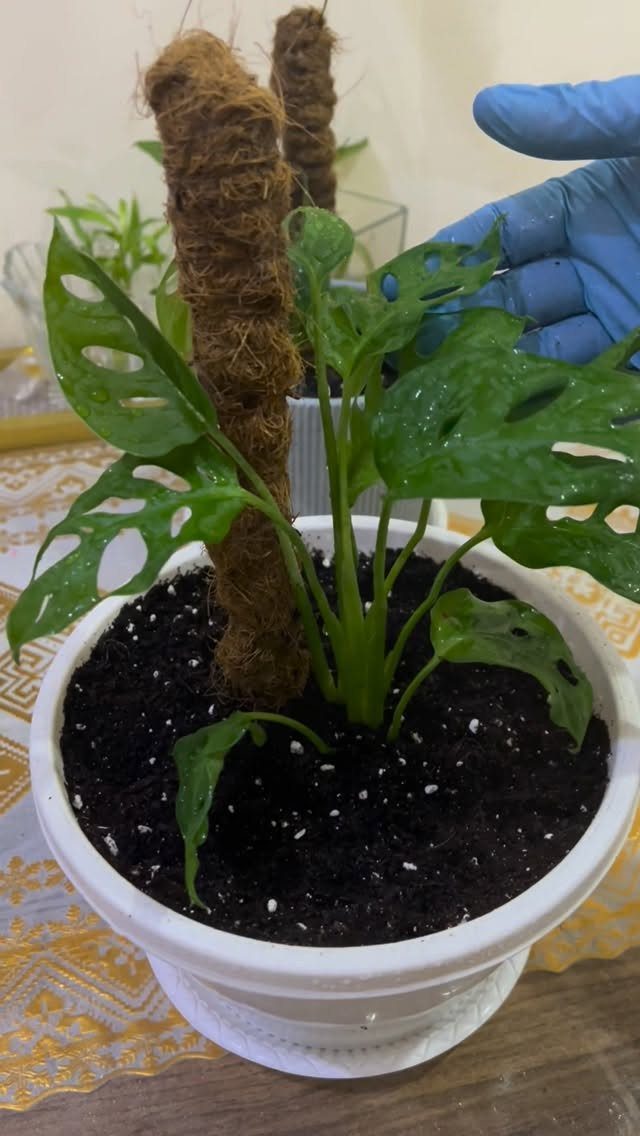
Coco coir holds moisture without the expense of sphagnum moss, and its fibrous surface lets Monstera roots anchor the moment they touch it.
Two slender poles, set an inch or two apart, brace a heavy vine better than one.
Press them deep into fresh potting mix so they cannot lean; as the plant climbs, the coir will compact and settle, so start with the pole rim an inch above where you want it to finish.
I replace mine once salt buildup from fertilizers turns the fibers pale and crusty.
4. Geometric Pattern Trellis
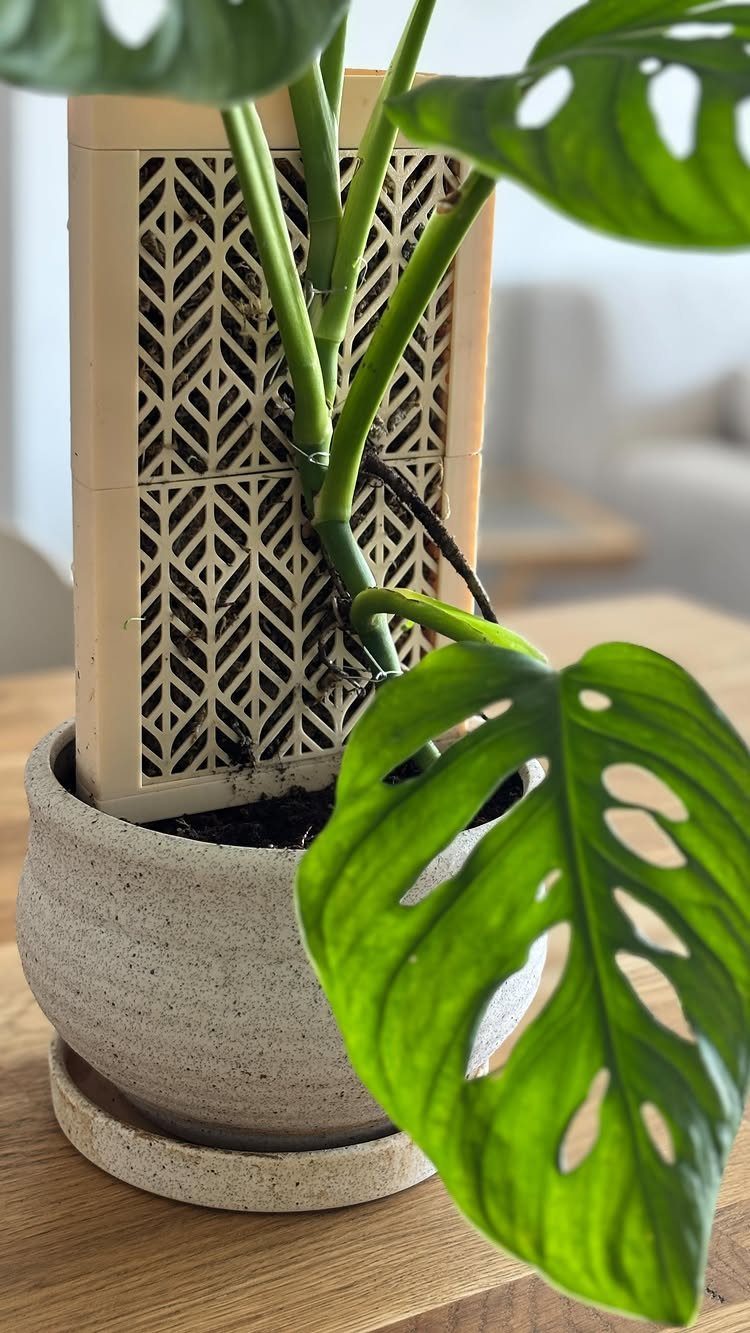
A geometric housing around a standard moss pole turns a functional stake into a room feature that reads as furniture, not a plant accessory.
The lattice casing lifts off for watering and lets you adjust the moss inside without dismantling the whole setup.
Build it from 1/4-inch plywood strips, mitered at the corners, with gaps wide enough for stems to thread through. A matte, warm finish avoids fighting the organic shapes of Monstera leaves; gloss is the wrong call here.
5. Wall-Mounted Wooden Lattice Trellis
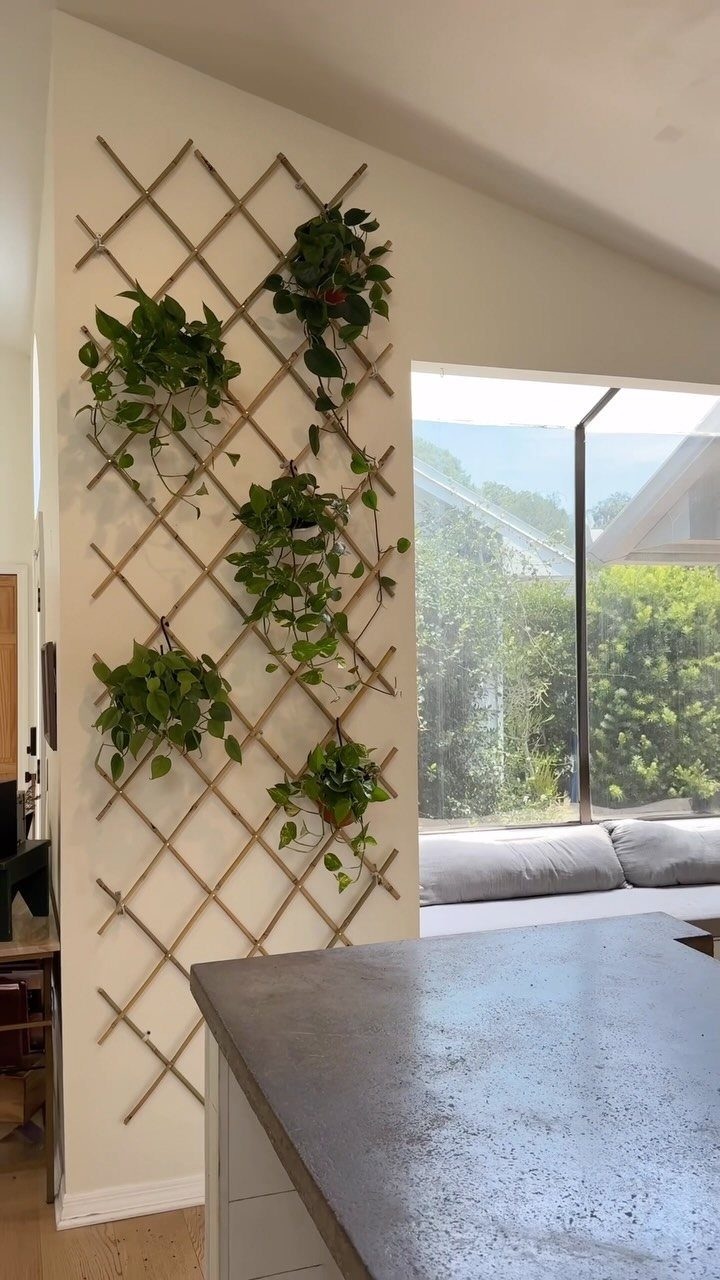
A wall-mounted lattice moves climbing plants off table surfaces and turns a blank wall into living texture, which is the only option when floor space is scarce.
Mount it with picture-hanging hardware rated for the total weight; wet soil in a cluster of small pots adds up fast.
I prefer diamond-pattern lattices because the angled intersections give stems more directions to wander than a simple grid. Position it where you can reach every pot without a step stool; these dry out faster than plants at counter height.
6. Circular Rope Trellis
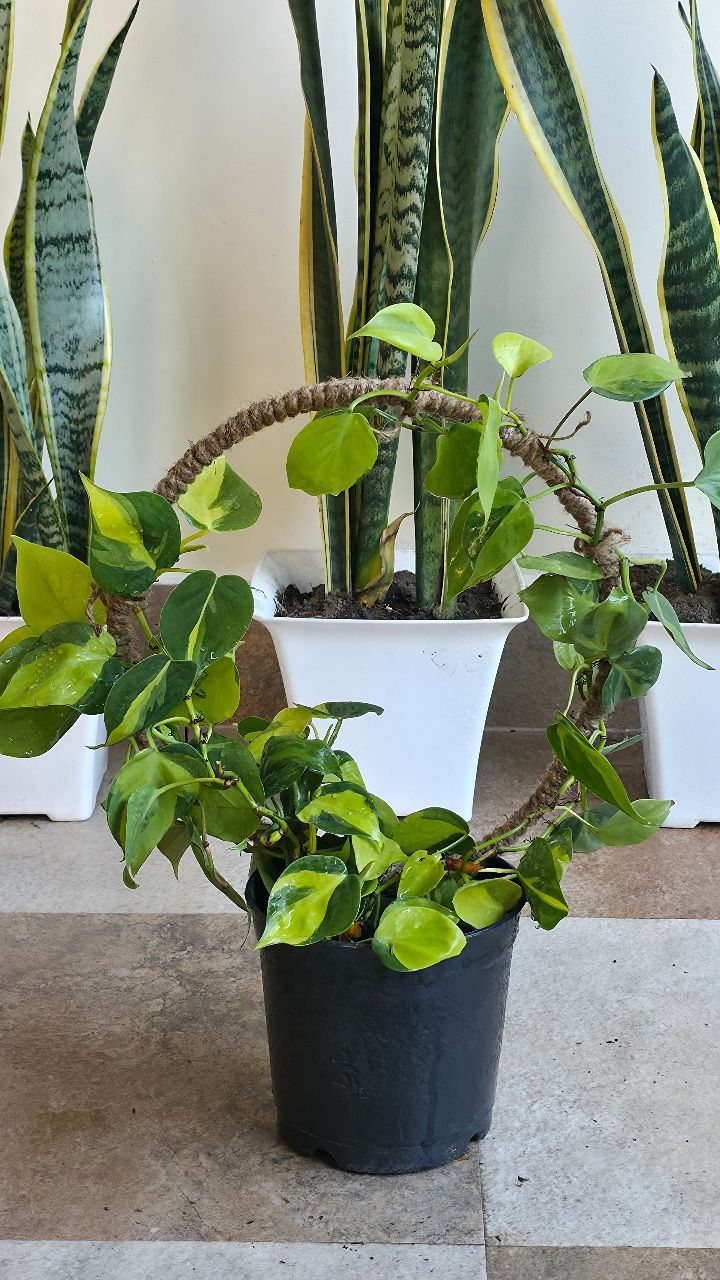
A circular hoop trains a trailing plant into a vertical halo, which changes the silhouette from spill-over to contained sculpture.
Wrap the ring in jute or cotton rope so stems have texture to grip; bare metal or plastic lets them slide.
Sink the hoop base deep and angle it slightly into the pot so gravity does not pull the whole frame toward the light. This form suits fast growers like pothos that will fill the circle in a single season.
7. Beaded Wire Trellis
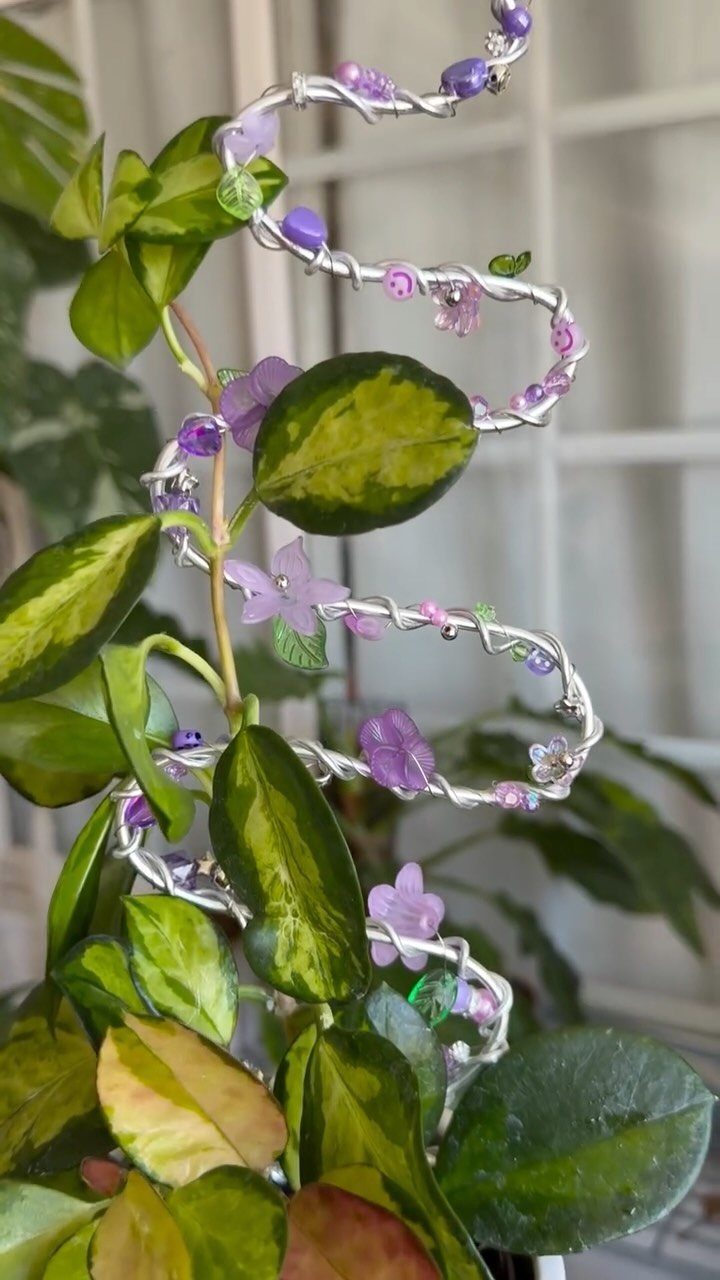
A hand-bent wire spiral strung with colored beads turns a plant stake into something that looks finished from across the room.
I would use 14-gauge aluminum wire; it bends into soft waves without snapping and carries no weight to speak of. String beads before you coil the shape, not after, or you will fight kinks at every turn.
Leave the beads loose enough to slide so you can redistribute them as the plant fills in. Keep the spiral open so stems thread through rather than wrapping around the outside and strangling themselves.
This suits a bright windowsill where the light catches the beads; a dim corner wastes the effort.
8. Wall Grid Wire Trellis
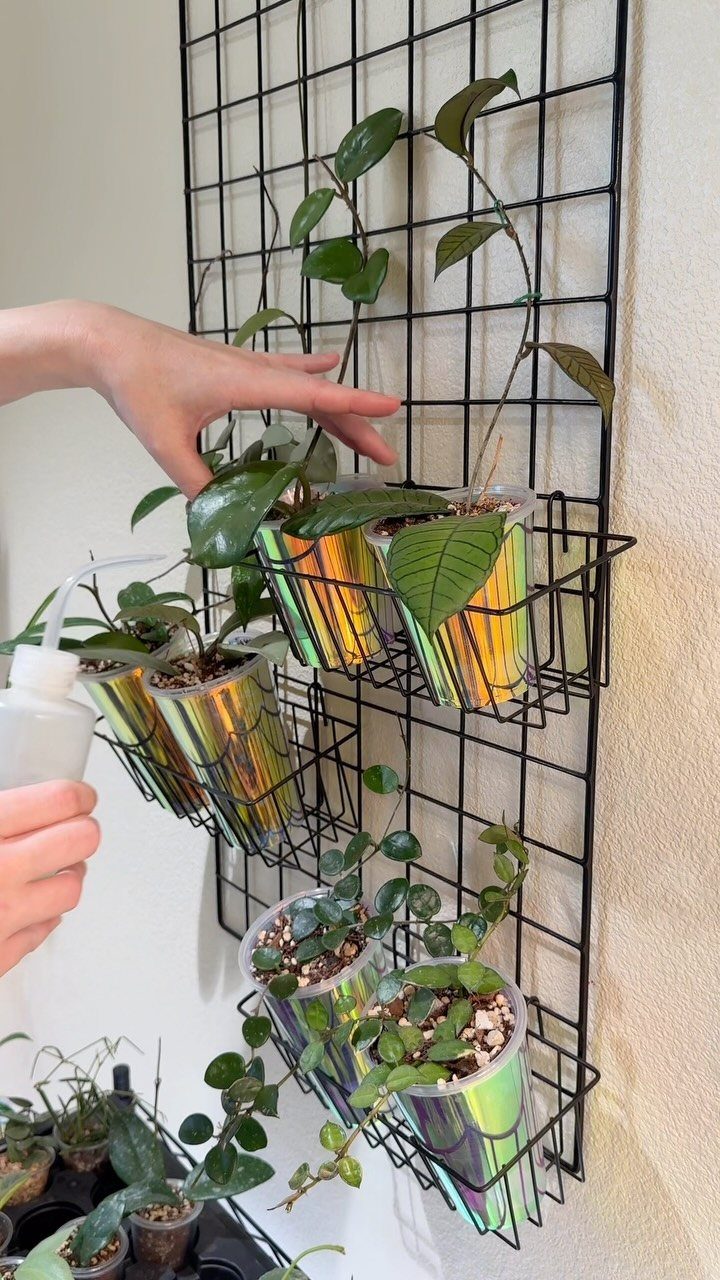
A black wire grid bolted to the wall turns vertical storage into a trellis by letting plants climb the grid itself while their pots hang from it.
Use toggle anchors if you hit drywall without a stud; between soil, water and plant weight, this pulls harder than a picture frame.
Keep the grid narrow enough that you can reach the center without stretching; arm’s length is the practical limit.
Any small pot with a hook lip works; the cups are just one option. Water before you hang them back, or carry a small spray bottle to the wall.
This trades floor space for wall space, which only helps if your walls are bare and your surfaces are full.
Benefits of Using a Trellis
A trellis keeps indoor vines from the spindly, stretched-out growth they get when left to sprawl across a shelf.
In a forest understory these plants climb toward light; give them something to climb at home and they fill out with tighter node spacing and larger leaves.
The vertical shape also turns a plant into something you look at from every angle.
A pothos on a shelf reads as greenery from the front and bare stems from the side. The same plant on a hoop or lattice reads as structure all around.
A trellis does not replace thoughtful placement.
A trellis supports growth; it does not fix a light problem. Place it where the plant already gets enough sun.
Choosing Materials for Trellises
Untreated wood and bamboo can sit raw for a dry-top trellis, but any piece that sits in or near the soil needs sealing on the end grain with wax or matte polyurethane so pot water does not wick upward and rot the fibers.
They wick excess moisture, dry evenly, and never off-gas.
For a heavy Monstera or mature Rhaphidophora tetrasperma, a single bamboo stake flexes too much; a paired coco coir pole, a wood plank or a wall-mounted lattice carries the load without bending.
Wire and metal suit lighter stems and smaller pots. Aluminum wire carries almost no weight and lasts indefinitely, though unwrapped metal rings let vines slide.
PVC works for moss poles because it stays rigid and never rots, but it offers nothing for roots to grip on its own; the sphagnum or coir layer does that job.
Plant Care with Trellises
A plant that reaches higher usually needs water more often.
Leaves exposed to brighter light and air movement at elevation lose moisture faster than leaves sitting low in still air. Check the top inch of soil a day or two earlier than your usual schedule after a vine starts climbing.
Fasten new growth with twine or soft plant ties in loose figure-eights, not tight knots that bite into stems.
Some vines grip on their own once aerial roots or tendrils take hold; until then, I check ties and move them up as the plant lengthens. Cut old ties rather than yanking them; stems scar easily.
Feed through the growing season.
New foliage needs nitrogen and the support to push it. During active growth I feed with half-strength liquid fertilizer and taper off well before the season slows.