These ideas run from a $100 wire shelving system you bolt up yourself on Saturday to glass-door wardrobes with interior LEDs and custom-cut zones that run closer to $10,000.
What picks one over another is whether you rent or own, because floor-mounted crates work where stud rules forbid anchors, while a built-in island only makes sense if you will stay long enough to live with it.
The pull-down rods here include hardware most roundups skip, like the wardrobe lifts that bring high storage down to where you can reach it.
[link-whisper-related-posts]1. Built-In Cabinets and Shelves
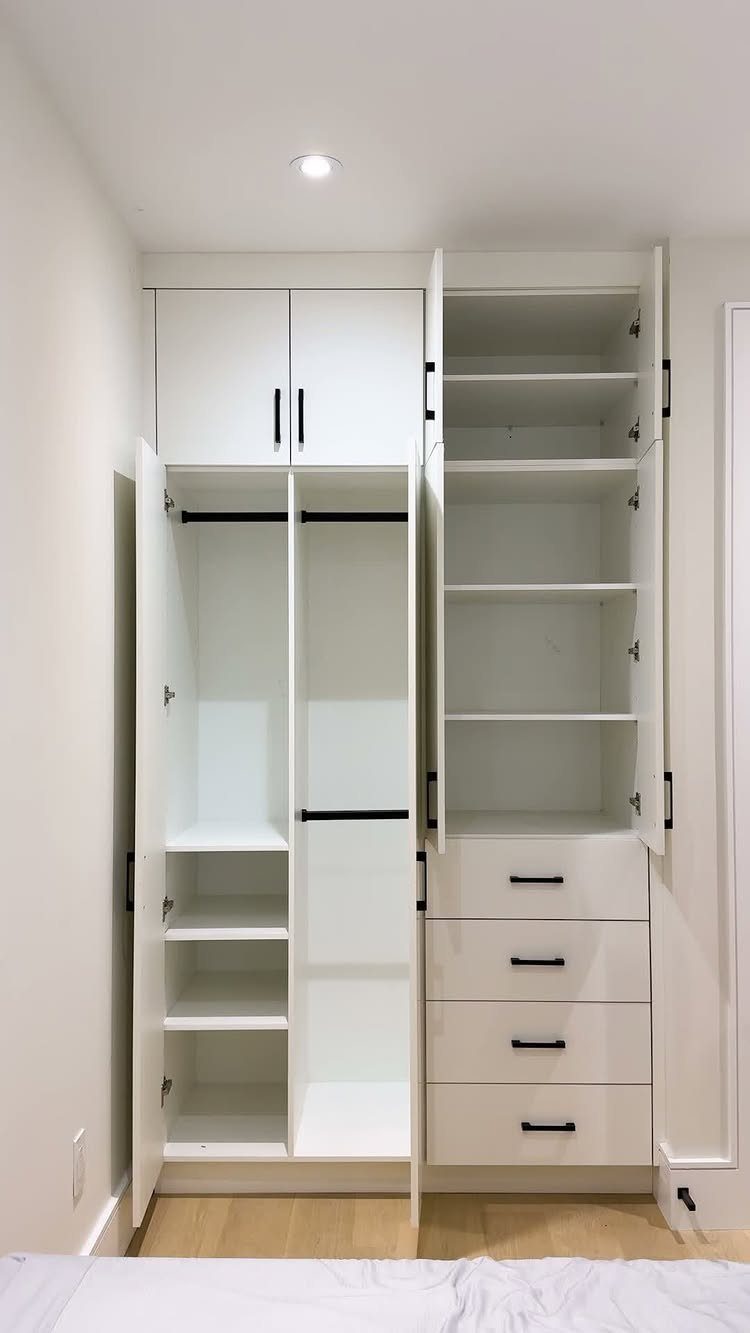
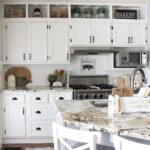
Built-in cabinets and shelves turn the whole closet wall into usable storage. A clean white system with open cabinets, hanging rods, and pull-out drawers at the bottom keeps folded items and accessories within reach without cluttering the sight lines.
I like this approach for reach-in closets where nothing but a rod exists now. The cabinets hide what you do not want seen; the open shelves keep daily items in reach.
It takes a Saturday to install pre-built cabinet boxes if your walls are plumb, or a weekend and a carpenter if they are not.
Paint the face frames to match your trim and the interior a shade lighter so contents show up.
2. Custom Closet System
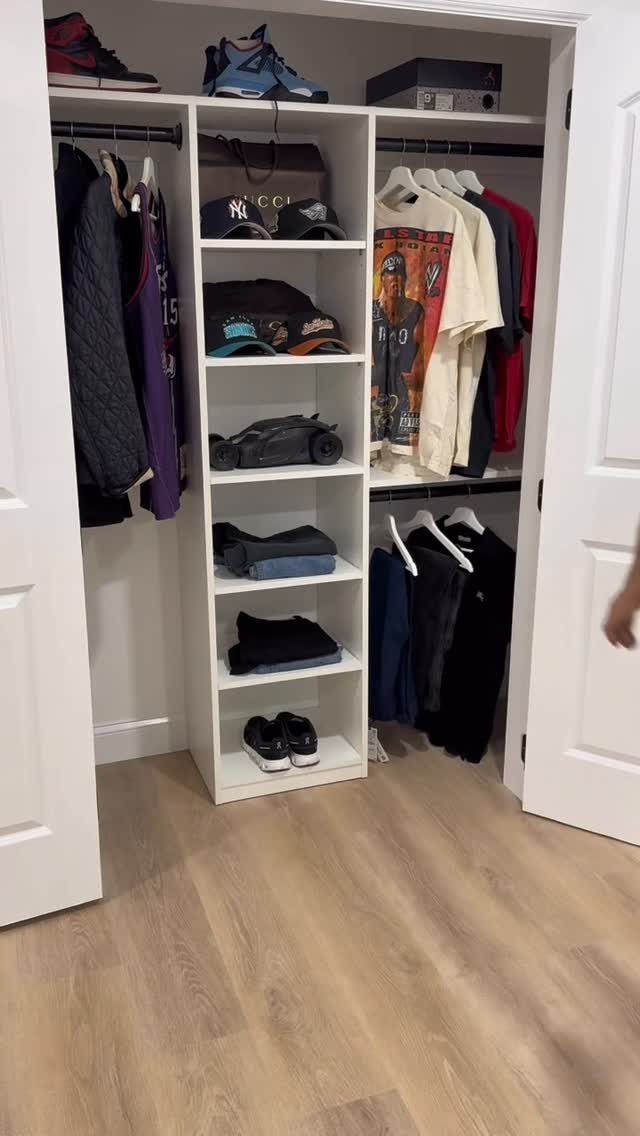
A custom closet system means every shelf depth, rod height, and divider is cut for your space and your wardrobe.
A white reach-in unit with a central tower splitting 2 hanging sections puts shoes below and a shelf for bags and hats above, which is the layout I start with in almost every reach-in.
I start by measuring what you actually own: enough hanging for shirts, more for coats, and shelves shallow enough for shoes to sit in a single row.
The custom route costs more than wire kits, but it uses odd corners and sloped ceilings that off-the-shelf units waste.
I would spend the money only if you plan to stay put for a while; otherwise, a good modular system gets you most of the way there.
3. High Shelves and Pull-Down Rods
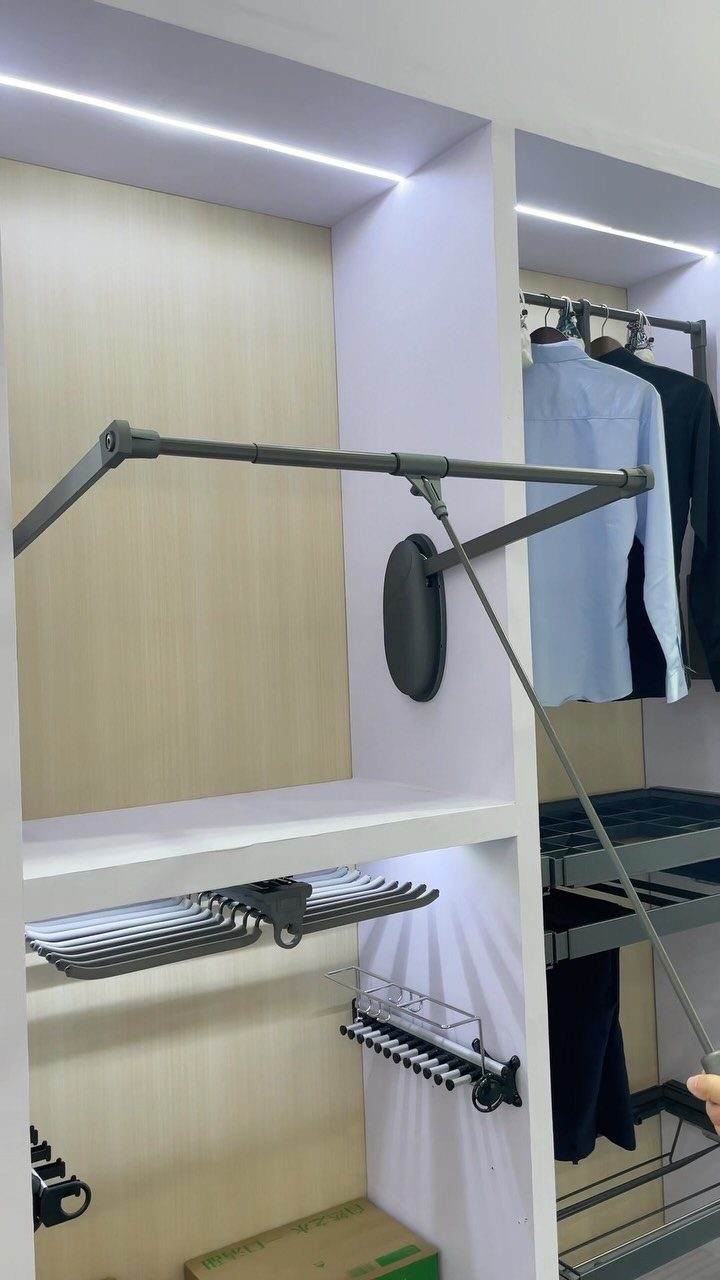
Pull-down rods bring the top third of a closet back into daily use. The mechanism drops from a tall upper shelf on a hinged arm, which lets you reach hanging clothes without dragging over a stepstool every morning.
The maker labels this a G15 wardrobe lift. Mount it between side panels or against a back wall high enough that the rod sits out of normal reach.
I have seen these rated for enough weight to hold a season of coats or a full row of dress pants.
Installation needs a drill, a level, and patience with the return spring; the job goes faster once the mounting location is clear.
Skip it if you hang only long dresses up top; the lift works best with shorter items on standard hangers.
4. High Shelves and Bins
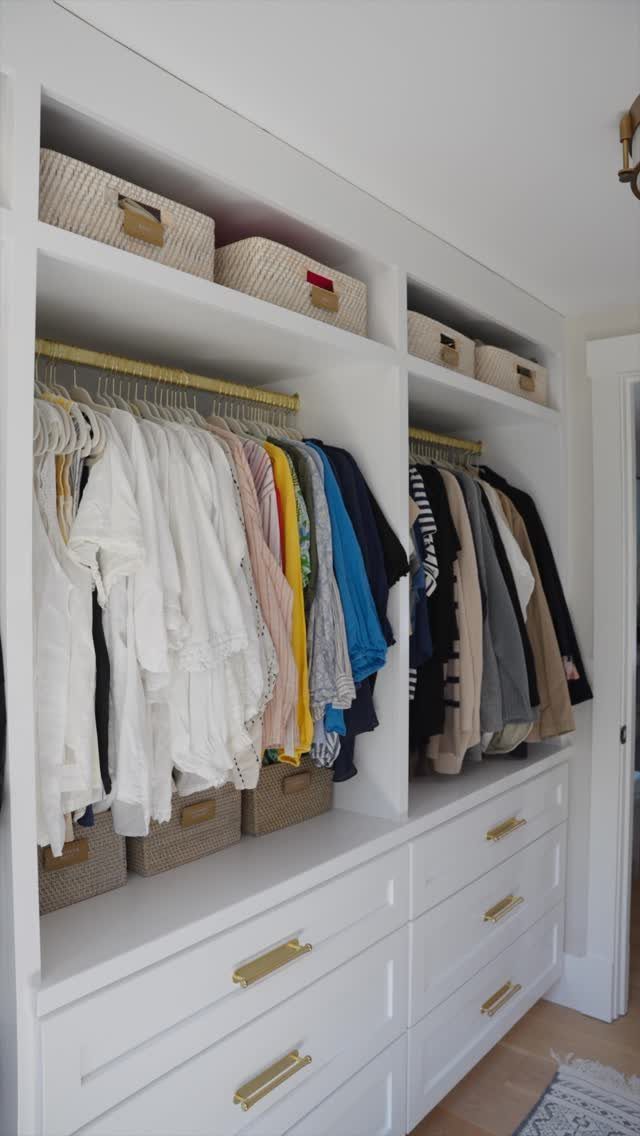
High shelves with bins store the stuff you rarely touch but cannot throw out. Woven baskets sitting above the hanging rods, with drawers below for daily items, separate what you use often from what you only reach for occasionally.
I set my high shelf above head height, wherever it clears your longest coat with room to spare. Bins on the narrower side fit most standard shelf depths without overhang.
Label the short edge so you read it from below. The bins here are woven, but any rigid bin with a lip works; plastic costs less, woven costs more, and both beat a pile that falls over.
What you trade is quick access, so I reserve this zone for off-season, occasion pieces, or luggage. One bin per household member keeps peace.
5. Closet Zones for Clothing and Shoes
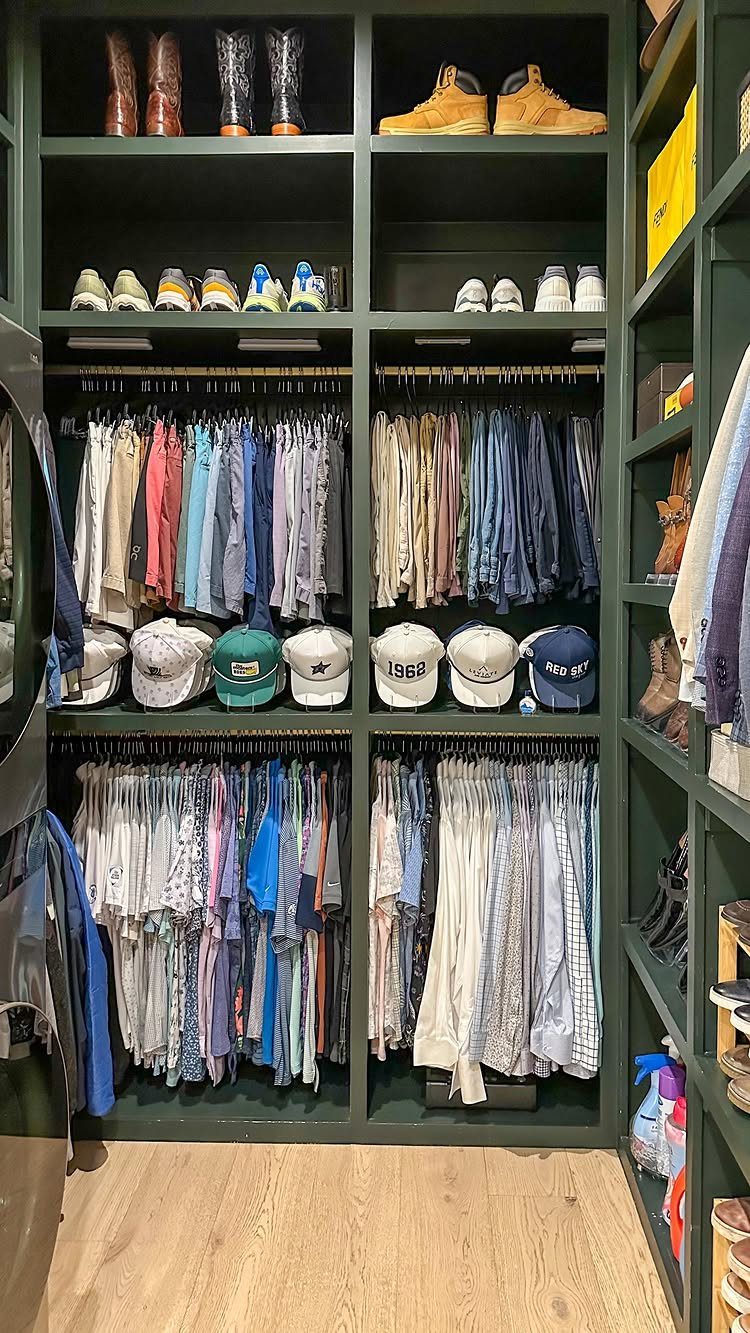
Zoning a closet by clothing type and shoes stops the morning hunt.
A green unit dedicating top shelves to boots and sneakers, rods to pants and shirts, a mid-shelf to caps, and side columns to stacked shoes keeps categories together so you stop hunting.
I map zones by the order I dress: underthings nearest the door, then shirts, then pants, shoes last.
The dark green paint here is a choice, not a requirement; any consistent color helps the closet read as designed rather than accumulated. For a reach-in, limit yourself to 3 zones or the space fragments.
In a walk-in, I add a folding surface between shoe storage and hanging. Shoes need a minimum shelf depth; boots need more depth and clearance above the sole so the shaft does not get crushed.
6. Double Hanging Rods
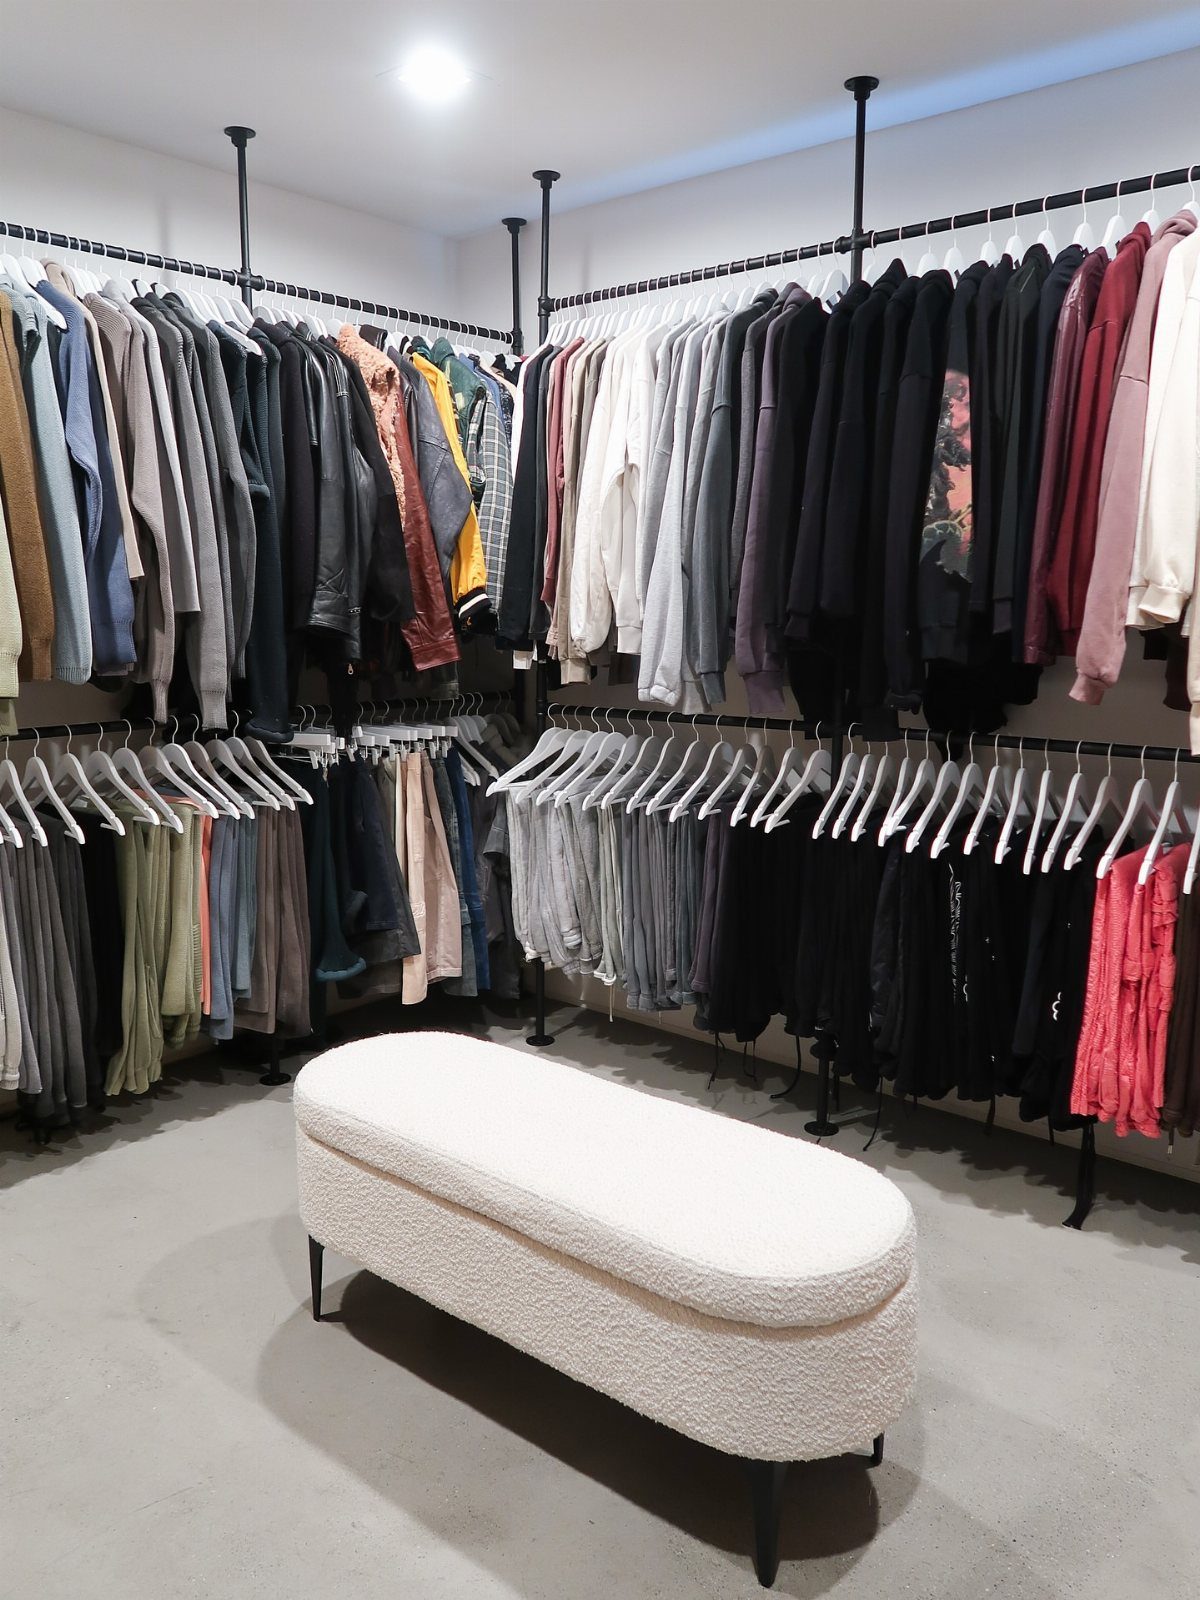
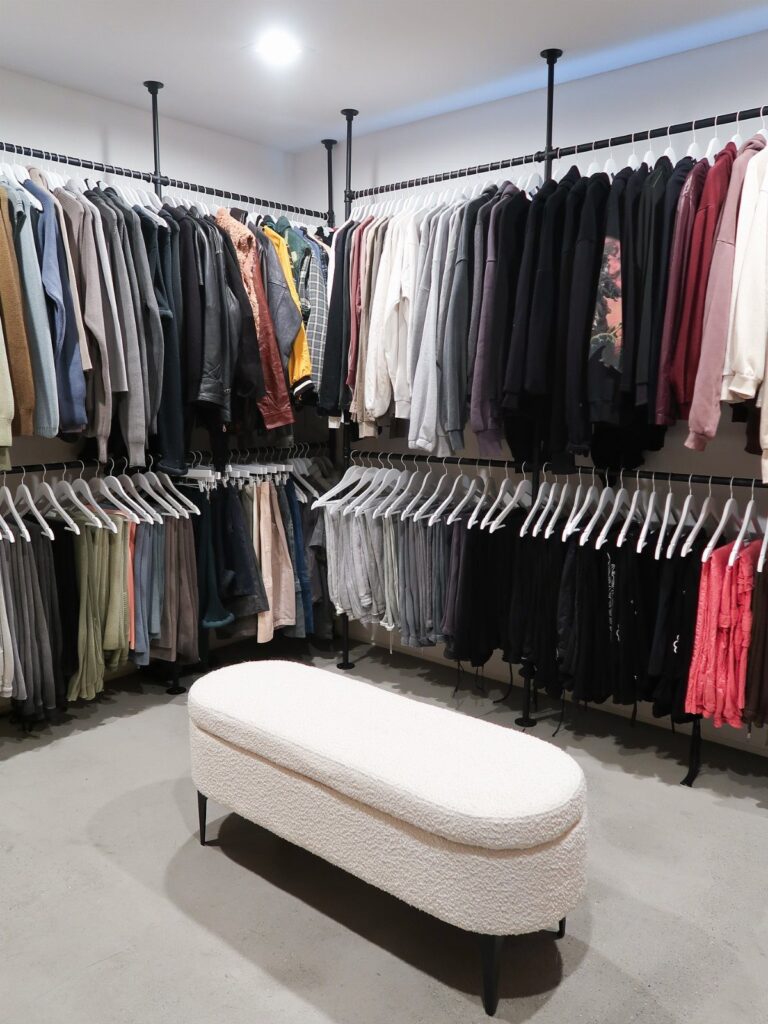
Double hanging rods stack two rows of short items where one long row would leave half the height empty.
Black pipe for both tiers, with shirts and folded pants on hangers above and below, takes advantage of height that usually goes empty.
This is the fastest way to double hanging capacity in a standard 8-foot closet. Set the top rod at 80 inches, the lower at 40, leaving enough vertical space for shirts and blouses on either row.
I reserve the lower rod for pants folded over the bar or shorter jackets; a full suit on a long hanger needs the single rod section you keep at one end.
Pipe and flanges from the hardware store cost less than finished closet kits, plus paint if you want black.
7. Drawer Dividers

Fabric drawer dividers inside an open light-wood drawer keep folded garments upright and separated without a complete organizer overhaul.
I buy these when the drawer itself is fine but the contents slide into a pile by Wednesday. Fabric bins that lift out let you carry the whole organizer to a bed when you are packing a suitcase.
Measure your drawer depth first; a bin that rises above the front lip catches every sleeve you push past. Replace them only when the cardboard base sags, which takes a few years of normal use.
8. Full-Length Mirror
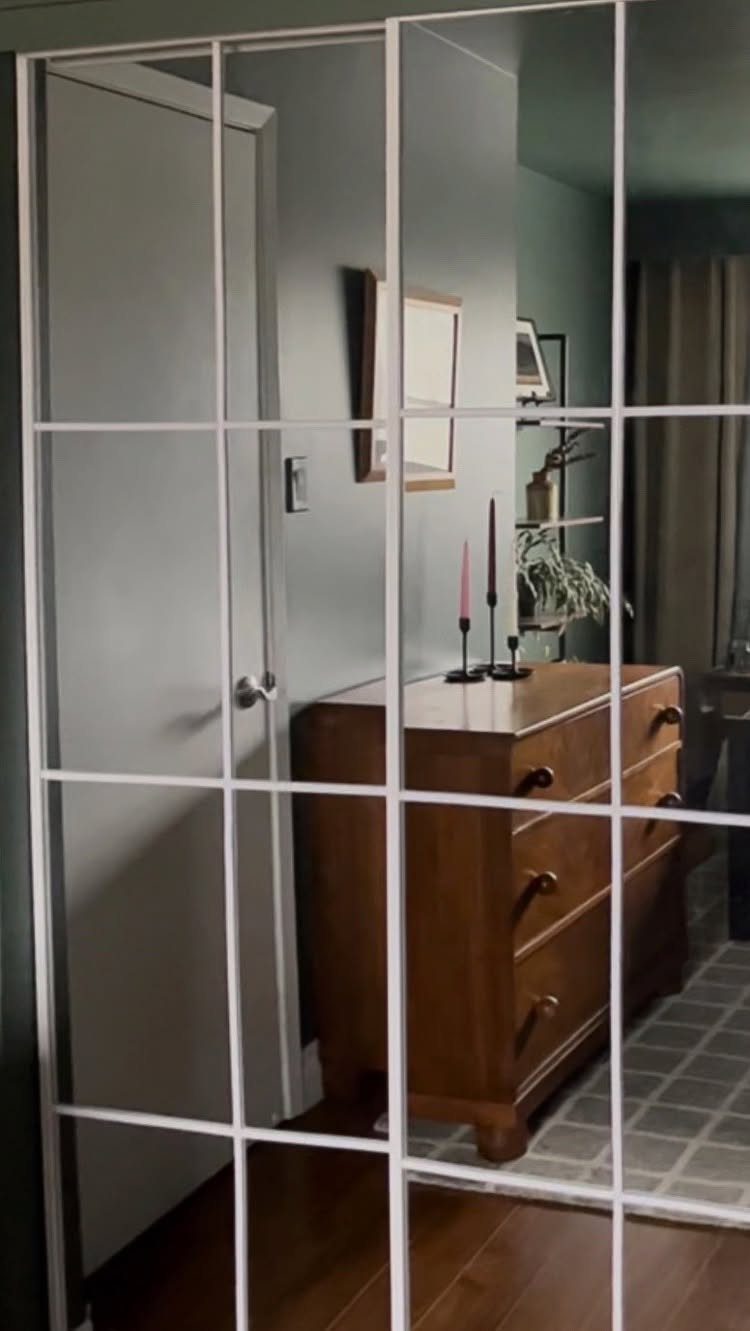
Full-length mirror doors turn closet fronts into a dressing station and bounce light into a dim bedroom without stealing wall space.
I prefer grid-framed sliding doors like these when the closet faces the bed; the white frame reads as intentional even when the mirror reflects nothing but rumpled sheets.
Mirrored kits come in standard door widths, so measure your opening before you order.
The weight means you need the top track level or the doors drift. If your closet is recessed, measure the jamb depth before ordering; some frames need flat casing to sit flush.
9. Floor-Mounted Closet System
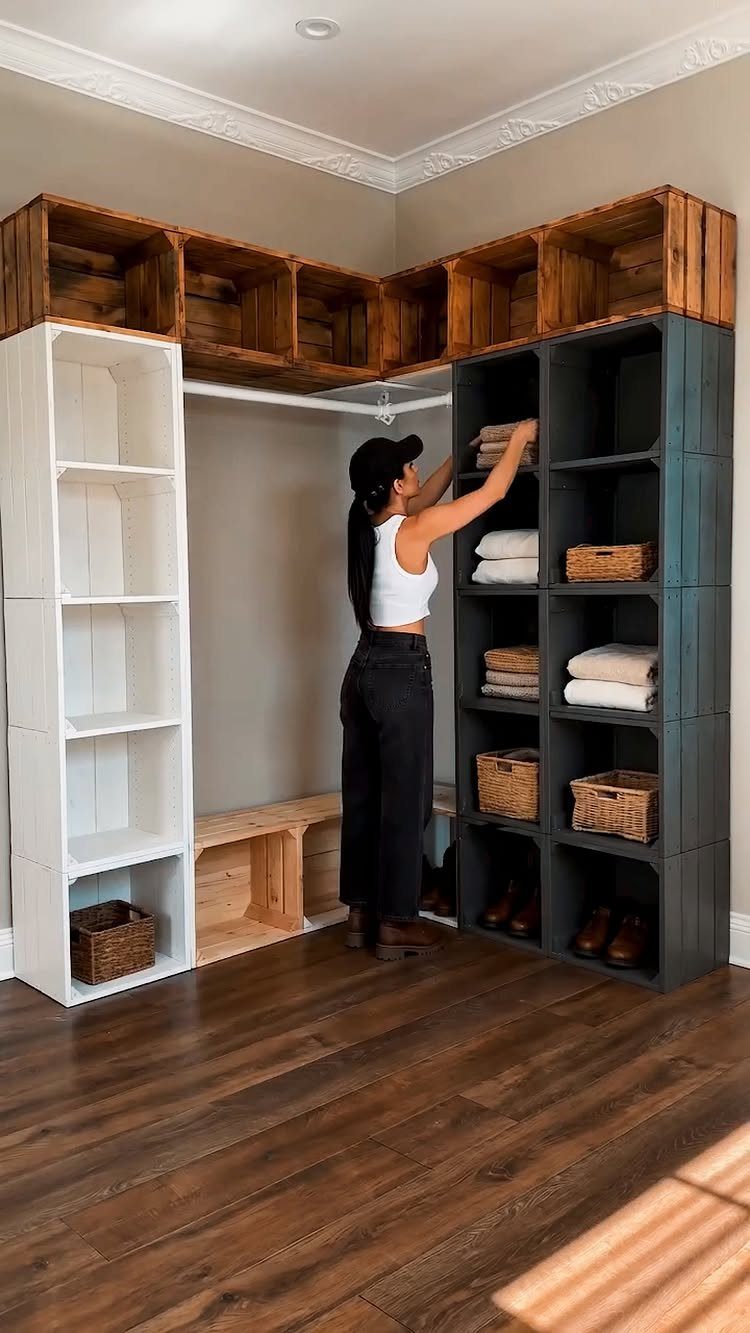
Floor-mounted systems of stacked wooden crates or dark grey shelving units stand independent of walls, which matters when your closet is an alcove with no studs where you need them.
I have set these up in rentals where landlords forbid wall anchors.
A crate system that rests on the floor and leans against the wall carries weight down to its own footprint and keeps marks off your drywall. Both need level floors or a shim under one corner.
No 2 units match exactly, so arrange the heavier crates at the base. I line the bottoms with spare wallpaper scraps so splinters do not snag folded linens.
10. Color-Code Your Closet
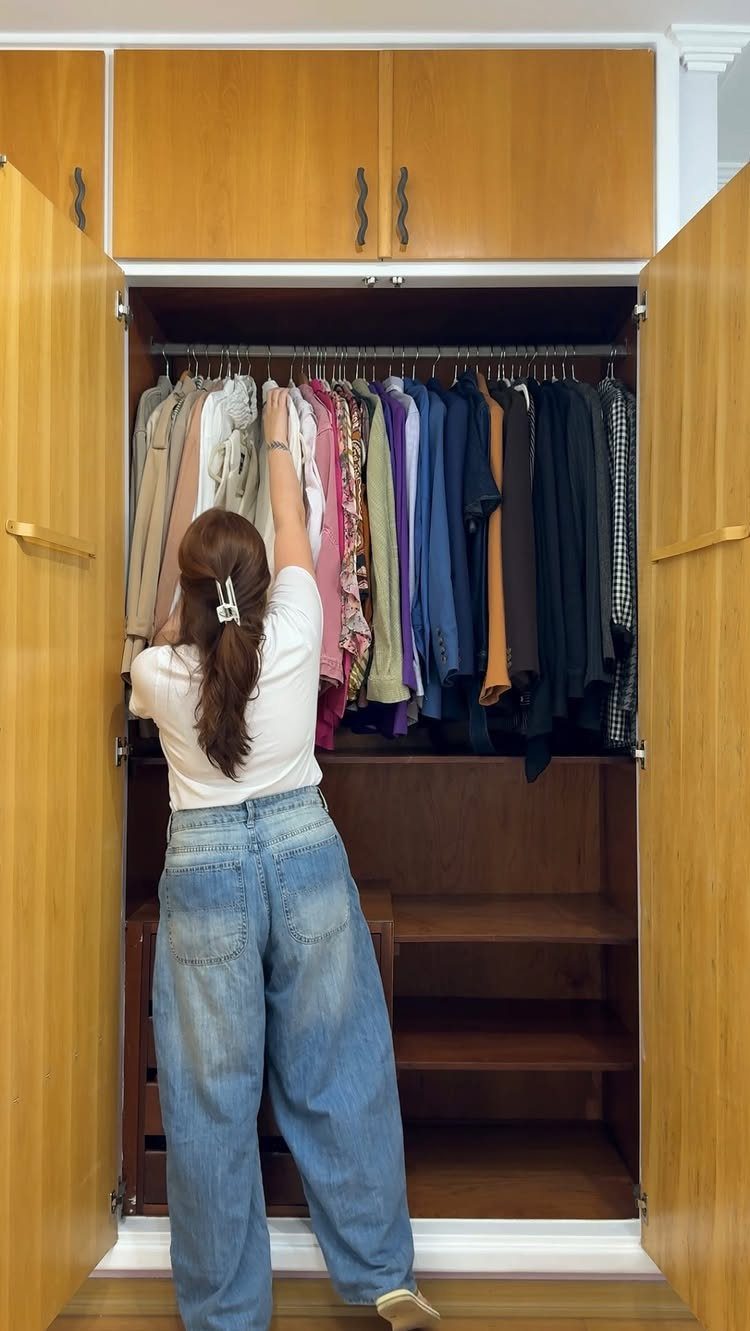
Color-coding your hanging clothes turns a wooden wardrobe into something that reads as designed rather than merely stored.
I sort by color within each clothing type, not across the whole closet. All shirts run light to dark, then all pants run light to dark; mixing categories by hue turns getting dressed into a game of memory.
Leave empty shelf space beneath rods as a buffer zone, or your color story collapses the minute you buy one new sweater.
This costs nothing but the hour it takes to rehang, and it fails gracefully if you skip a shade you barely own.
11. Valet Hook
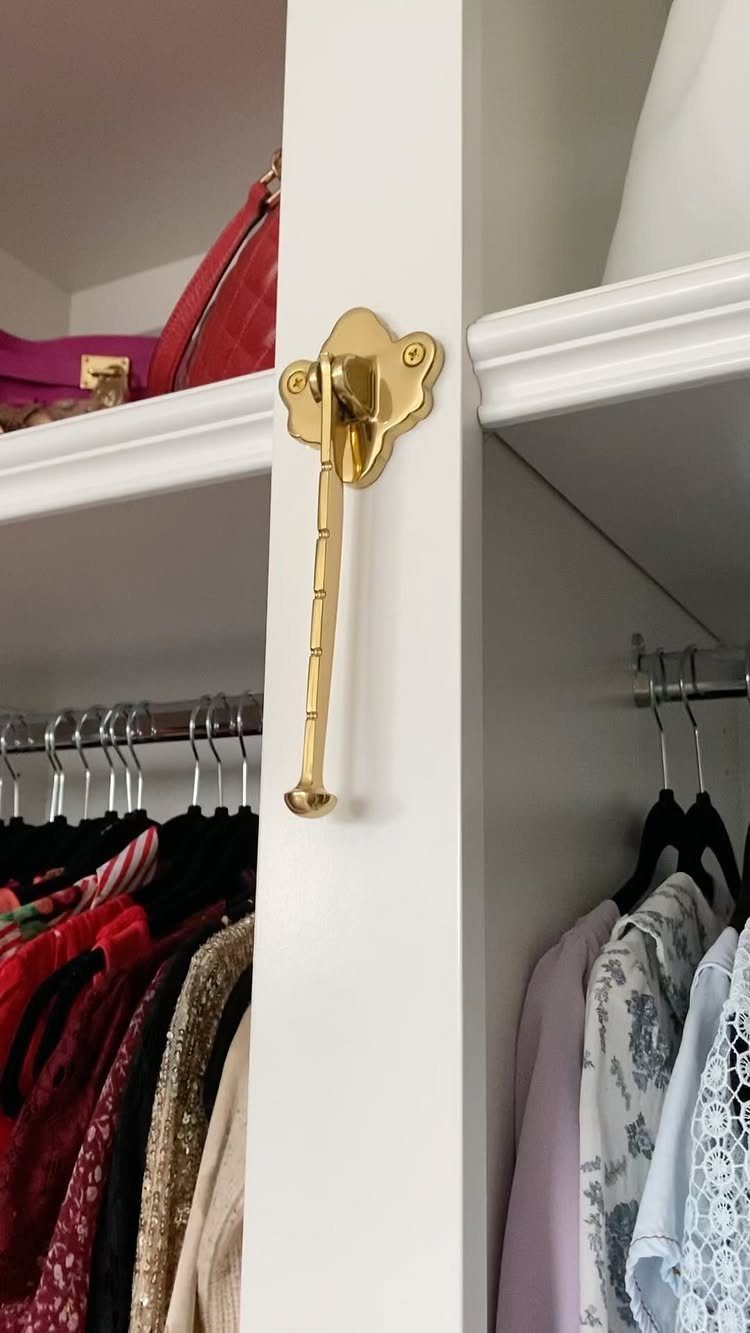
A fold-down brass valet hook on a white closet partition holds tomorrow’s outfit or returns that dry cleaning you keep forgetting to put away.
I mount mine at shoulder height, not eye level; the hook drops to hold a shirt and bag, then folds flat when you pass with an armful of laundry.
Brass darkens where fingers touch it, which I like, but a lacquered finish stays bright longer. A real valet hook needs blocking or a stud behind the panel; hollow-core doors will crush under the screw pressure.
Skip this if your closet is a reach-in with a single rod against the wall, as the hook needs a vertical surface facing you.
12. Closet Island with Drawers
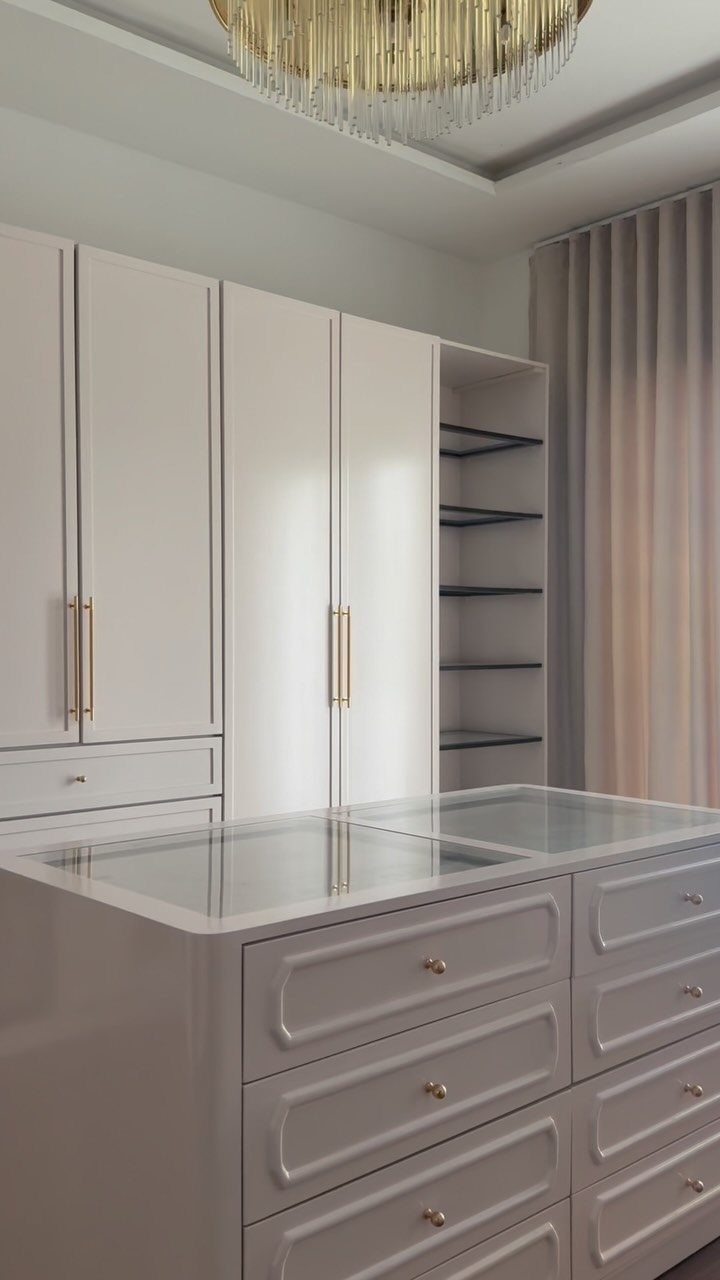
A closet island with drawers sits in the open floor of a walk-in, turning the center dead zone into folded storage and a surface for packing bags.
Glass inserts on drawer fronts let you read contents without pulling each one open; the lighter or darker frame is just a tone choice.
I allow passage room on all sides for walking through with a basket, more if you plan to open drawers from both sides at once.
The chandelier overhead is a choice, not a requirement; most people add a ceiling flush-mount for even light. Build this only after your perimeter storage is complete, or the island blocks access to half your wardrobe before you are dressed.
13. Consider Flooring Options
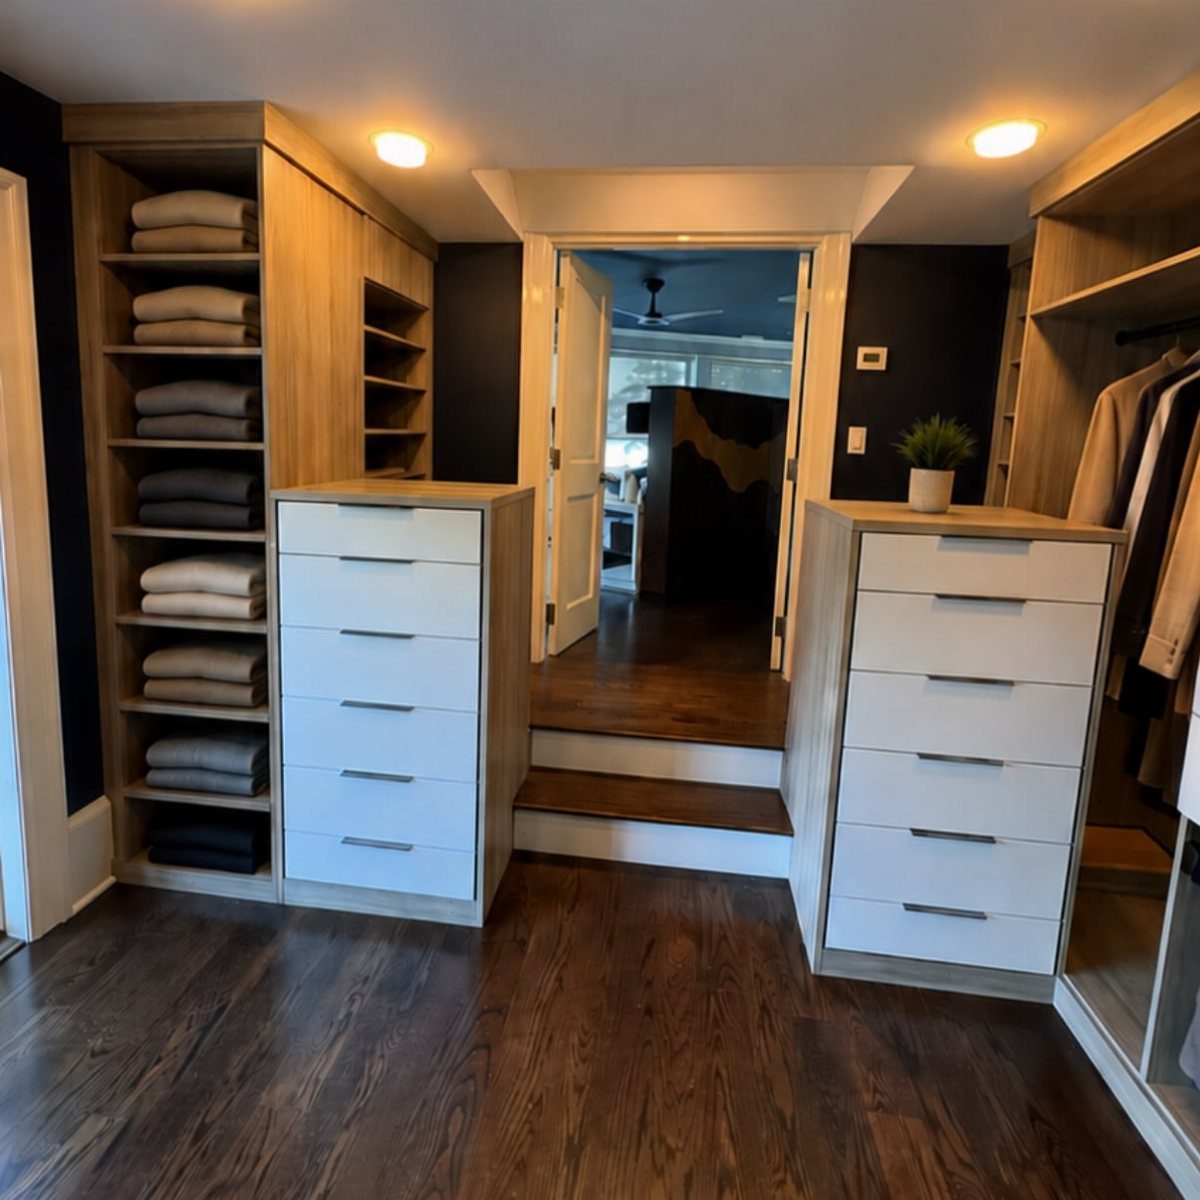
Dark hardwood flooring underfoot makes this walk-in read as a room, not an afterthought. The floor anchors the light wood shelving and white cabinets so the space builds upward from a solid base.
I would not install anything lighter than the wood tones above it, or the eye breaks in the wrong place.
Engineered hardwood handles closet humidity swings better than solid boards; vinyl plank costs less and fakes it well enough for a weekend install.
Match the threshold to the adjoining room or the step up reads as a stumble, not a transition.
14. Matching Hangers
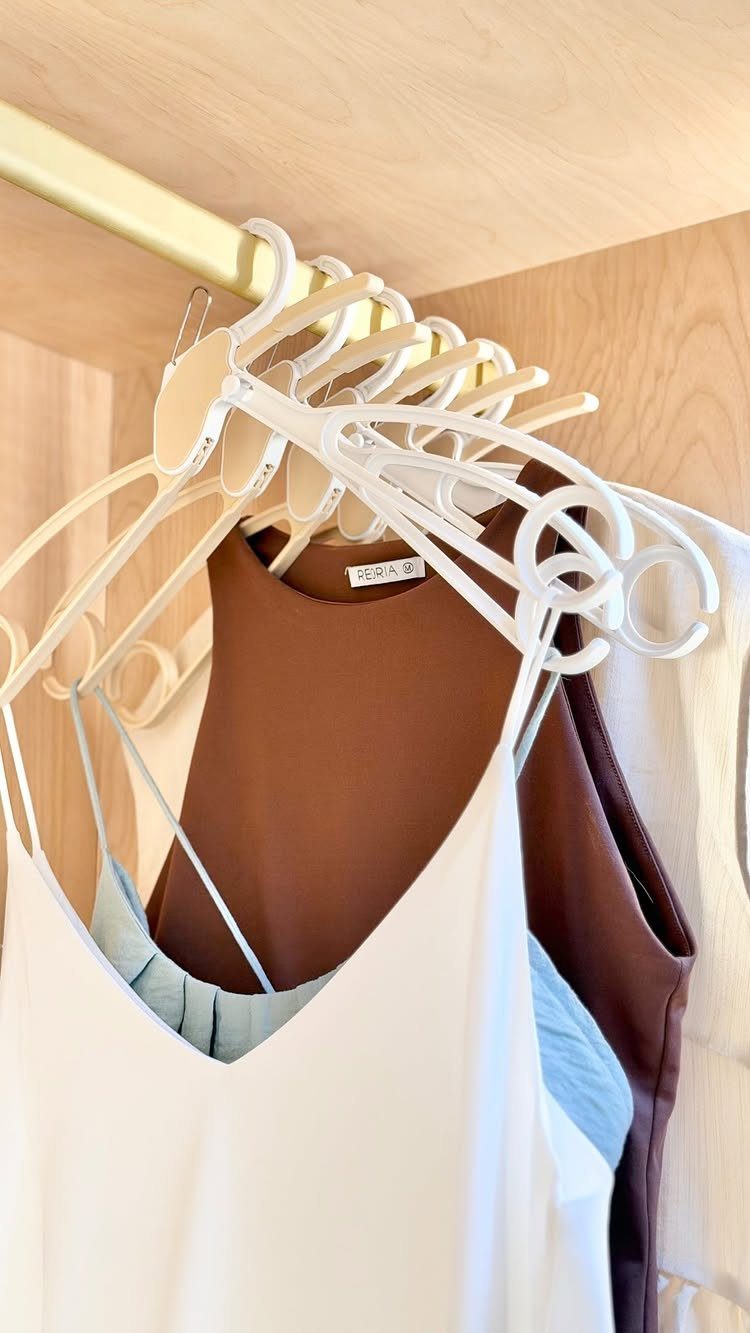
Cream and white plastic hangers on a brass rod turn a closet into something that photographs clean even on Tuesday morning. The multi-hook version here corrals camisoles that slide off standard shoulders.
I switched to one hanger style years ago and never went back.
Plastic costs pennies per piece; wood looks richer but doubles the tab and triples the thickness, which matters in a shallow closet. The brass rod lets the neutral hangers read as intentional, not leftover.
Toss the dry-cleaner wire the day you bring clothes home; it bends and stains shoulders. A single style means you stop thinking about your tools and start thinking about your clothes.
15. Built-In Vanity Area
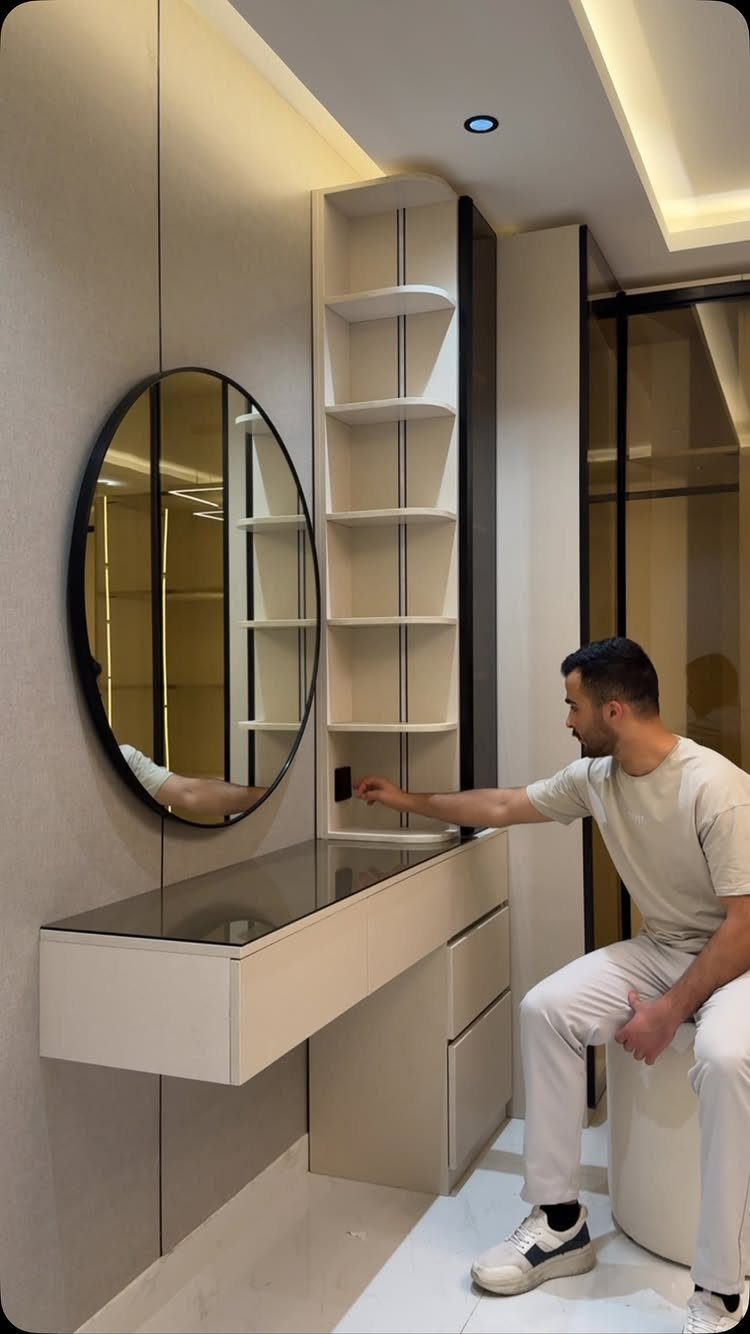
A floating desk with a round mirror and tall side shelving turns a walk-in corner into a dressing station where you sit to pull on shoes or sort jewelry. The stool tucks under when you pass with laundry.
I would mount the mirror oval-height so you see your face straight-on while seated; a mirror hung for standing reflects your collarbone and confusion.
The floating desk needs bracket support into studs or a backing panel, since makeup and hair tools add weight over time.
Add a power source if you style with heat tools, or you run cords across the floor. This trades hanging space for surface space, so I place it only after rods and shelves are settled.
16. Central Seating Bench
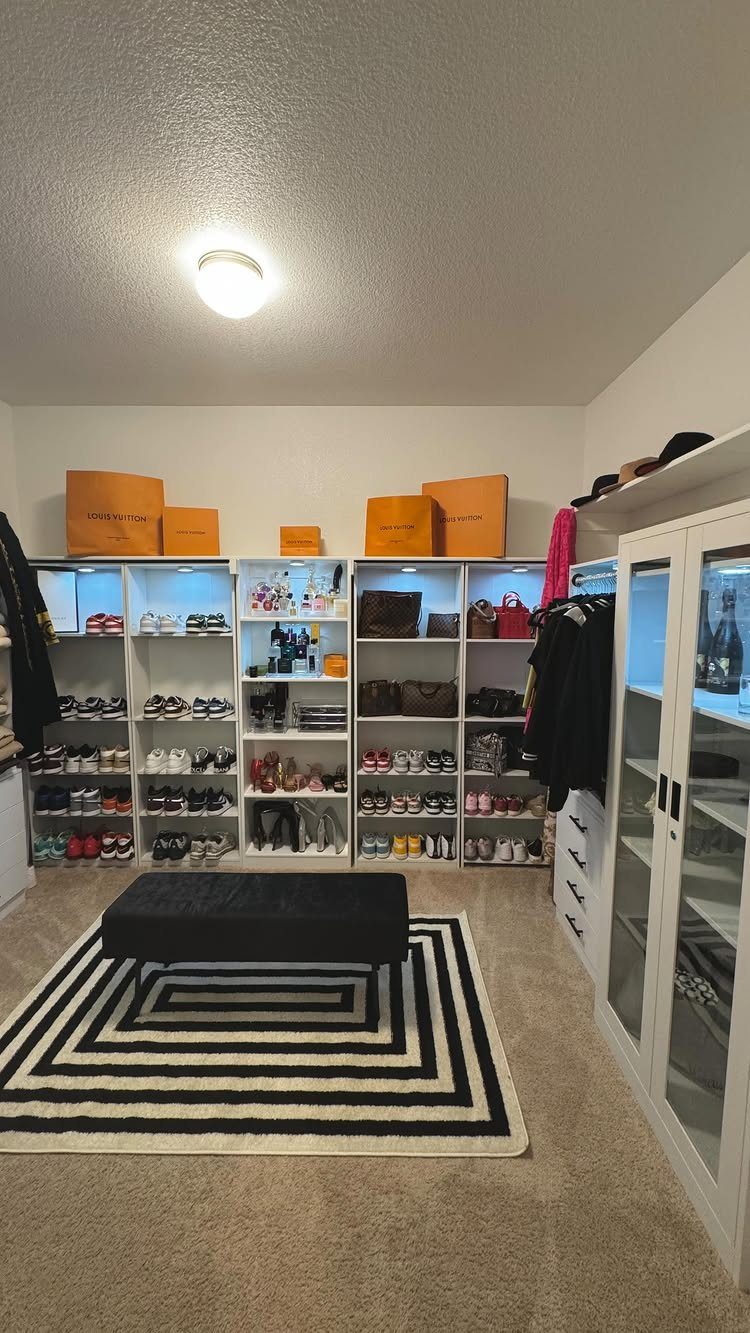
A black bench in the center of a walk-in gives you somewhere to lace shoes or set down a bag without retreating to the bedroom. The geometric rug underneath marks the zone so the bench does not drift.
I keep the bench backless and narrow, just deep enough for seating without blocking drawer pulls or shoe rows. Upholstery collects lint from clothes passing by; leather or vinyl wipes clean.
Build perimeter storage first or the bench becomes a surface for clothes that never make it to hangers. Leave clear space on at least 2 sides for walking through with arms full.
17. Wire Shelving and Rod System
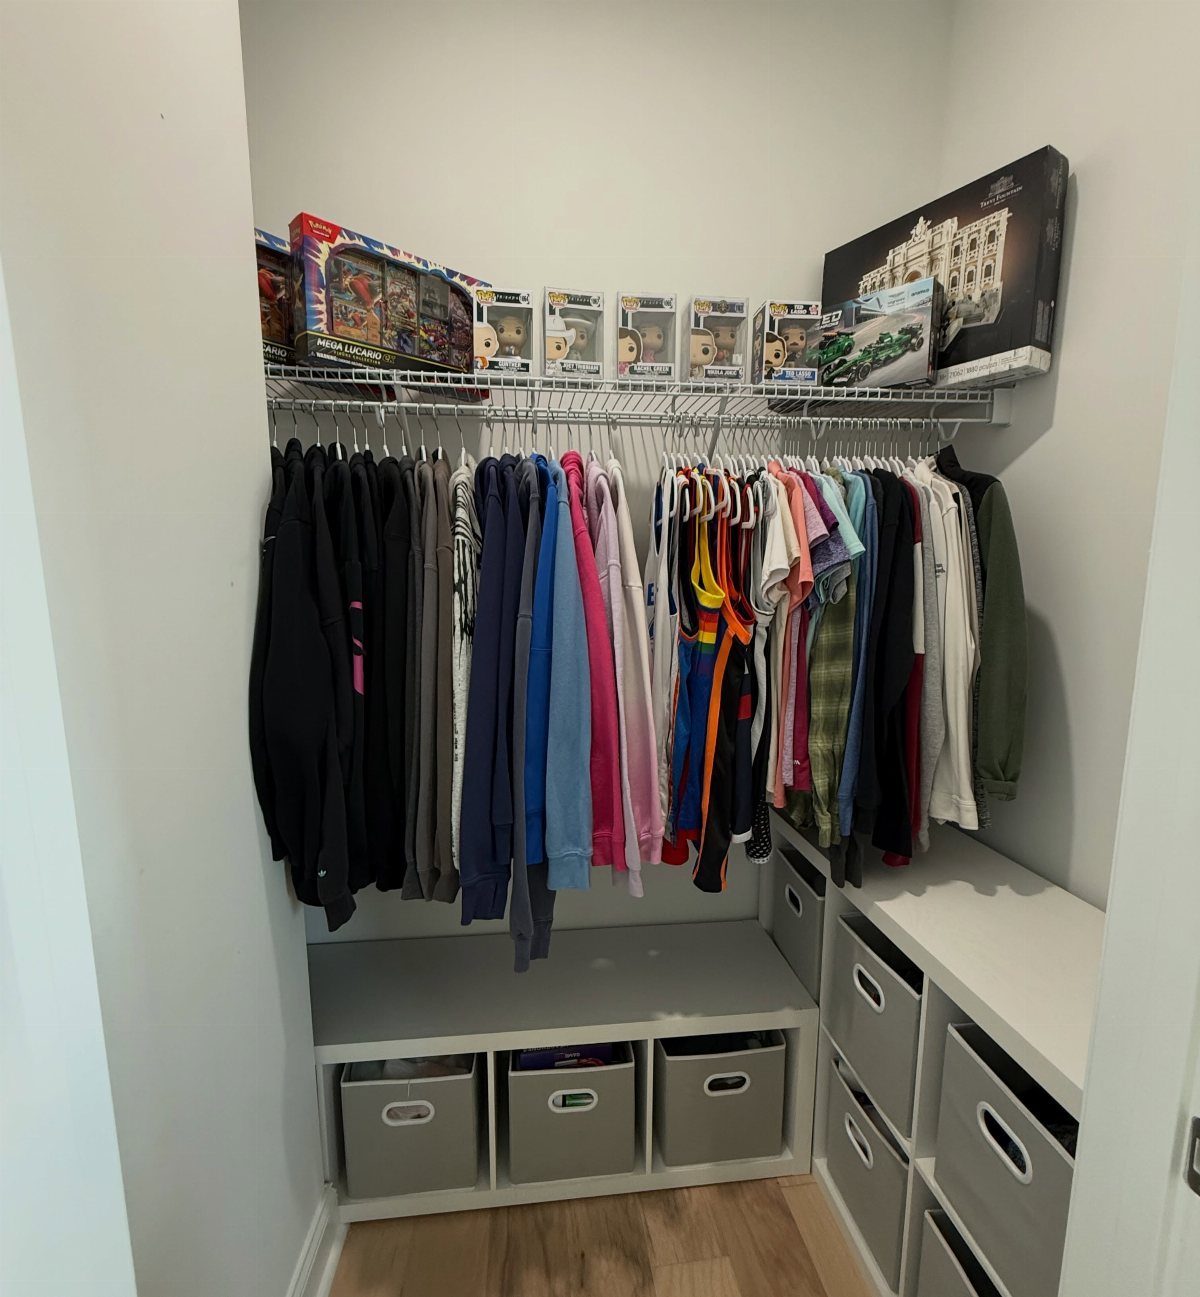
Wire shelving with an integrated hanging rod and cubby bins below is the setup I recommend when the budget is tight and the closet is small. The wire lets air circulate; the bins below catch what does not hang.
A shallow wire shelf holds folded shirts or a single row of shoes; a deeper one fits two shoe rows but costs more and needs stiffer brackets. Mount the rod high enough for shirts, lower for a child’s closet.
The cubby units underneath need level floors or they rack; I set them on a sheet of plywood cut to size so dust does not gather in the gaps.
This system shows more than solid shelving, so I use it only where I do not mind the visual noise.
18. Glass Door Wardrobes with Lighting
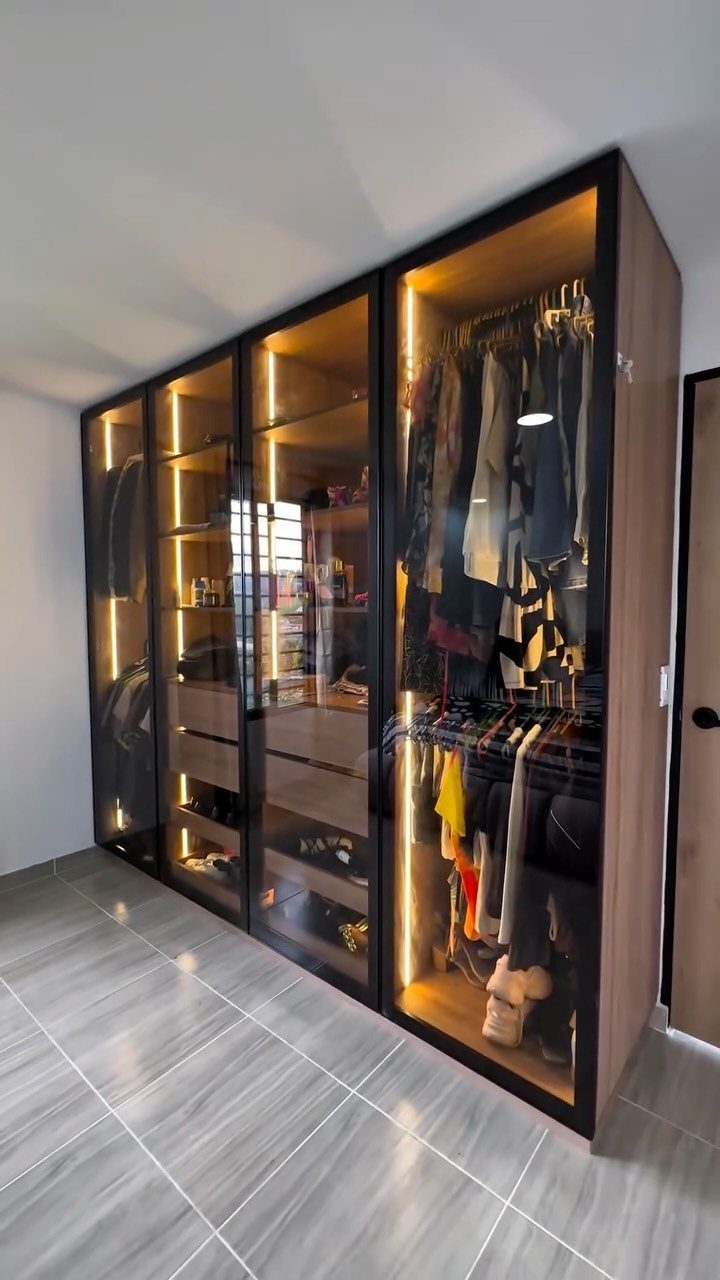
Tinted glass doors with black framing and interior LED strips turn stored clothes into a display you see before you open anything. The warm lighting reads after sunset when the closet has no window.
I would wire the LEDs to a door-jamb switch so they come on when you enter and off when you close up; a manual switch gets left on.
The tint reduces glare and hides slight disorder, but you still need some rhythm inside or the glow shows chaos. Glass doors need swing clearance or a track for sliding; measure twice before you order.
This is the most expensive entry on the list, and it pays off only in a closet large enough that the doors read as architecture, not appliance.
19. Curtain Room Divider

Long cream curtains on a ceiling track turn an open closet into something you can close off without a single wall stud or hinge.
I use this in bedrooms where the closet has no door and the sight of hanging clothes pulls focus from the bed.
A ceiling-mounted track spans the opening; curtains with a header that clips or glides slide open in the morning and shut at night.
Floor-length panels pool an inch or two for weight, or stop at the floor to avoid dust. The fabric should be heavy enough to fall straight, light enough to push aside with one hand.
Skip if you need real sound privacy; curtains read the room as calmer, but they do not seal it.
20. Glass-Topped Accessory Drawer
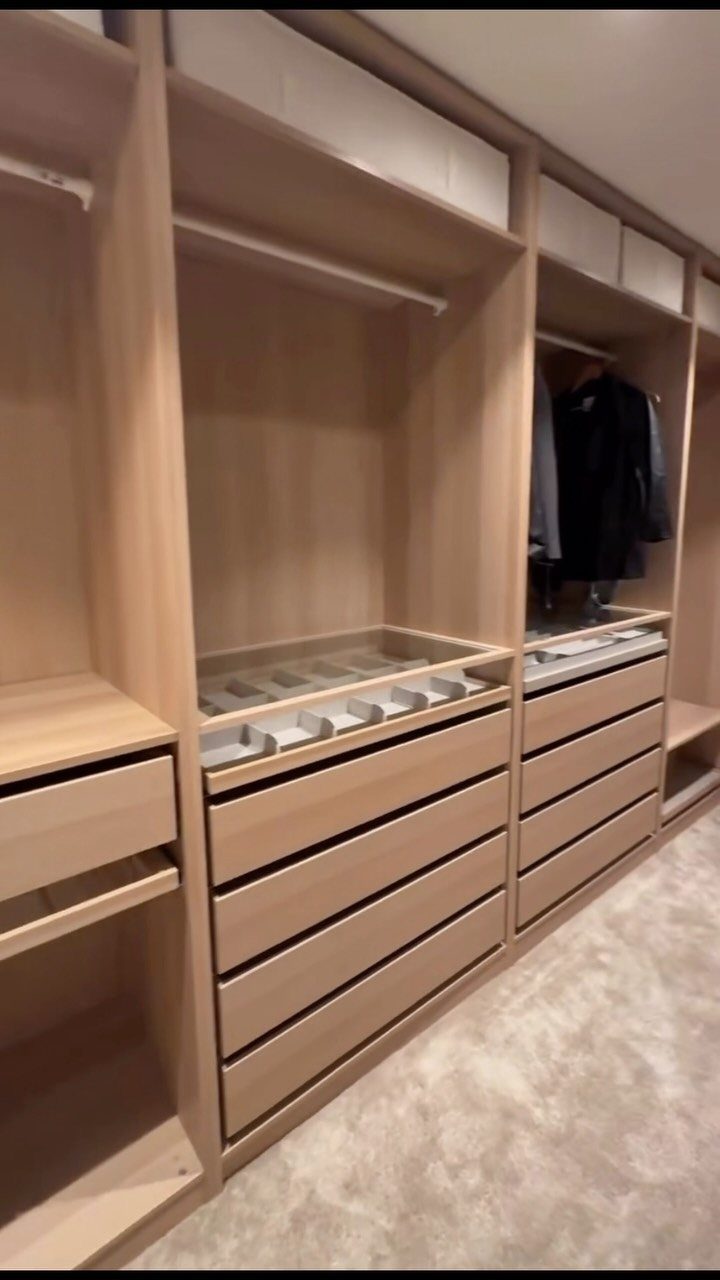
Glass tops on shallow pull-out drawers let you read what is inside before you touch the handle, which saves time on mornings when you are matching a belt to a bag.
The drawer sits in a stack of light wood organizers, its interior divided into compartments sized for watches, jewelry, or folded ties.
I would line the bottom in velvet or felt so items do not slide; the glass shows everything, including scratches and dust, so a dark liner reads better than bare wood.
The top itself needs a frame thick enough to sit flush, not rattle.
Build this only when your hanging clothes and shoe storage are settled. Accessories are easy to move; the drawer that holds them should not dictate where everything else goes.
Budgeting for Your Remodel
Closet remodel costs sit on a spectrum you can mostly map before you choose a direction. Wire shelving and basic kits from big-box stores run $100 to $500, and you install them yourself.
Modular systems with more finish options climb to $500 to $2,500, sometimes with professional help for larger layouts. Fully custom builds start around $2,000 and can pass $10,000 depending on size, materials, and accessories like islands or LED lighting.
The biggest cost driver is square footage.
A reach-in closet runs cheaper than a walk-in at every price point, from off-the-shelf systems up to full custom. After that, materials separate laminate from wood veneer from solid wood, and accessories add incrementally.
Custom work earns its price only if you will stay long enough to test the warranty; until then, a written quote after exact measurement beats any estimate before.
Preparing for Installation
Clear everything out before anyone measures or builds. This is the phase for decluttering, cleaning, and painting; what you skip here shows up later under installed shelves.
Accurate measurements matter more than choice of system. A modular or custom build fits only if the space is prepared to receive it, walls cleared, floors bare, and existing fixtures removed.
If your remodel involves tearing down walls or relocating electrical, hire that done before the closet team arrives. The installation itself goes smoother, and you are not paying storage pros to wait through construction dust.
I paint during this empty phase every time. The closet interior rarely gets attention once rods and shelves are mounted, and a coat of white or a shade lighter than your system makes contents easier to spot later.
Maximizing Closet Space
Vertical space is the first place a closet wastes capacity. Shelves set above the usual rod line and a pull-down rod for the top third will put the full height to work.
In smaller closets, vertical racks tailored to shallow depth fix the gap between what you own and what standard shelving assumes.
Shoes on a shallow shelf, 2 rows only on deeper shelves with stiffer brackets; this is how you convert air into storage without expanding the footprint.
Frequently Asked Questions
What are the steps to remodel a closet?
Clear everything out first, then measure what you actually own against the space. I map hanging versus folded pieces, note rod heights for shirts versus coats, and mark where odd corners or sloped ceilings cut into usable depth.
From there you choose a system, buy or order components, and install; a wire kit takes an afternoon, a custom build takes a weekend or more if walls are not plumb.
How can I maximize my closet space?
Use the full height. Pull-down rods bring the upper third back into daily use, and high shelves with labeled bins store off-season items above head height wherever they clear your longest coat.